II.Installation and Operating Instructions A. Checks Before Installation
IMPORTANT
1.Install in accordance with all applicable national, state, and local regulations.
2.Remove the shipping carton, tape, and packing material. If any are left in the icemaker, it will not work properly.
3.Ensure all components, fasteners, and thumbscrews are securely in place after installation.
1)Remove the panels to prevent damage when installing the icemaker. (See "B. How to Remove Panels.")
2)Remove the package containing the accessories.
3)Remove the protective plastic film from the panels. If the icemaker is exposed to the sun or to heat, remove the film after the icemaker cools.
4)Check that the refrigerant lines do not rub or touch lines or other surfaces, and that the fan blade turns freely.
5)Check that the compressor is snug on all mounting pads.
6)See the nameplate on the rear panel, and check that your voltage supplied corresponds with the voltage specified on the nameplate.
7)This icemaker can be installed on a storage bin or dispenser unit. The
8)On remote
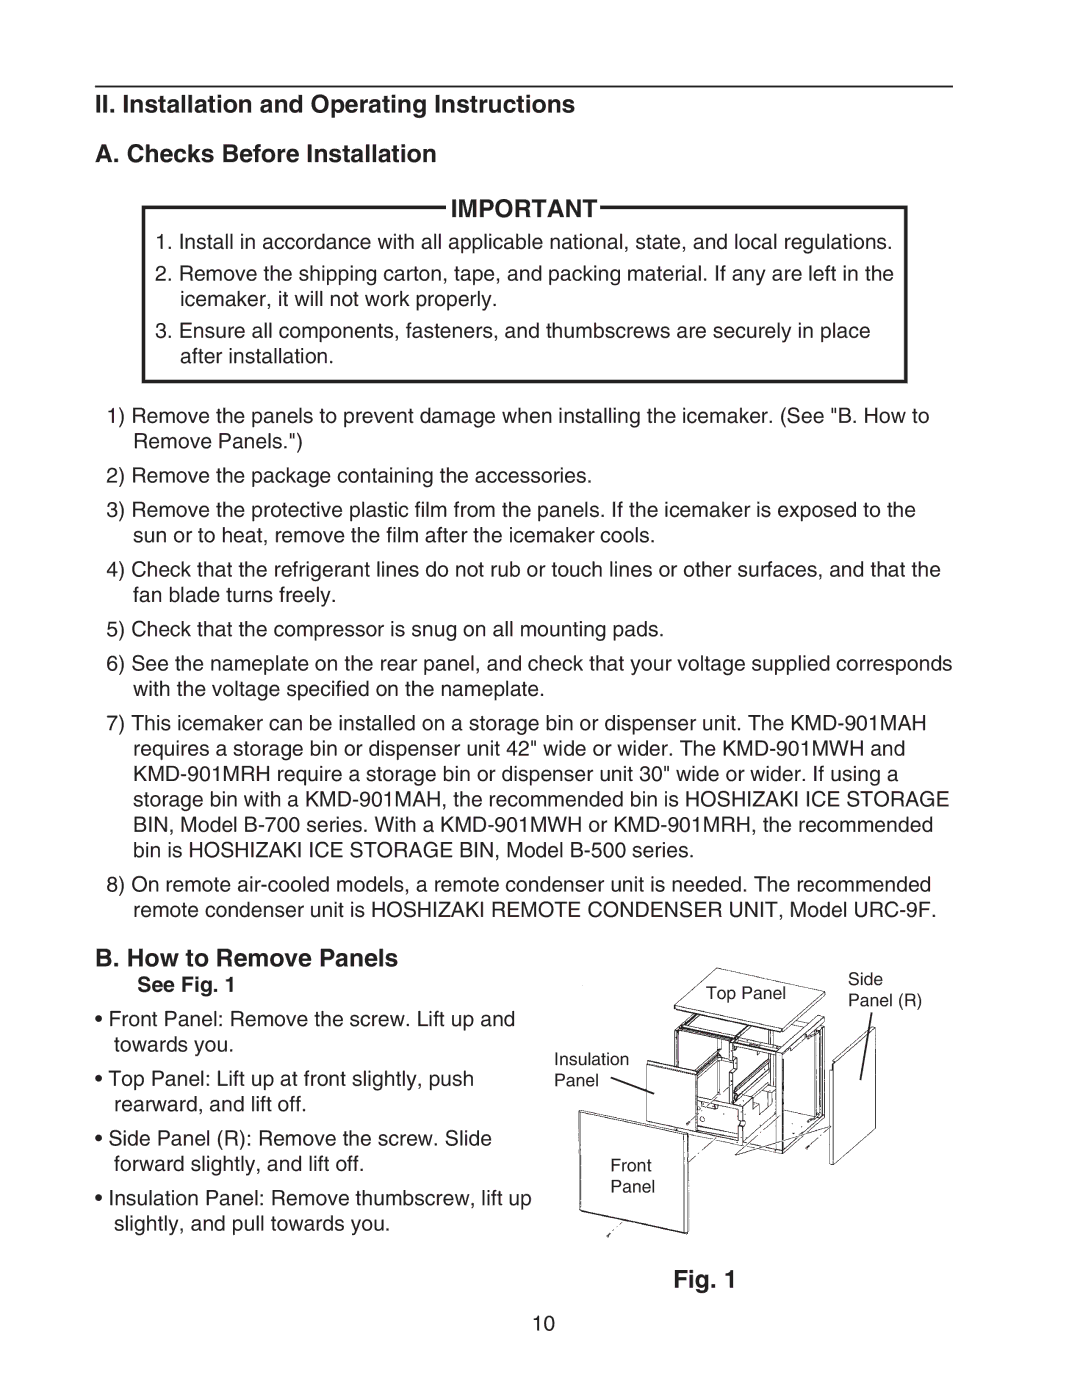
B. How to Remove Panels
See Fig. 1
•Front Panel: Remove the screw. Lift up and towards you.
•Top Panel: Lift up at front slightly, push rearward, and lift off.
•Side Panel (R): Remove the screw. Slide forward slightly, and lift off.
•Insulation Panel: Remove thumbscrew, lift up slightly, and pull towards you.
Top Panel | Side | |
Panel (R) | ||
|
Insulation
Panel
Front
Panel
Fig. 1
10