Disposal of your product
To minimise the risk of injury to children please dispose of your product carefully and safely. Remove all doors and lids. Remove the mains cable (where fitted) by cutting off flush with the appliance and always ensure that no plug is left in a condition where it could be connected to the electricity supply.
To help the environment, Local Authority instructions should be followed for the disposal of your product.
Disposal of old electrical appliances 
Assembling the sliding rack kit * | GB | ||
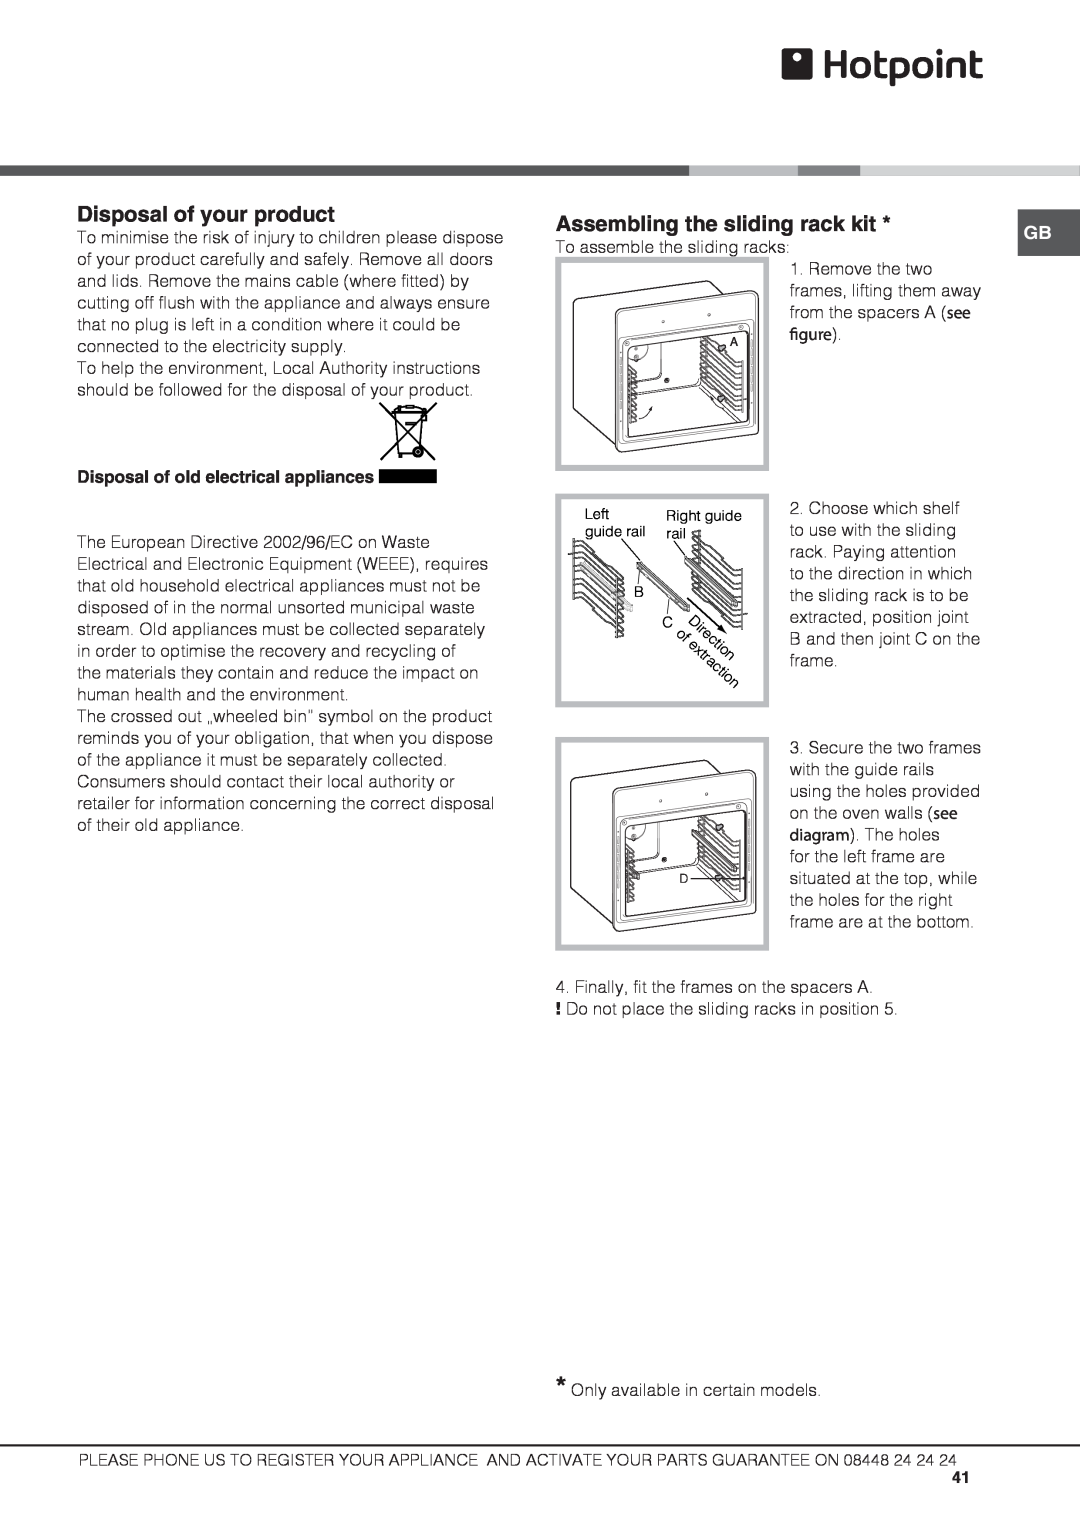
To assemble the sliding racks: | |||
| |||
| 1. Remove the two |
| |
| frames, lifting them away |
| |
| from the spacers A (see |
| |
A | figure). |
| |
|
| ||
The European Directive 2002/96/EC on Waste Electrical and Electronic Equipment (WEEE), requires that old household electrical appliances must not be disposed of in the normal unsorted municipal waste stream. Old appliances must be collected separately in order to optimise the recovery and recycling of the materials they contain and reduce the impact on human health and the environment.
The crossed out „wheeled bin” symbol on the product reminds you of your obligation, that when you dispose
Left | Right guide | |||
guide rail | rail |
|
| |
B |
|
|
|
|
| C | D |
| |
|
| i |
| |
| of | rect | ||
|
| e | i | |
|
|
| x | on |
|
|
| tract | |
|
|
|
| i |
|
|
|
| on |
2.Choose which shelf to use with the sliding rack. Paying attention to the direction in which the sliding rack is to be extracted, position joint B and then joint C on the frame.
of the appliance it must be separately collected. Consumers should contact their local authority or retailer for information concerning the correct disposal of their old appliance.
D |
3.Secure the two frames with the guide rails using the holes provided on the oven walls (see diagram). The holes
for the left frame are situated at the top, while the holes for the right frame are at the bottom.
4. Finally, fit the frames on the spacers A.
!Do not place the sliding racks in position 5.
* Only available in certain models.
PLEASE PHONE US TO REGISTER YOUR APPLIANCE AND ACTIVATE YOUR PARTS GUARANTEE ON 08448 24 24 24
41