Care and Cleaning
GB
(DH93KS-DH93CXS-DH93CK)
Take particular care not to damage the inner surface of the door inner glass that is coated with a heat reflective layer. Do not use scouring pads, or abrasive powder, which will scratch the glass. Ensure that the glass panel is not subjected to any sharp mechanical blows.
Stubborn stains can be removed by using a fine steel wool pad. For slight soiling the inner glass panel may be cleaned, while still warm, without removing it from the door. After cleaning, rinse and dry with a soft cloth.
CLEANING THE DOORS
SIDE OPENING DOORS
Cleaning the door glass is the same as the drop down doors, except take care to support the weight of the inner glass when removing and refitting.
DROP DOWN DOORS
Remove the door inner glass as follows.
1.Open the door fully and unscrew the two screws securing the glass panel so that the securing bra- ckets can be turned. There is no need to remove
the screws completely.
2.Turn the brackets so that the glass can be removed and cleaned
at the sink (Fig. 1.).
3.The inside of the outer door glass can now be cleaned while still fitted to the cooker.
NEVER OPERATE THE COOKER WITHOUT THE INNER DOOR GLASS IN POSITION.
Refit the door inner glass as follows.
1.NOTE: The inner door glass has a special reflective coating on one side. Replace the door inner glass so that the statement: „IMPORTANT THIS FACE TOWARDS THE OVEN” can be read from the inner
side of the door.
2.Turn the two securing brackets back to their original position to
retain the glass and ![]() tighten the screws (Fig. 2.)
tighten the screws (Fig. 2.)
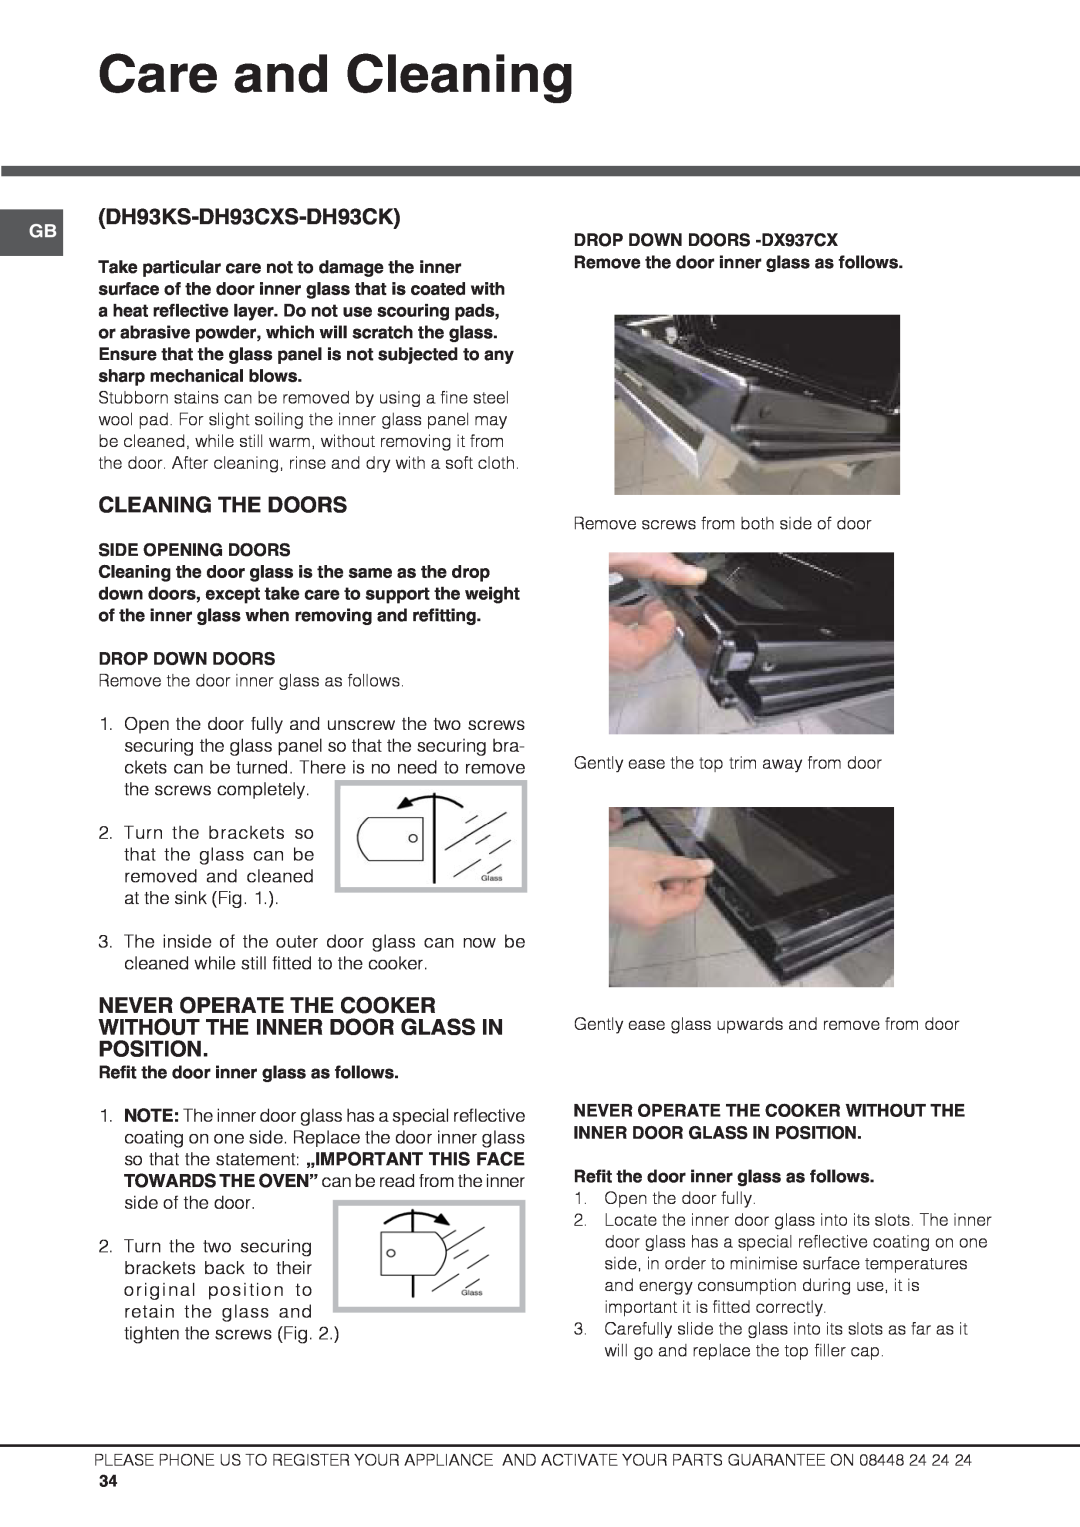
DROP DOWN DOORS
Remove screws from both side of door
Gently ease the top trim away from door
Gently ease glass upwards and remove from door
NEVER OPERATE THE COOKER WITHOUT THE INNER DOOR GLASS IN POSITION.
Refit the door inner glass as follows.
1.Open the door fully.
2.Locate the inner door glass into its slots. The inner door glass has a special reflective coating on one side, in order to minimise surface temperatures and energy consumption during use, it is important it is fitted correctly.
3.Carefully slide the glass into its slots as far as it will go and replace the top filler cap.
PLEASE PHONE US TO REGISTER YOUR APPLIANCE AND ACTIVATE YOUR PARTS GUARANTEE ON 08448 24 24 24
34