D ISHWASHER

Installation

Choose where you want to install your dishwasher, you can place it so that its sides or back panel are side by side with furniture or up against the wall. The dishwasher is providedwithwatersupplyanddrain hoses, which can be directed towards the left or right to facilitate appropriateinstallation.

Levelling.

Once the appliance is positioned, adjust the feet by screwing them in or out depending on how high you want it and to level it so that it is horizontal. Make sure that it is not inclined more than 2 degrees. If the applianceislevel,itwill helpensure its correct operation.

Height Adjustment

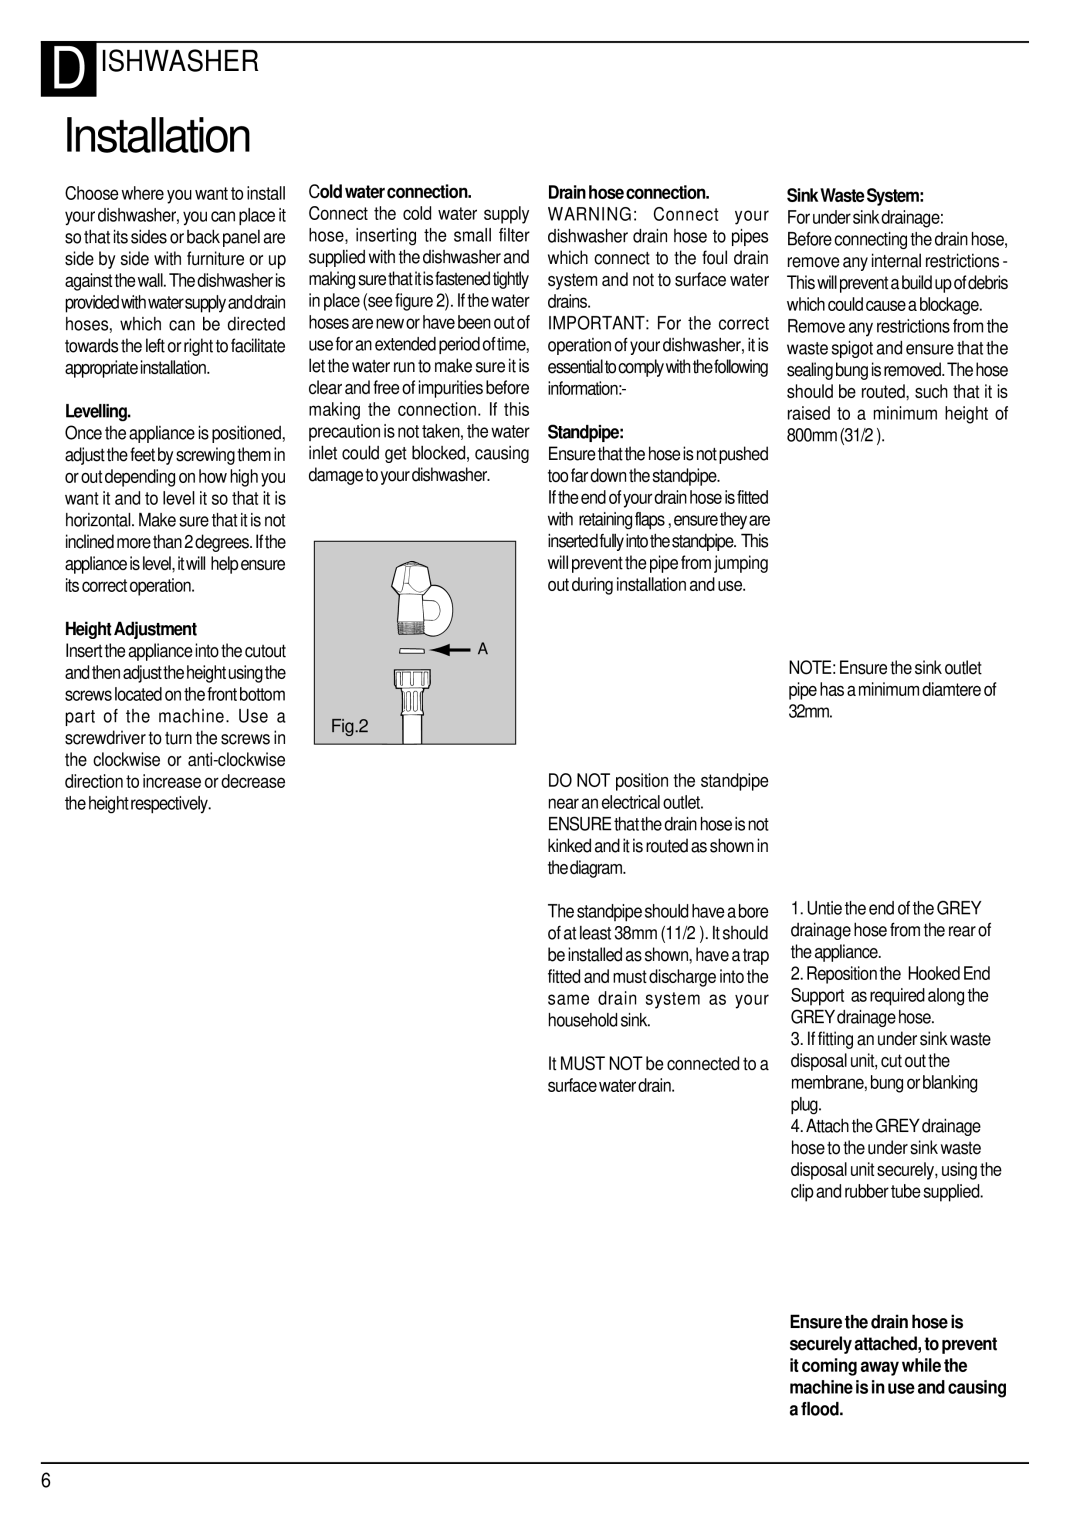
Cold water connection. Connect the cold water supply hose, inserting the small filter supplied with the dishwasher and makingsurethatitisfastenedtightly in place (see figure 2). If the water hoses are new or have been out of use for an extended period of time, let the water run to make sure it is clear and free of impurities before making the connection. If this precaution is not taken, the water inlet could get blocked, causing damage to your dishwasher.

Drain hose connection. WARNING: Connect your dishwasher drain hose to pipes which connect to the foul drain system and not to surface water drains.

IMPORTANT: For the correct operation of your dishwasher, it is essentialtocomplywiththefollowing information:-

Standpipe:

Ensure that the hose is not pushed too far down the standpipe.

If the end of your drain hose is fitted with‘retainingflaps’,ensuretheyare insertedfullyintothestandpipe. This will prevent the pipe from jumping out during installation and use.

Sink Waste System: For under sink drainage:

Before connecting the drain hose, remove any internal restrictions - This will prevent a build up of debris which could cause a blockage.

Remove any restrictions from the waste spigot and ensure that the sealingbungisremoved.Thehose should be routed, such that it is raised to a minimum height of 800mm(31/2”).

Insert the appliance into the cutout andthenadjusttheheightusingthe screws located on the front bottom part of the machine. Use a screwdriver to turn the screws in the clockwise or anti-clockwise direction to increase or decrease the height respectively.

A

Fig.2

DO NOT position the standpipe near an electrical outlet. ENSURE that the drain hose is not kinked and it is routed as shown in thediagram.

NOTE: Ensure the sink outlet pipe has a minimum diamtere of 32mm.

The standpipe should have a bore of at least 38mm (11/2”). It should be installed as shown, have a trap fitted and must discharge into the same drain system as your household sink.

It MUST NOT be connected to a surface water drain.

1.Untie the end of the GREY drainage hose from the rear of the appliance.

2.Reposition the ‘Hooked End Support’ as required along the GREY drainage hose.

3.If fitting an under sink waste disposal unit, cut out the membrane, bung or blanking plug.

4.Attach the GREY drainage hose to the under sink waste disposal unit securely, using the clip and rubber tube supplied.

Ensure the drain hose is securely attached, to prevent it coming away while the machine is in use and causing a flood.

6

Page 6
Image 6
Hotpoint FDW65, FDW60 manual Levelling, Height Adjustment, Standpipe

FDW60, FDW65 specifications

The Hotpoint FDW65 and FDW60 are two contemporary dishwashers known for their efficiency, reliability, and strong performance. Designed to cater to the needs of modern households, both models offer a range of features that maximize convenience while ensuring exceptional cleaning results.

One notable characteristic of the FDW65 and FDW60 is their energy efficiency. Both dishwashers are designed to minimize water and energy consumption without compromising on performance. This makes them not only environmentally friendly but also economical for everyday use. With high energy ratings, they can help save on utility bills, appealing to eco-conscious consumers.

Another significant feature of these Hotpoint models is their customizable washing programs. The FDW65, for instance, offers multiple settings that allow users to choose the ideal wash cycle for various types of dishes, from heavily soiled pans to delicate glassware. The FDW60, similarly, provides a range of options, ensuring that users can tackle any cleaning challenge they encounter.

Both models also incorporate advanced technologies to enhance cleaning performance. One such technology is the Eco Wash function, which optimizes the wash cycle for energy efficiency while still delivering superior cleaning results. Additionally, the rapid wash feature allows for shorter cycles when time is of the essence, making them perfect for busy households.

Capacity is another area where the FDW65 and FDW60 excel. They both offer ample space for a generous load, accommodating up to 12 place settings, making them perfect for families or entertaining guests. The adjustable top basket and foldable plate holders offer versatility in loading, maximizing the usable space for varied dish sizes.

These Hotpoint dishwashers also prioritize user convenience with their intuitive controls. The clear LED display allows easy navigation through the settings and provides real-time updates on the washing cycle. Moreover, the delay start function allows users to set the dishwasher to begin at a later time, giving more flexibility to their schedule.

Noise level is another aspect where the FDW65 and FDW60 shine. Operating at a quiet level, these models ensure that dishwashing becomes a hassle-free task that does not disrupt daily activities.

In conclusion, the Hotpoint FDW65 and FDW60 combine modern technology with user-friendly features, making them excellent additions to any kitchen. With their energy-efficient designs, customizable washing programs, and impressive capacity, these dishwashers offer both functionality and convenience for every household.