3.Disconnect the power from the computer by first unplugging the power cord from the AC outlet, and then unplugging the AC adapter from the computer.
4.Remove the battery (see Battery on page 47).
5.Remove the following components:
a.Bottom door (see Bottom door on page 49).
b.Optical drive (see Optical drive on page 50)
c.Keyboard (see Keyboard on page 63)
Remove the top cover:
1.Position the computer
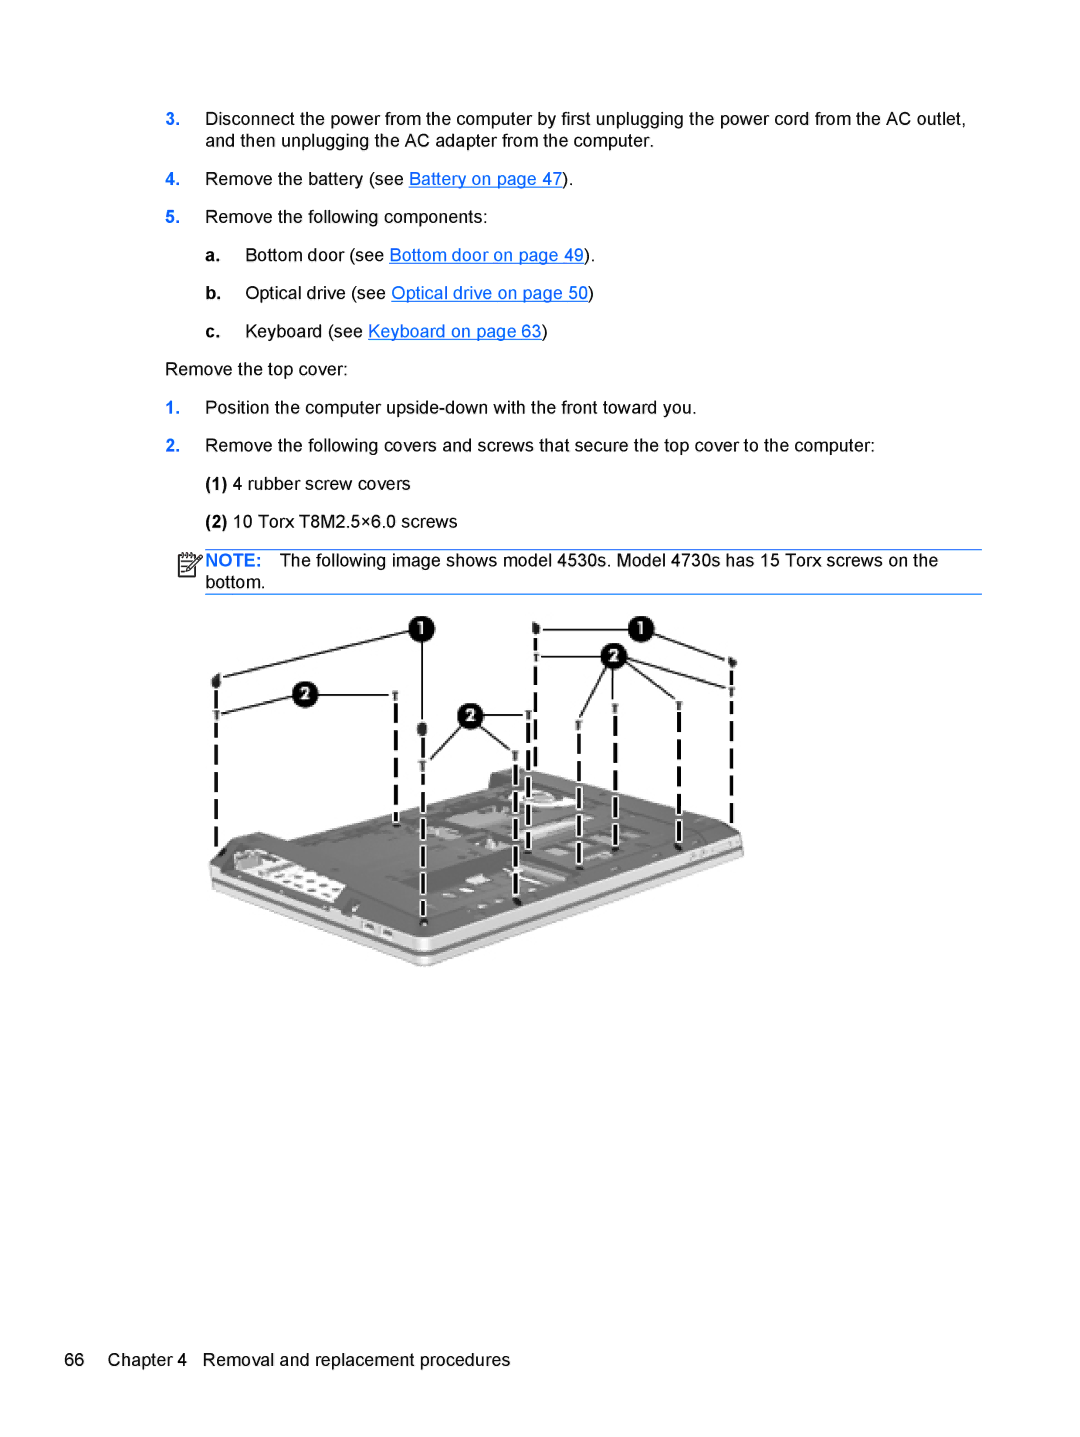
2.Remove the following covers and screws that secure the top cover to the computer:
(1)4 rubber screw covers
(2)10 Torx T8M2.5×6.0 screws
![]()
![]()
![]()
![]() NOTE: The following image shows model 4530s. Model 4730s has 15 Torx screws on the bottom.
NOTE: The following image shows model 4530s. Model 4730s has 15 Torx screws on the bottom.
66 Chapter 4 Removal and replacement procedures
