Installing and Removing a Port Cover
An optional rear port cover is available for the computer.
To install the port cover:
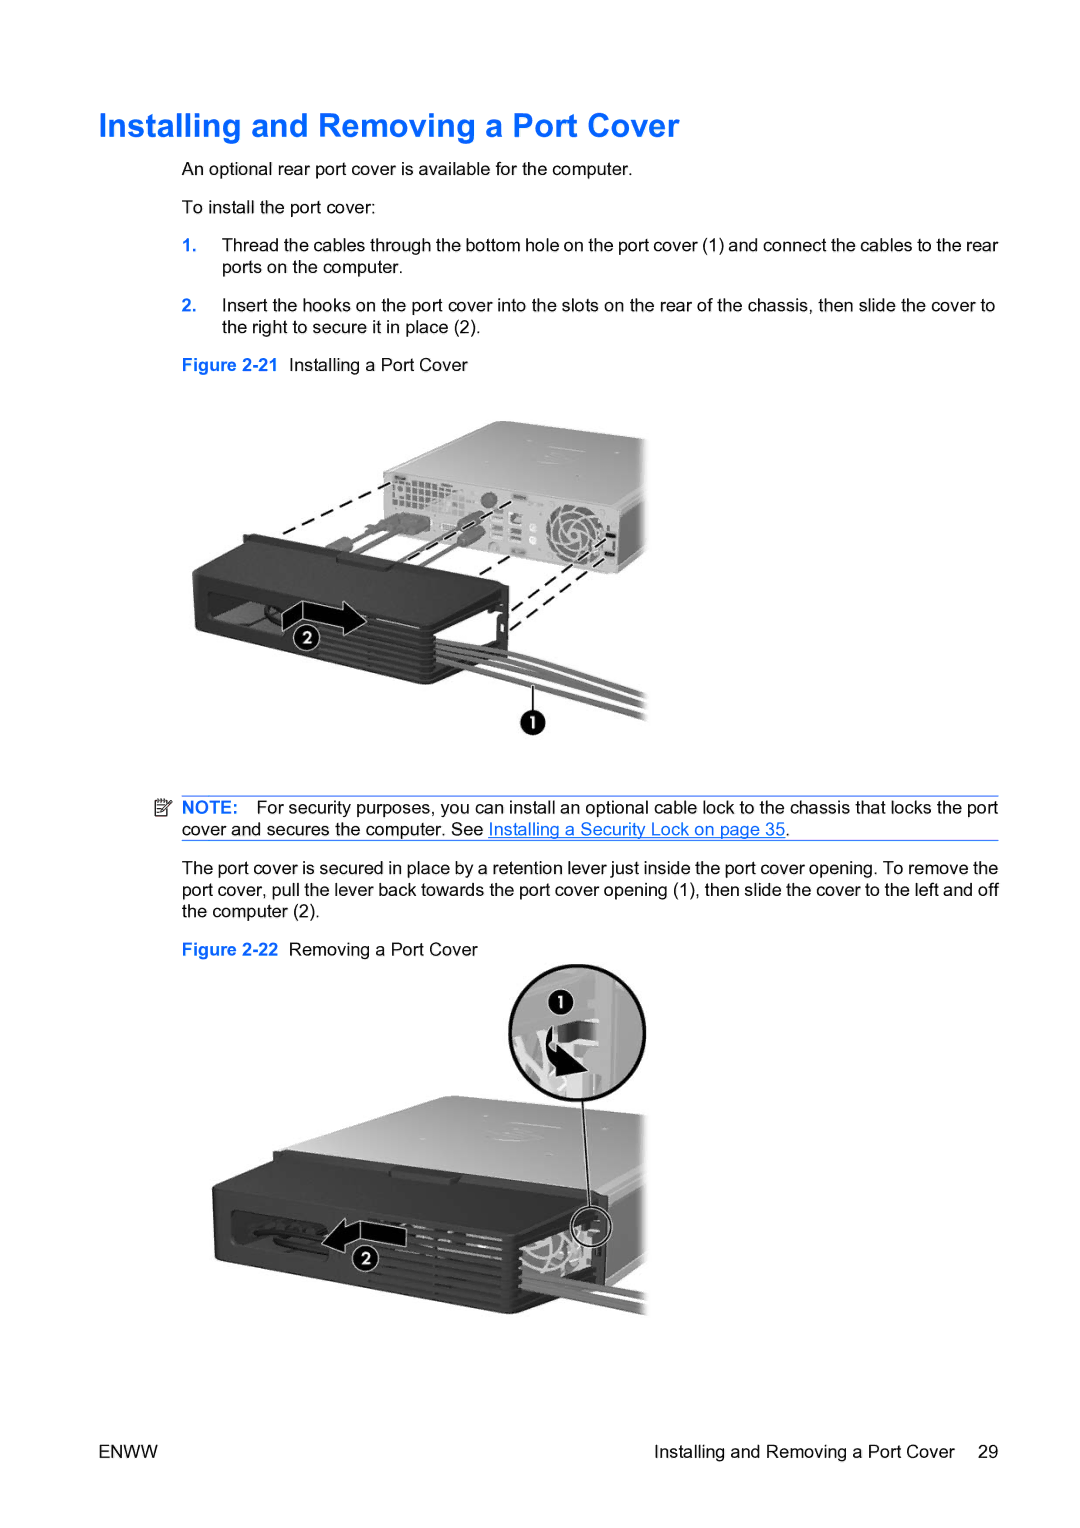
1.Thread the cables through the bottom hole on the port cover (1) and connect the cables to the rear ports on the computer.
2.Insert the hooks on the port cover into the slots on the rear of the chassis, then slide the cover to the right to secure it in place (2).
Figure 2-21 Installing a Port Cover
![]() NOTE: For security purposes, you can install an optional cable lock to the chassis that locks the port cover and secures the computer. See Installing a Security Lock on page 35.
NOTE: For security purposes, you can install an optional cable lock to the chassis that locks the port cover and secures the computer. See Installing a Security Lock on page 35.
The port cover is secured in place by a retention lever just inside the port cover opening. To remove the port cover, pull the lever back towards the port cover opening (1), then slide the cover to the left and off the computer (2).
Figure 2-22 Removing a Port Cover
ENWW | Installing and Removing a Port Cover 29 |