Upgrading the Hard Drive
![]() NOTE: The
NOTE: The
Before you remove the old hard drive, be sure to back up the data from the old hard drive so that you can transfer the data to the new hard drive. Also, if you are replacing the primary hard drive, make sure you have created a Recovery Disc Set to restore the operating system, software drivers, and any software applications that were preinstalled on the computer. If you do not have this CD set, select Start > HP Backup and Recovery and create it now.
The
1.Remove/disengage any security devices that prohibit opening the computer.
2.Remove all removable media, such as a compact disc, from the computer.
3.Turn off the computer properly through the operating system, then turn off any external devices.
4.Disconnect the power cord from the power outlet and disconnect any external devices.
CAUTION: Regardless of the
5.If the computer is on a stand, remove the computer from the stand and lay the computer down.
6.Remove the computer access panel.
7.Remove the optical drive. Refer to Removing the Existing Optical Drive on page 24 for instructions.
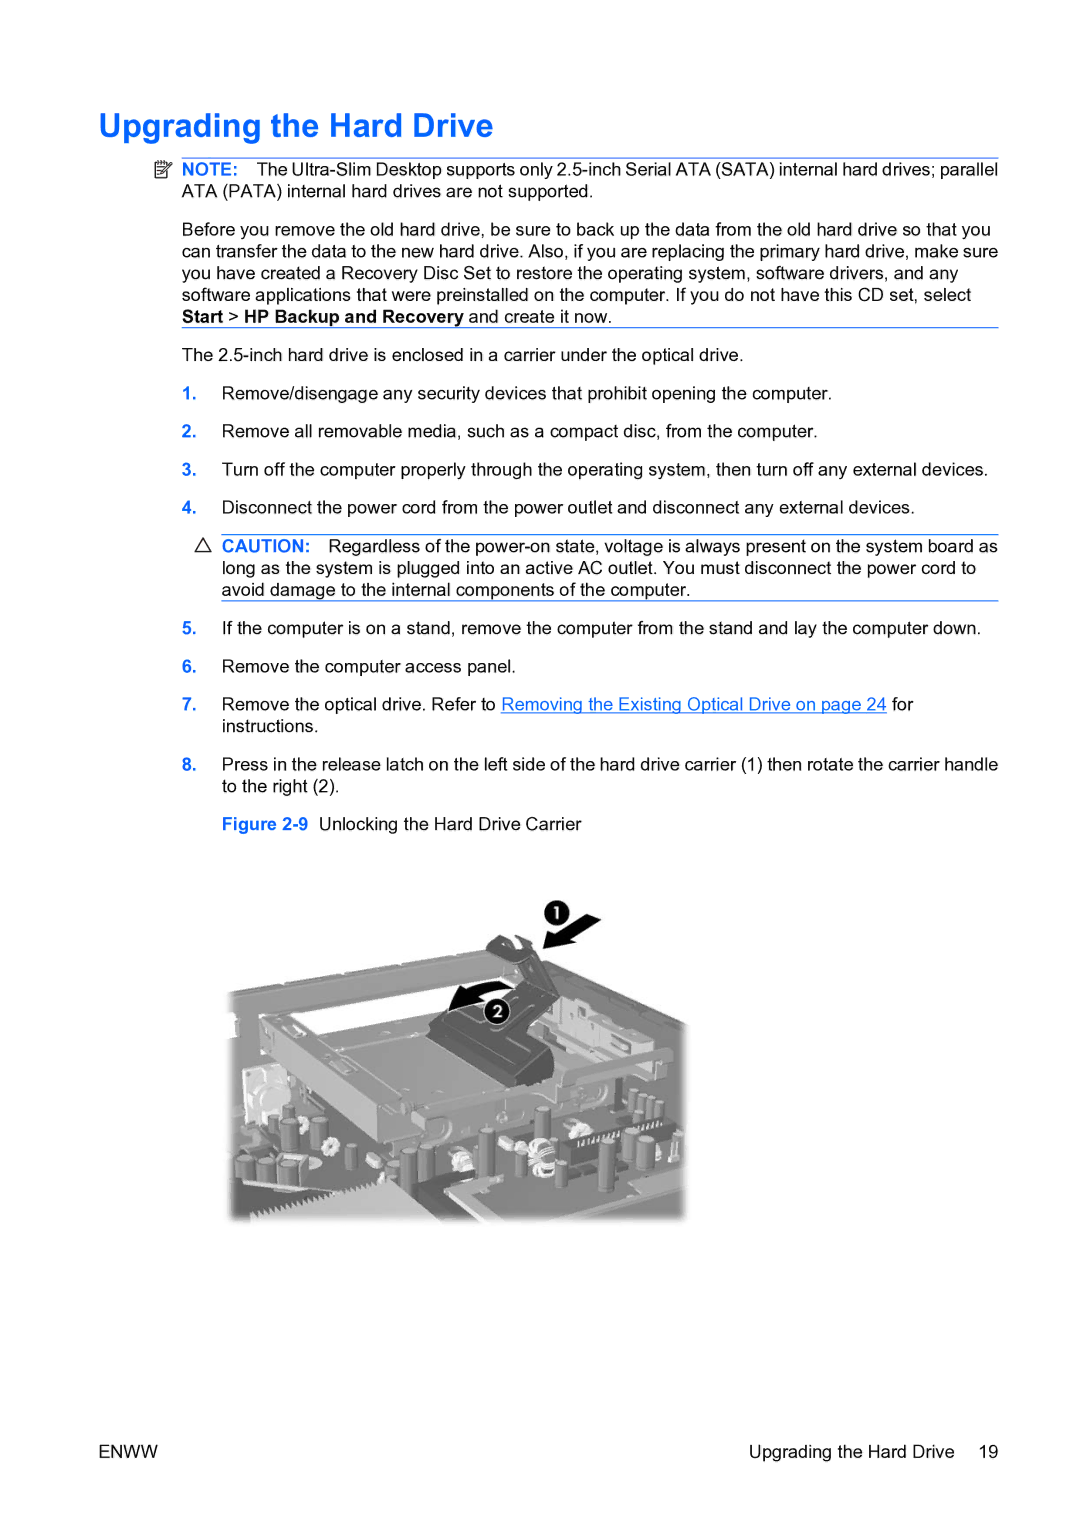
8.Press in the release latch on the left side of the hard drive carrier (1) then rotate the carrier handle to the right (2).
Figure 2-9 Unlocking the Hard Drive Carrier
ENWW | Upgrading the Hard Drive 19 |