Paste the certificate into the wizard and then click Next.
5.The Library Certificate Information screen displays information about the next wizard steps. Click Next.
6.In the KMIP Client Configuration screen, enter the username and password that the library will use to communicate with the KMIP server and then click Next.
NOTE: This username and password must match the client username and password entered on the KMIP server for this library.
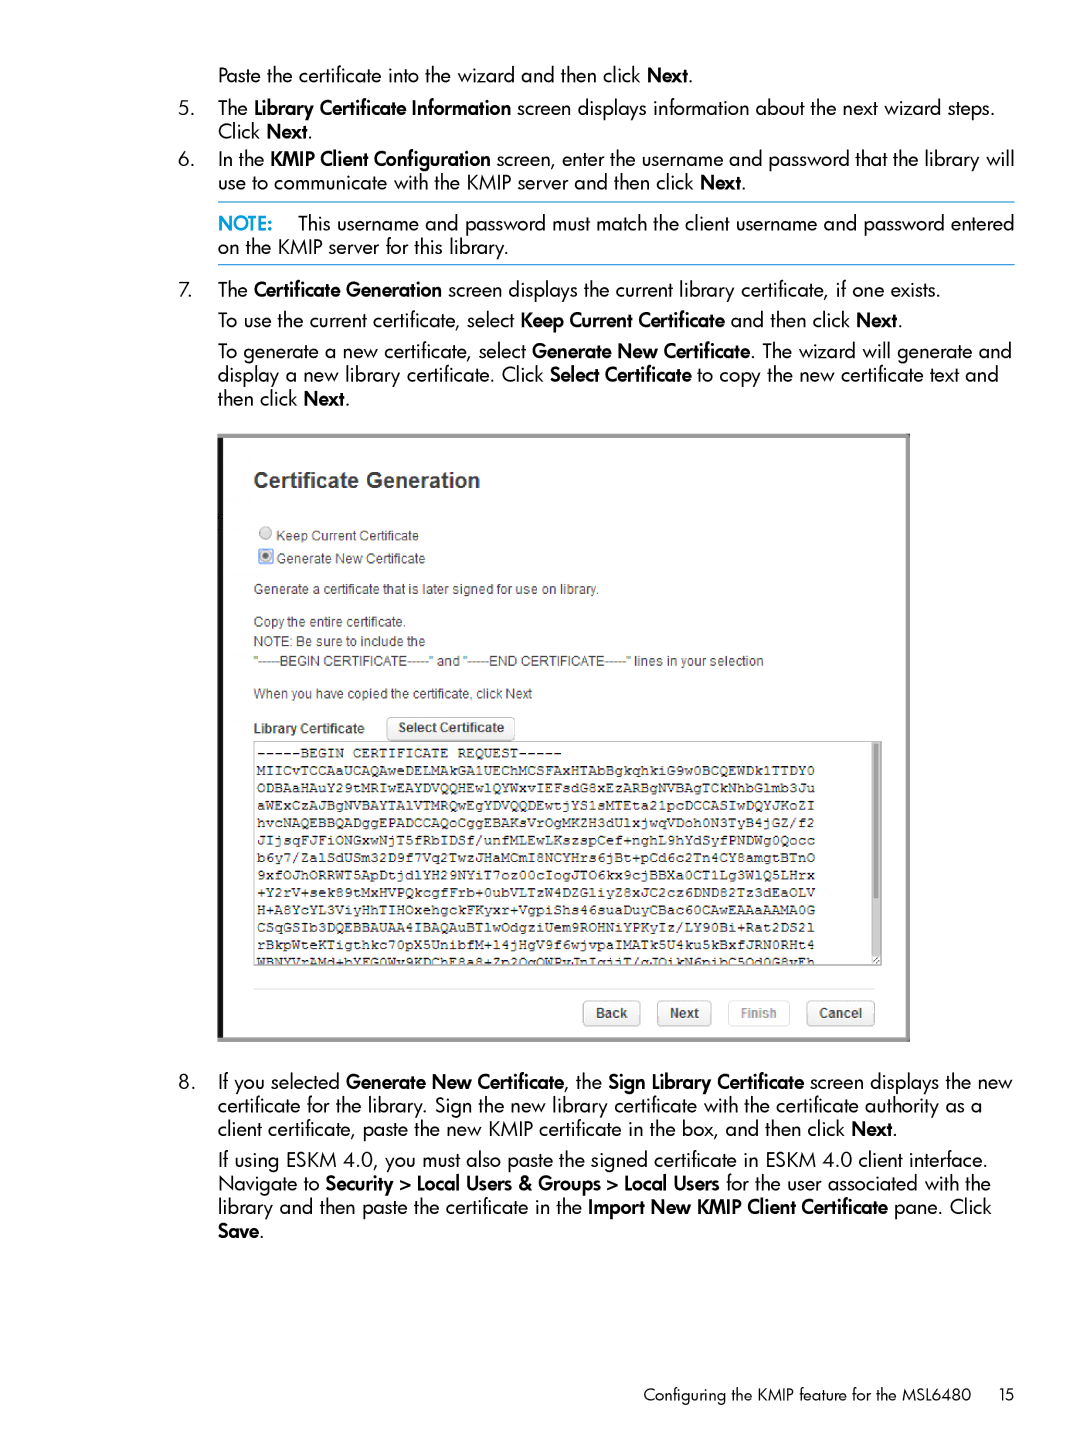
7.The Certificate Generation screen displays the current library certificate, if one exists. To use the current certificate, select Keep Current Certificate and then click Next.
To generate a new certificate, select Generate New Certificate. The wizard will generate and display a new library certificate. Click Select Certificate to copy the new certificate text and then click Next.
8.If you selected Generate New Certificate, the Sign Library Certificate screen displays the new certificate for the library. Sign the new library certificate with the certificate authority as a client certificate, paste the new KMIP certificate in the box, and then click Next.
If using ESKM 4.0, you must also paste the signed certificate in ESKM 4.0 client interface. Navigate to Security > Local Users & Groups > Local Users for the user associated with the library and then paste the certificate in the Import New KMIP Client Certificate pane. Click Save.
