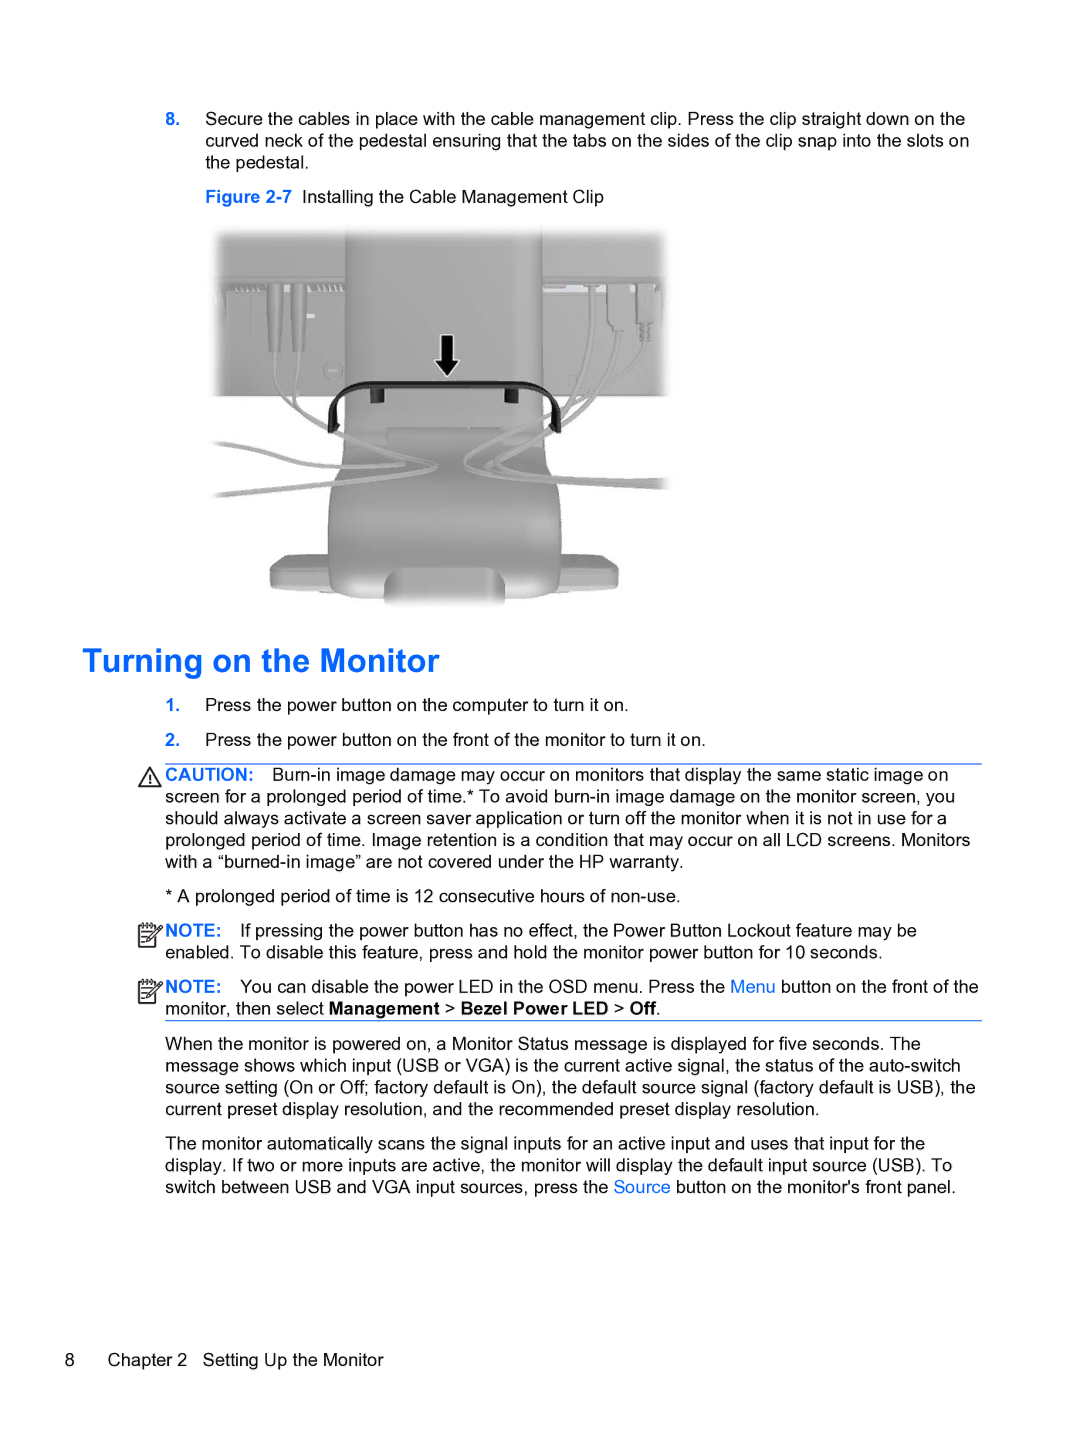
8.Secure the cables in place with the cable management clip. Press the clip straight down on the curved neck of the pedestal ensuring that the tabs on the sides of the clip snap into the slots on the pedestal.
Figure 2-7 Installing the Cable Management Clip
Turning on the Monitor
1.Press the power button on the computer to turn it on.
2.Press the power button on the front of the monitor to turn it on.
CAUTION:
* A prolonged period of time is 12 consecutive hours of
![]()
![]()
![]()
![]() NOTE: If pressing the power button has no effect, the Power Button Lockout feature may be enabled. To disable this feature, press and hold the monitor power button for 10 seconds.
NOTE: If pressing the power button has no effect, the Power Button Lockout feature may be enabled. To disable this feature, press and hold the monitor power button for 10 seconds.
![]()
![]()
![]()
![]() NOTE: You can disable the power LED in the OSD menu. Press the Menu button on the front of the monitor, then select Management > Bezel Power LED > Off.
NOTE: You can disable the power LED in the OSD menu. Press the Menu button on the front of the monitor, then select Management > Bezel Power LED > Off.
When the monitor is powered on, a Monitor Status message is displayed for five seconds. The message shows which input (USB or VGA) is the current active signal, the status of the
The monitor automatically scans the signal inputs for an active input and uses that input for the display. If two or more inputs are active, the monitor will display the default input source (USB). To switch between USB and VGA input sources, press the Source button on the monitor's front panel.
8 Chapter 2 Setting Up the Monitor