Connecting an HP Notebook Computer and Installing Drivers
To use the monitor with an HP notebook computer, connect the USB cable between the notebook and monitor and install the USB and LAN drivers. The video signal is sent over the USB cable. The USB cable also enables all of the port replicator functions.
You can install the drivers from the CD included with the monitor before connecting the notebook to the monitor or you can install the drivers from the monitor's internal flash drive after connecting the notebook to the monitor.
To install the drivers from the monitor's internal flash drive:
1.Turn on power to the monitor and the HP notebook computer.
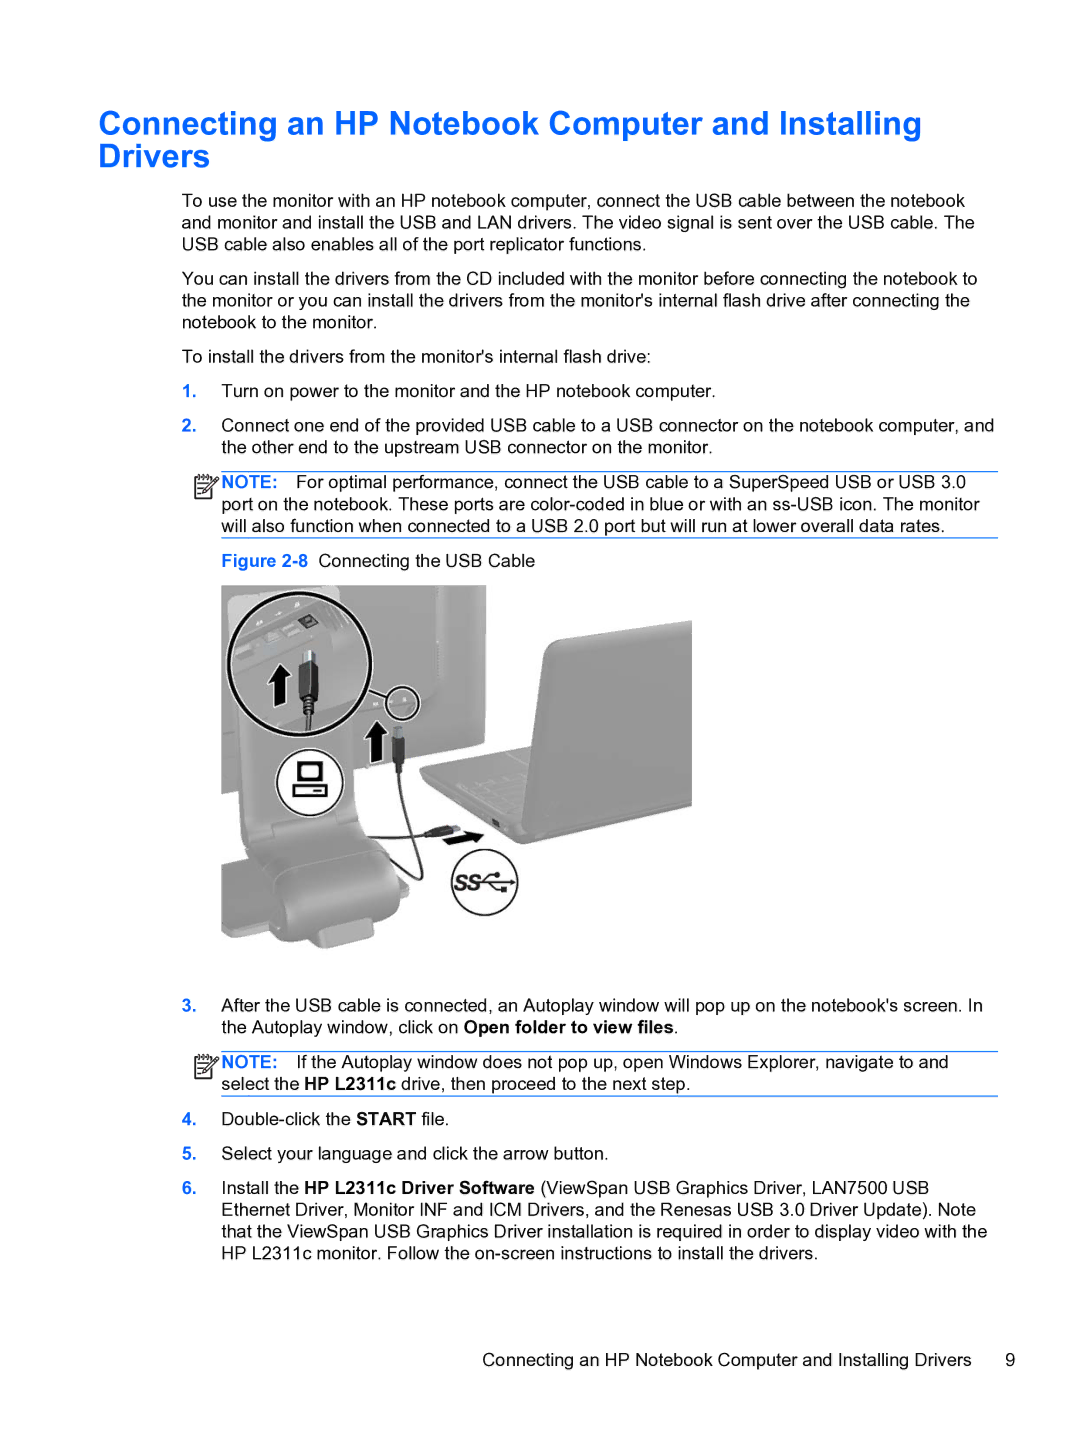
2.Connect one end of the provided USB cable to a USB connector on the notebook computer, and the other end to the upstream USB connector on the monitor.
![]()
![]()
![]()
![]() NOTE: For optimal performance, connect the USB cable to a SuperSpeed USB or USB 3.0 port on the notebook. These ports are
NOTE: For optimal performance, connect the USB cable to a SuperSpeed USB or USB 3.0 port on the notebook. These ports are
Figure 2-8 Connecting the USB Cable
3.After the USB cable is connected, an Autoplay window will pop up on the notebook's screen. In the Autoplay window, click on Open folder to view files.
![]()
![]()
![]()
![]() NOTE: If the Autoplay window does not pop up, open Windows Explorer, navigate to and select the HP L2311c drive, then proceed to the next step.
NOTE: If the Autoplay window does not pop up, open Windows Explorer, navigate to and select the HP L2311c drive, then proceed to the next step.
4.Double-click the START file.
5.Select your language and click the arrow button.
6.Install the HP L2311c Driver Software (ViewSpan USB Graphics Driver, LAN7500 USB Ethernet Driver, Monitor INF and ICM Drivers, and the Renesas USB 3.0 Driver Update). Note that the ViewSpan USB Graphics Driver installation is required in order to display video with the HP L2311c monitor. Follow the on-screen instructions to install the drivers.
Connecting an HP Notebook Computer and Installing Drivers | 9 |
