Press the INPUT button on the remote control to select the input signal. Press the SET button to save your change.
Or, press the SOURCE button on the back side of the monitor panel. Press the AUTO/SET button to save your change.
a.When connecting with a VGA signal input cable, select the RGB PC from the Input menu.
b.When connecting with a HDMI to DVI signal input cable, select HDMI/DVI from the Input menu.
![]() NOTE: If connecting two computers, connect the signal cables (HDMI to DVI and VGA) to each computer. Press the INPUT button on the remote control to select the computer use.
NOTE: If connecting two computers, connect the signal cables (HDMI to DVI and VGA) to each computer. Press the INPUT button on the remote control to select the computer use.
![]() CAUTION:
CAUTION:
Connecting Daisy Chain Monitors
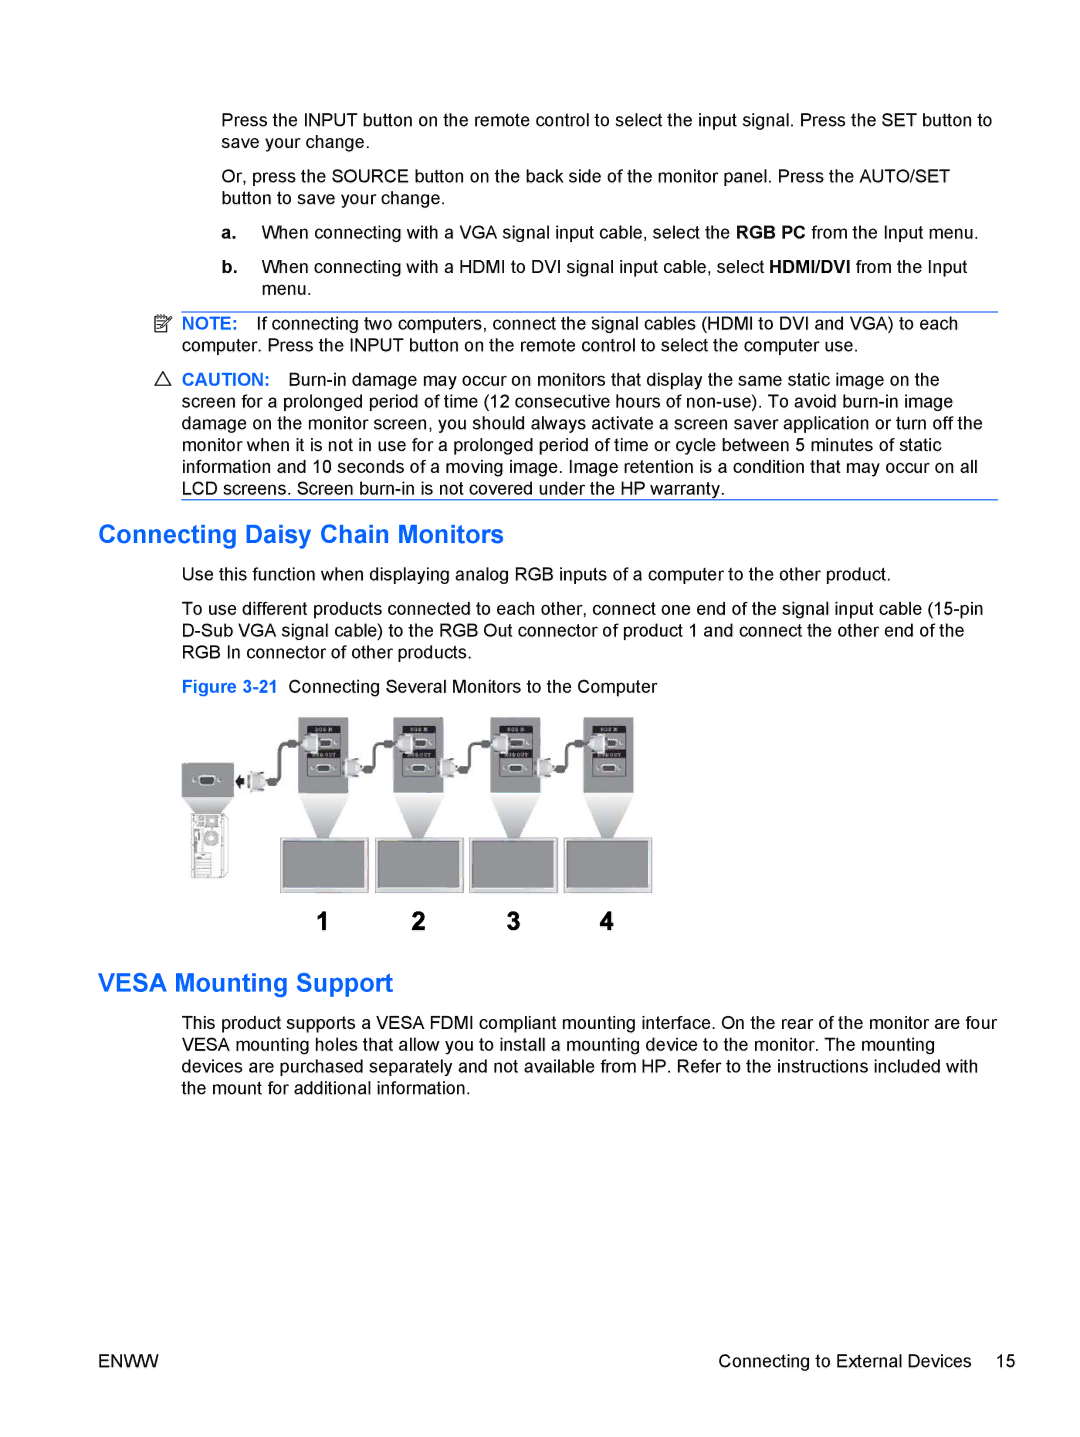
Use this function when displaying analog RGB inputs of a computer to the other product.
To use different products connected to each other, connect one end of the signal input cable
Figure 3-21 Connecting Several Monitors to the Computer
VESA Mounting Support
This product supports a VESA FDMI compliant mounting interface. On the rear of the monitor are four VESA mounting holes that allow you to install a mounting device to the monitor. The mounting devices are purchased separately and not available from HP. Refer to the instructions included with the mount for additional information.
ENWW | Connecting to External Devices 15 |
