OptiPrinter PRO CD/DVD Inkjet Printer
Follow the on screen instructions.
1.Step 1: Set both offsets to ‘0’. This is the default setting.
2.Step 2: Place a disc onto the CD tray and retract the tray into the printer. Click ‘1st Test Print’. A series of solid black circles will print onto the disc as shown in Fig. 24 on the previous page.
3.Step 3: rotate to discs 180 degrees in the CD tray and retract the tray once more into the printer. Click ‘2nd Test Print’. A series of broken, red circles will print onto the disc as shown in Fig. 24 on the previous page.
4.If the printer is in calibration, the 2nd Test Print should sit directly on top of the 1st. If this is not the case, the ‘Offsets’ need to be adjusted.
5.Adjust the Offset
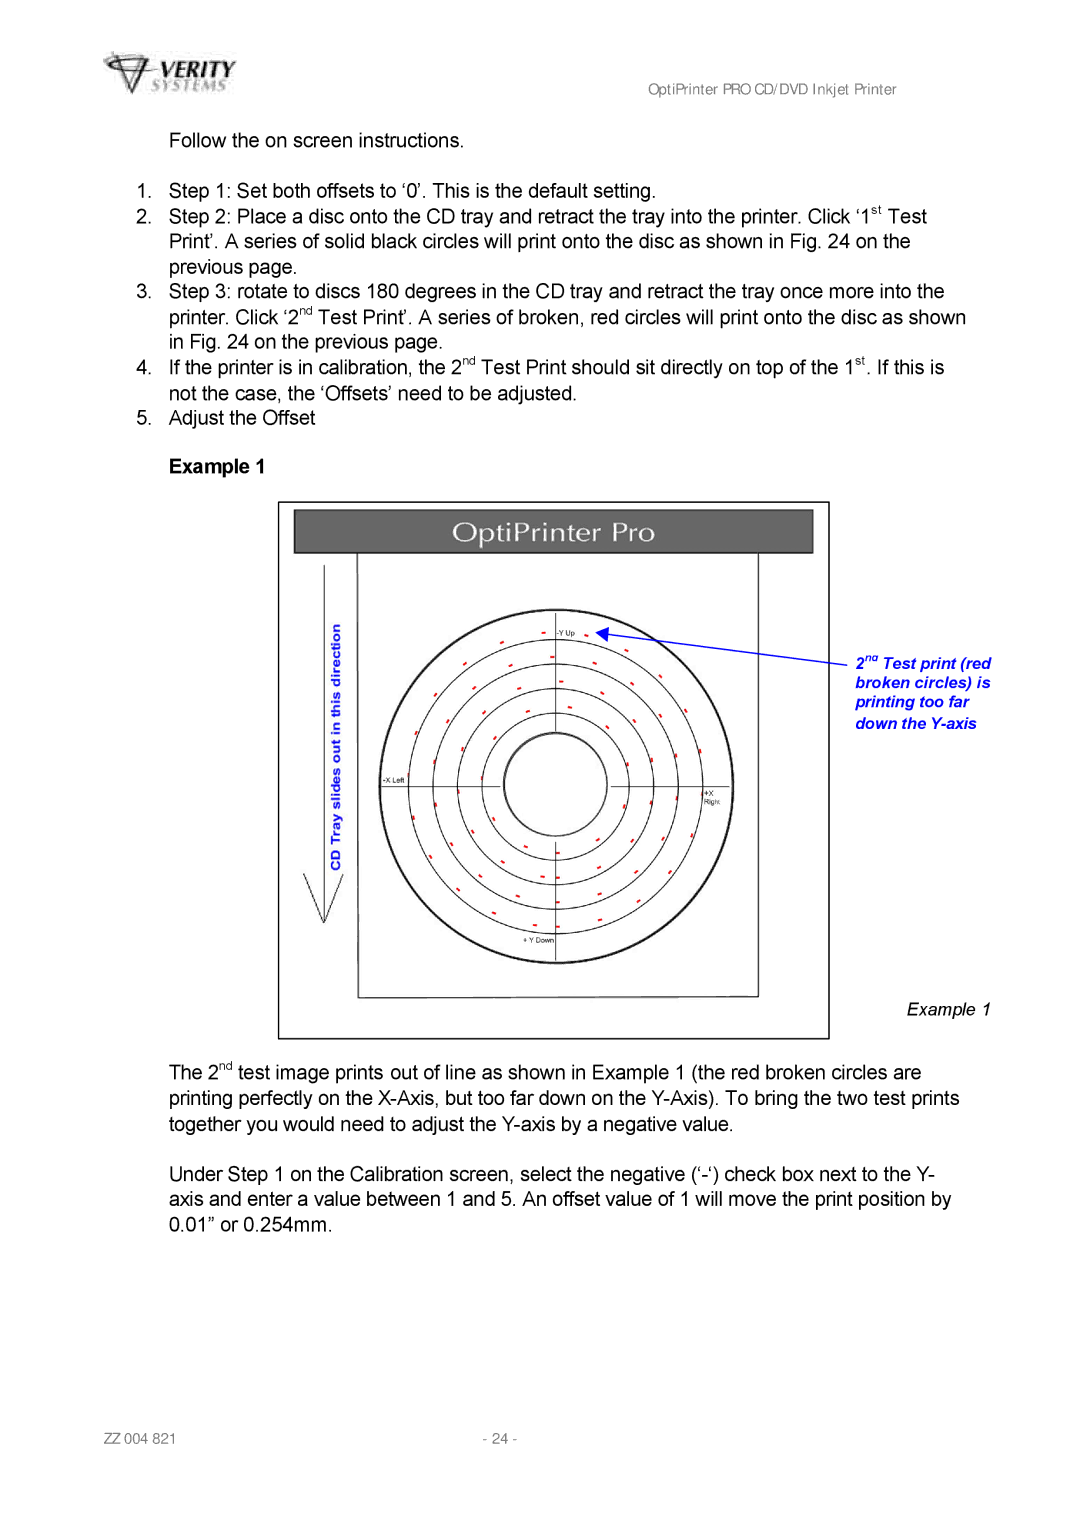
Example 1
2nd Test print (red broken circles) is printing too far down the
Example 1
The 2nd test image prints out of line as shown in Example 1 (the red broken circles are printing perfectly on the
Under Step 1 on the Calibration screen, select the negative
ZZ 004 821 | - 24 - |