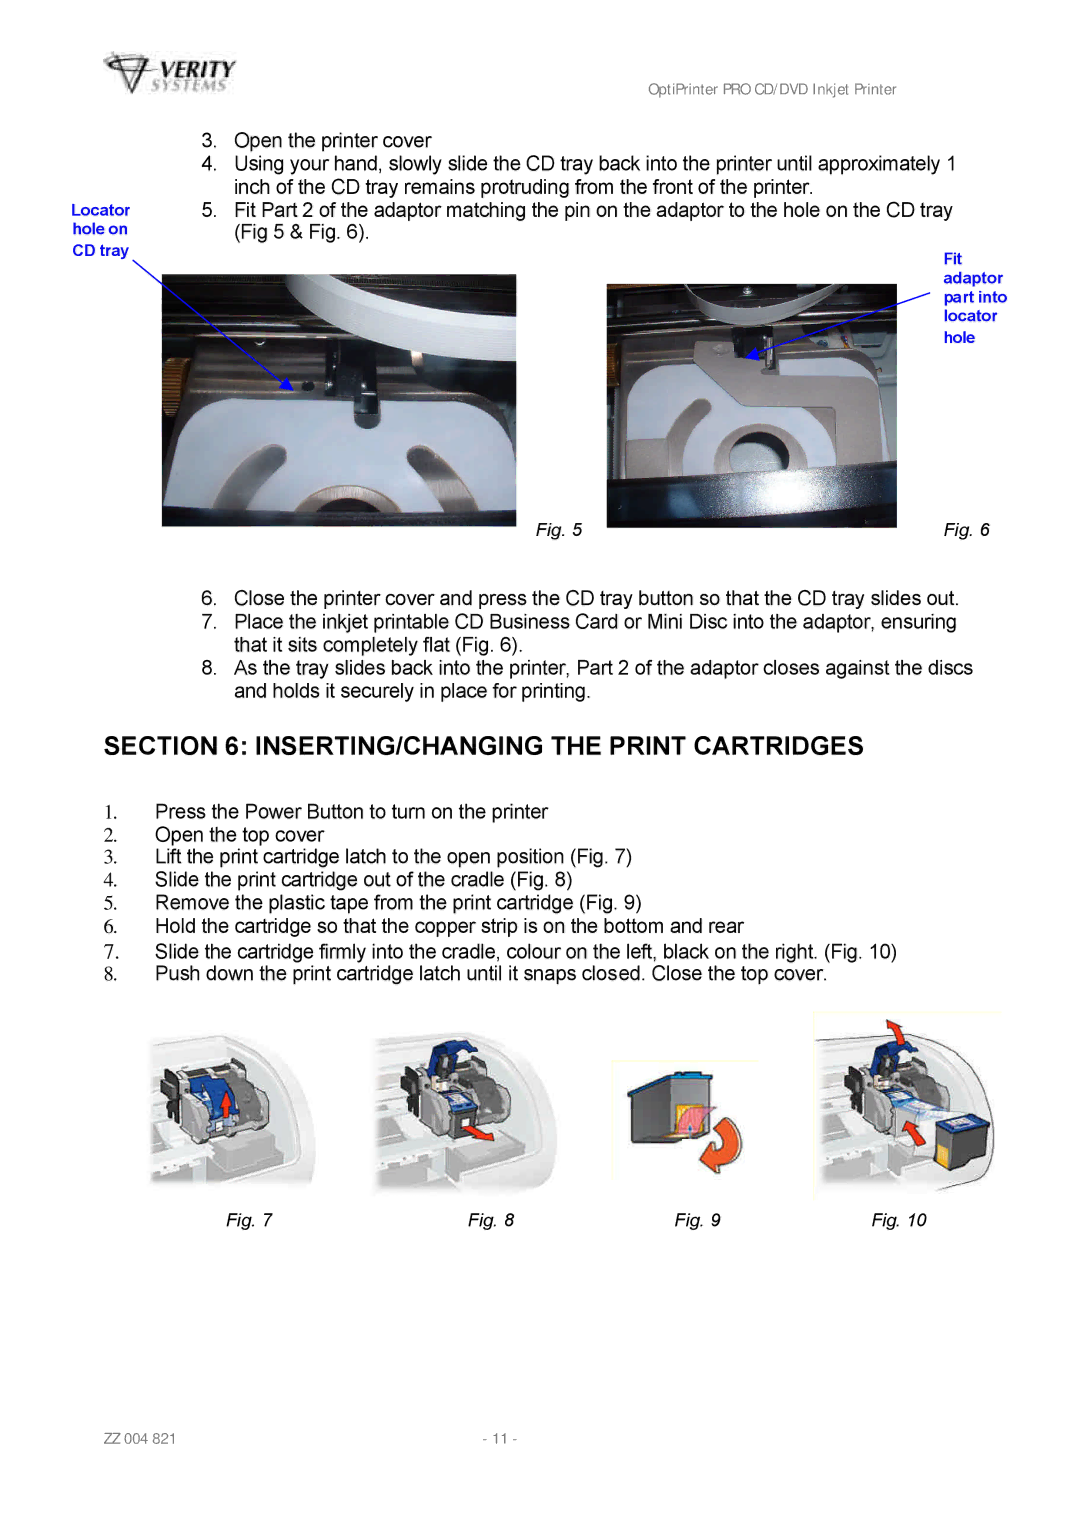
Locator hole on CD tray
OptiPrinter PRO CD/DVD Inkjet Printer
3.Open the printer cover
4.Using your hand, slowly slide the CD tray back into the printer until approximately 1 inch of the CD tray remains protruding from the front of the printer.
5.Fit Part 2 of the adaptor matching the pin on the adaptor to the hole on the CD tray (Fig 5 & Fig. 6).
Fit adaptor part into locator hole
Fig. 5 | Fig. 6 |
6.Close the printer cover and press the CD tray button so that the CD tray slides out.
7.Place the inkjet printable CD Business Card or Mini Disc into the adaptor, ensuring that it sits completely flat (Fig. 6).
8.As the tray slides back into the printer, Part 2 of the adaptor closes against the discs and holds it securely in place for printing.
SECTION 6: INSERTING/CHANGING THE PRINT CARTRIDGES
1.Press the Power Button to turn on the printer
2.Open the top cover
3.Lift the print cartridge latch to the open position (Fig. 7)
4.Slide the print cartridge out of the cradle (Fig. 8)
5.Remove the plastic tape from the print cartridge (Fig. 9)
6.Hold the cartridge so that the copper strip is on the bottom and rear
7.Slide the cartridge firmly into the cradle, colour on the left, black on the right. (Fig. 10)
8.Push down the print cartridge latch until it snaps closed. Close the top cover.
Fig. 7 | Fig. 8 | Fig. 9 |
Fig. 10
ZZ 004 821 | - 11 - |
