Removal and Replacement Procedures
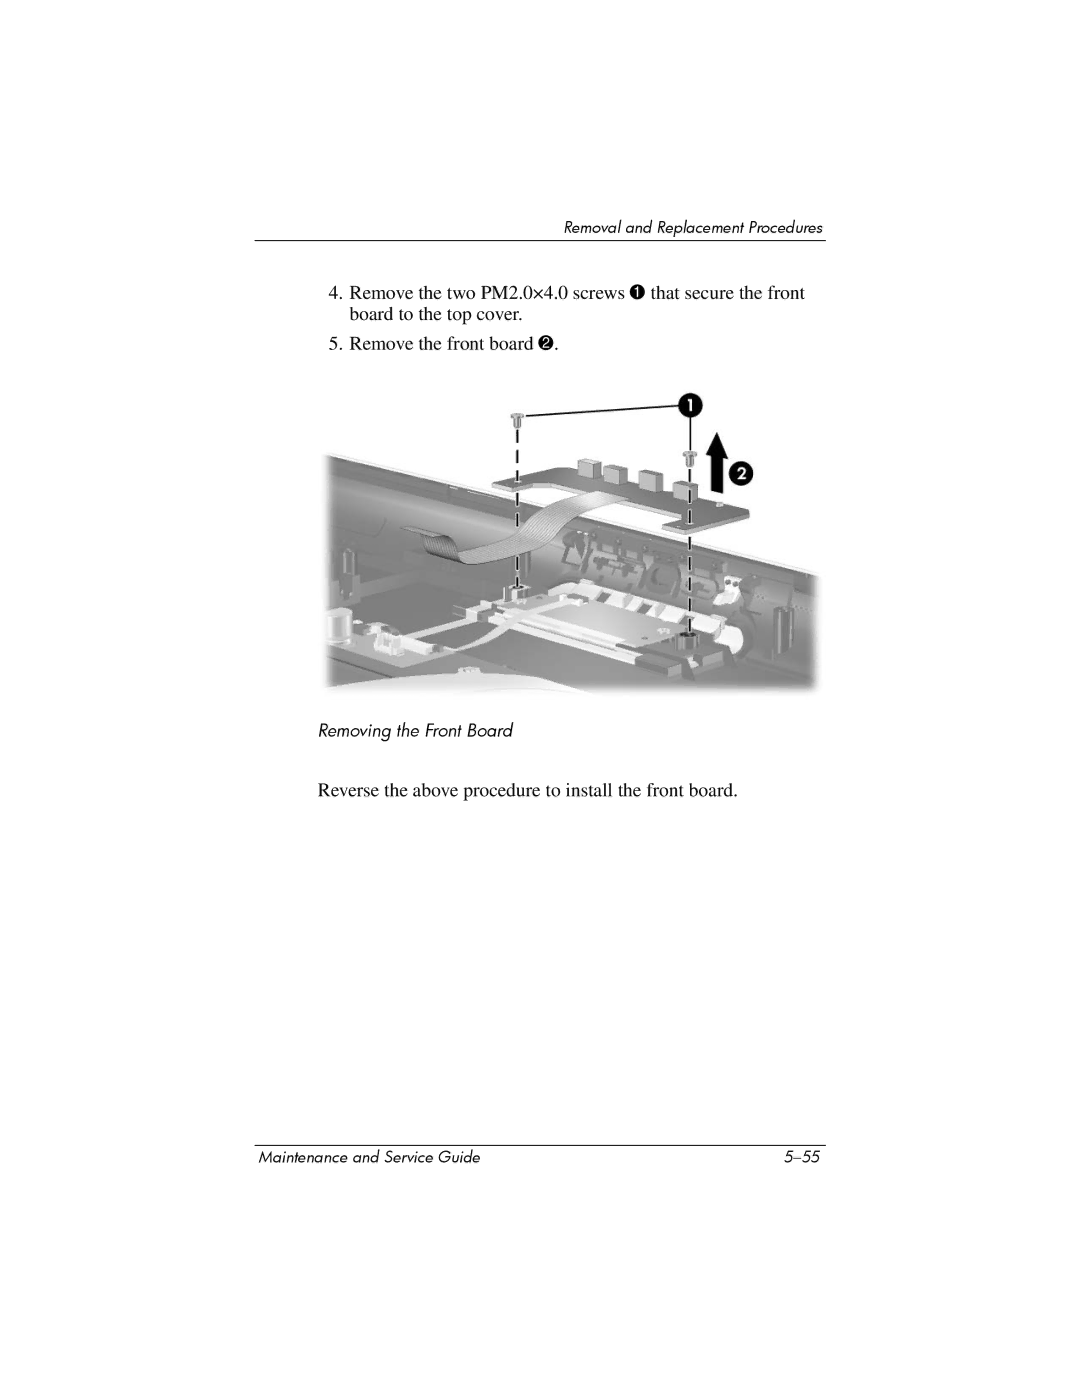
4.Remove the two PM2.0×4.0 screws 1 that secure the front board to the top cover.
5.Remove the front board 2.
Removing the Front Board
Reverse the above procedure to install the front board.
Maintenance and Service Guide |
