CAUTION: The cache module connector does not use the
1.Close all applications, and then power down the server blade.
2.Remove or open the access panel.
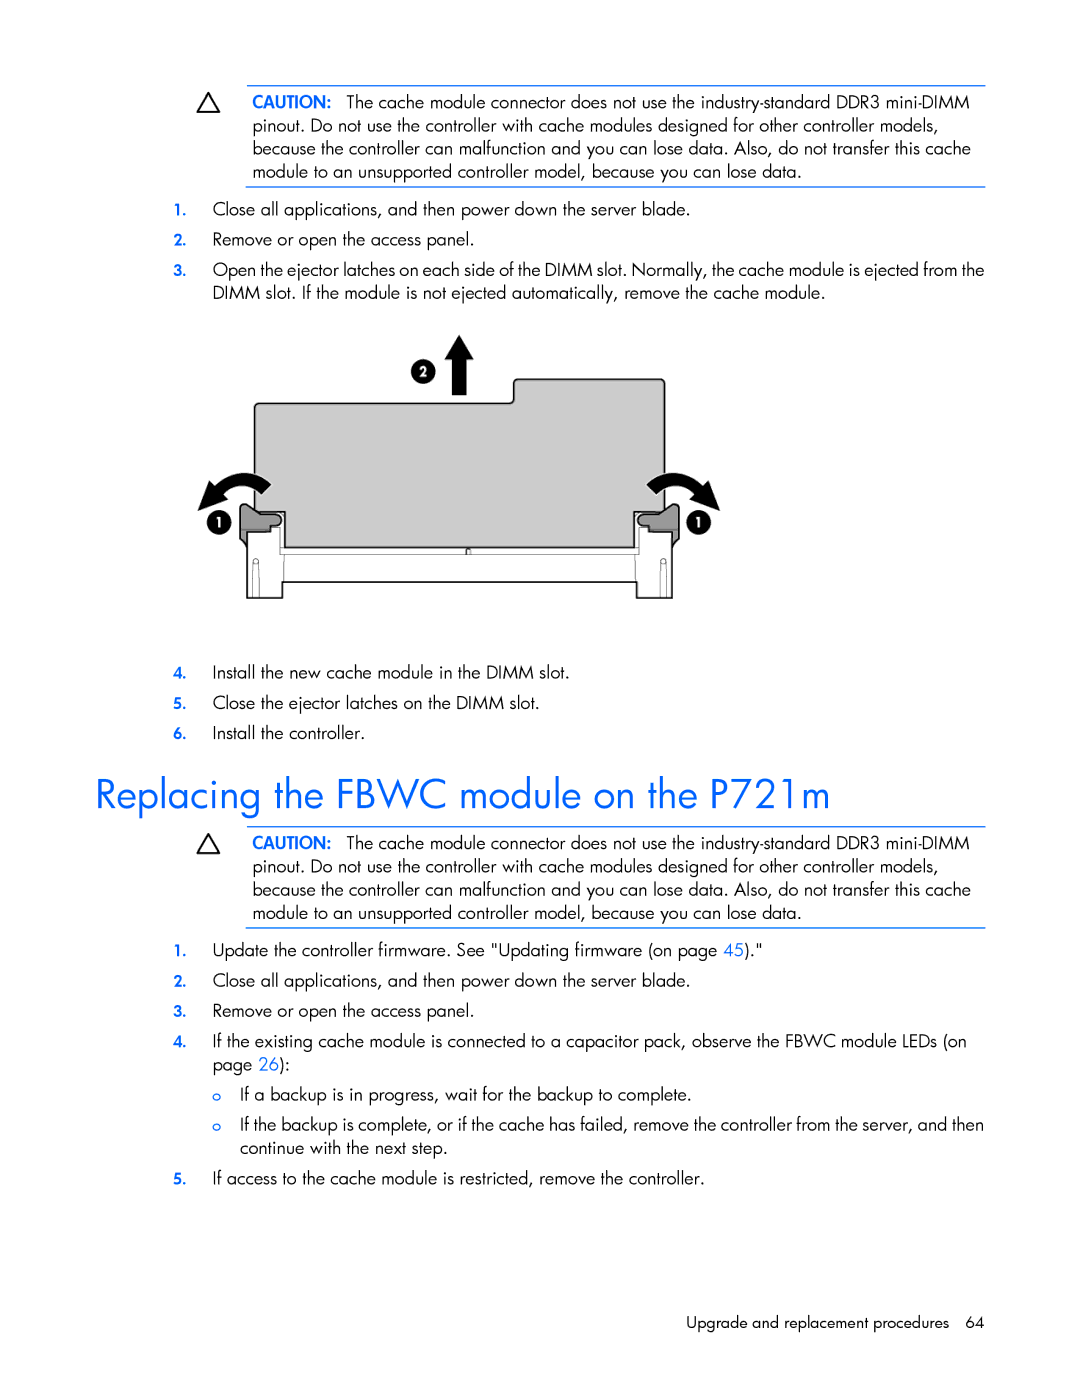
3.Open the ejector latches on each side of the DIMM slot. Normally, the cache module is ejected from the DIMM slot. If the module is not ejected automatically, remove the cache module.
4.Install the new cache module in the DIMM slot.
5.Close the ejector latches on the DIMM slot.
6.Install the controller.
Replacing the FBWC module on the P721m
CAUTION: The cache module connector does not use the
1.Update the controller firmware. See "Updating firmware (on page 45)."
2.Close all applications, and then power down the server blade.
3.Remove or open the access panel.
4.If the existing cache module is connected to a capacitor pack, observe the FBWC module LEDs (on page 26):
o If a backup is in progress, wait for the backup to complete.
o If the backup is complete, or if the cache has failed, remove the controller from the server, and then continue with the next step.
5.If access to the cache module is restricted, remove the controller.