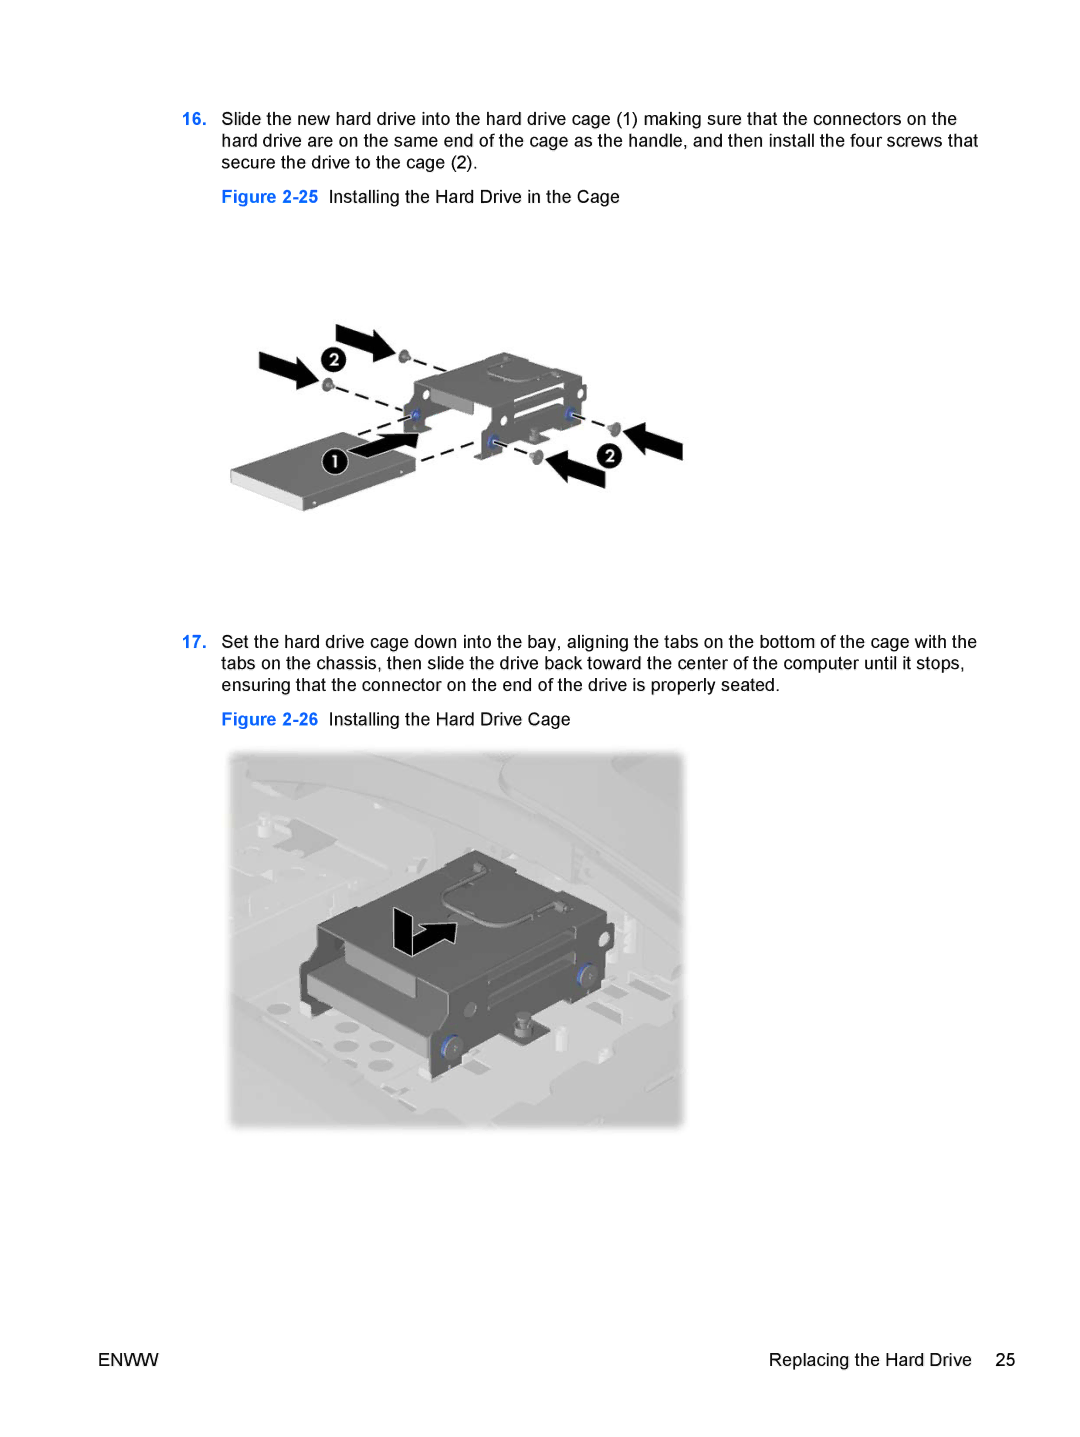
16.Slide the new hard drive into the hard drive cage (1) making sure that the connectors on the hard drive are on the same end of the cage as the handle, and then install the four screws that secure the drive to the cage (2).
Figure 2-25 Installing the Hard Drive in the Cage
17.Set the hard drive cage down into the bay, aligning the tabs on the bottom of the cage with the tabs on the chassis, then slide the drive back toward the center of the computer until it stops, ensuring that the connector on the end of the drive is properly seated.
Figure 2-26 Installing the Hard Drive Cage
ENWW | Replacing the Hard Drive 25 |
