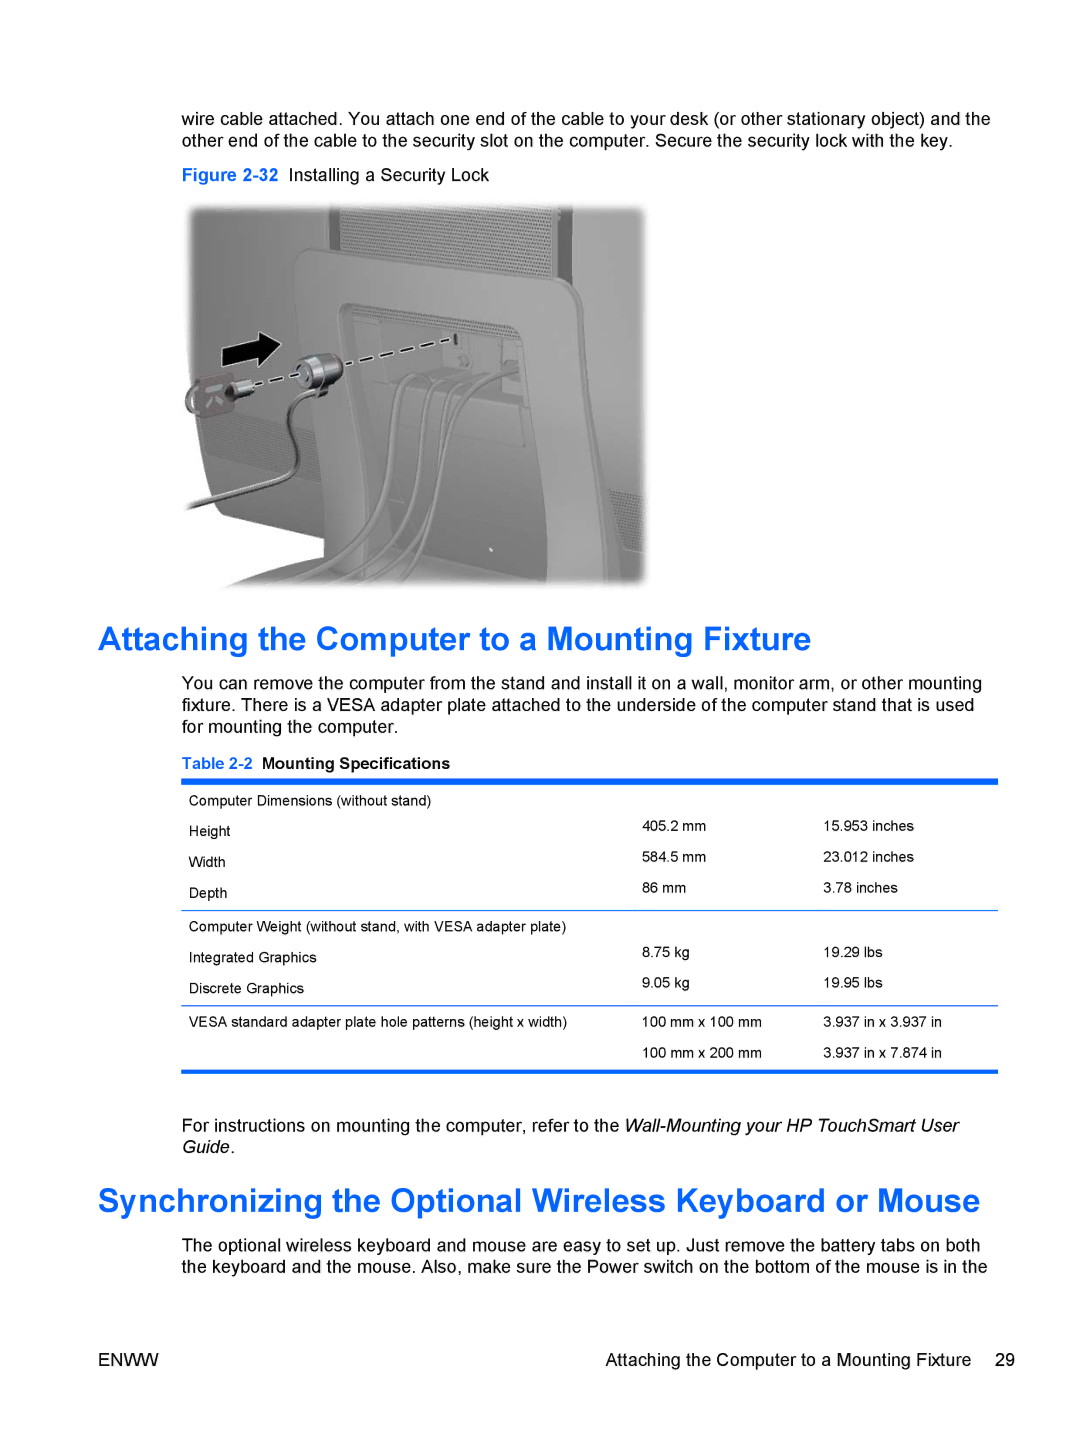
wire cable attached. You attach one end of the cable to your desk (or other stationary object) and the other end of the cable to the security slot on the computer. Secure the security lock with the key.
Figure 2-32 Installing a Security Lock
Attaching the Computer to a Mounting Fixture
You can remove the computer from the stand and install it on a wall, monitor arm, or other mounting fixture. There is a VESA adapter plate attached to the underside of the computer stand that is used for mounting the computer.
Table 2-2 Mounting Specifications
Computer Dimensions (without stand) |
|
|
Height | 405.2 mm | 15.953 inches |
|
| |
Width | 584.5 mm | 23.012 inches |
|
| |
Depth | 86 mm | 3.78 inches |
|
| |
|
|
|
Computer Weight (without stand, with VESA adapter plate) |
|
|
Integrated Graphics | 8.75 kg | 19.29 lbs |
|
| |
Discrete Graphics | 9.05 kg | 19.95 lbs |
|
| |
|
|
|
VESA standard adapter plate hole patterns (height x width) | 100 mm x 100 mm | 3.937 in x 3.937 in |
| 100 mm x 200 mm | 3.937 in x 7.874 in |
|
|
|
For instructions on mounting the computer, refer to the
Synchronizing the Optional Wireless Keyboard or Mouse
The optional wireless keyboard and mouse are easy to set up. Just remove the battery tabs on both the keyboard and the mouse. Also, make sure the Power switch on the bottom of the mouse is in the
ENWW | Attaching the Computer to a Mounting Fixture 29 |