ENGINE

See engine manual.

Lubrication

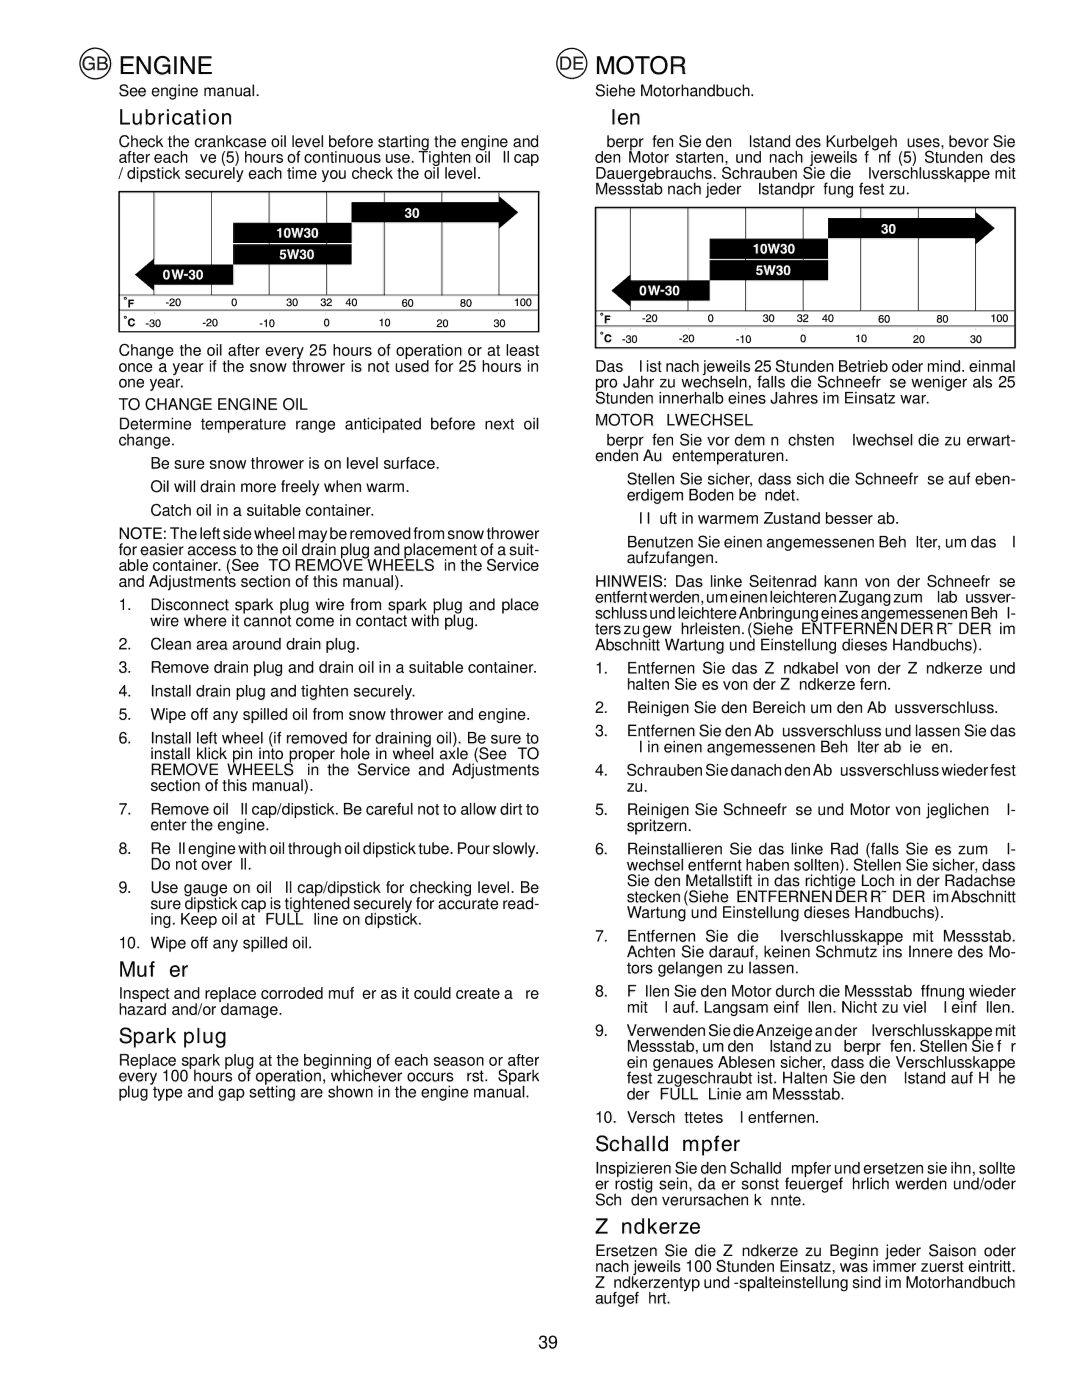
Check the crankcase oil level before starting the engine and after each fi ve (5) hours of continuous use. Tighten oil fi ll cap / dipstick securely each time you check the oil level.

Change the oil after every 25 hours of operation or at least once a year if the snow thrower is not used for 25 hours in one year.

TO CHANGE ENGINE OIL

Determine temperature range anticipated before next oil change.

Be sure snow thrower is on level surface.

Oil will drain more freely when warm.

Catch oil in a suitable container.

NOTE: The left side wheel may be removed from snow thrower for easier access to the oil drain plug and placement of a suit- able container. (See “TO REMOVE WHEELS” in the Service and Adjustments section of this manual).

1.Disconnect spark plug wire from spark plug and place wire where it cannot come in contact with plug.

2.Clean area around drain plug.

3.Remove drain plug and drain oil in a suitable container.

4.Install drain plug and tighten securely.

5.Wipe off any spilled oil from snow thrower and engine.

6.Install left wheel (if removed for draining oil). Be sure to install klick pin into proper hole in wheel axle (See “TO REMOVE WHEELS” in the Service and Adjustments section of this manual).

7.Remove oil fi ll cap/dipstick. Be careful not to allow dirt to enter the engine.

8.Refi ll engine with oil through oil dipstick tube. Pour slowly. Do not overfi ll.

9.Use gauge on oil fi ll cap/dipstick for checking level. Be sure dipstick cap is tightened securely for accurate read- ing. Keep oil at “FULL” line on dipstick.

10.Wipe off any spilled oil.

Muffler

Inspect and replace corroded muffl er as it could create a fi re hazard and/or damage.

Spark plug

Replace spark plug at the beginning of each season or after every 100 hours of operation, whichever occurs fi rst. Spark plug type and gap setting are shown in the engine manual.

MOTOR

Siehe Motorhandbuch.

Ölen

Überprüfen Sie den Ölstand des Kurbelgehäuses, bevor Sie den Motor starten, und nach jeweils fünf (5) Stunden des Dauergebrauchs. Schrauben Sie die Ölverschlusskappe mit Messstab nach jeder Ölstandprüfung fest zu.

Das Öl ist nach jeweils 25 Stunden Betrieb oder mind. einmal pro Jahr zu wechseln, falls die Schneefräse weniger als 25 Stunden innerhalb eines Jahres im Einsatz war.

MOTORÖLWECHSEL

Überprüfen Sie vor dem nächsten Ölwechsel die zu erwart- enden Außentemperaturen.

Stellen Sie sicher, dass sich die Schneefräse auf eben- erdigem Boden befi ndet.

Öl läuft in warmem Zustand besser ab.

Benutzen Sie einen angemessenen Behälter, um das Öl aufzufangen.

HINWEIS: Das linke Seitenrad kann von der Schneefräse entfernt werden, um einen leichteren Zugang zum Ölabflussver- schluss und leichtereAnbringung eines angemessenen Behäl- ters zu gewährleisten. (Siehe “ENTFERNEN DER RÄDER” im Abschnitt Wartung und Einstellung dieses Handbuchs).

1.Entfernen Sie das Zündkabel von der Zündkerze und halten Sie es von der Zündkerze fern.

2.Reinigen Sie den Bereich um den Abfl ussverschluss.

3.Entfernen Sie den Abfl ussverschluss und lassen Sie das Öl in einen angemessenen Behälter abfl ießen.

4.Schrauben Sie danach den Abflussverschluss wieder fest zu.

5.Reinigen Sie Schneefräse und Motor von jeglichen Öl- spritzern.

6.Reinstallieren Sie das linke Rad (falls Sie es zum Öl- wechsel entfernt haben sollten). Stellen Sie sicher, dass Sie den Metallstift in das richtige Loch in der Radachse stecken (Siehe “ENTFERNEN DER RÄDER” imAbschnitt Wartung und Einstellung dieses Handbuchs).

7.Entfernen Sie die Ölverschlusskappe mit Messstab. Achten Sie darauf, keinen Schmutz ins Innere des Mo- tors gelangen zu lassen.

8.Füllen Sie den Motor durch die Messstaböffnung wieder mit Öl auf. Langsam einfüllen. Nicht zu viel Öl einfüllen.

9.Verwenden Sie dieAnzeige an der Ölverschlusskappe mit Messstab, um den Ölstand zu überprüfen. Stellen Sie für ein genaues Ablesen sicher, dass die Verschlusskappe fest zugeschraubt ist. Halten Sie den Ölstand auf Höhe der “FULL” Linie am Messstab.

10.Verschüttetes Öl entfernen.

Schalldämpfer

Inspizieren Sie den Schalldämpfer und ersetzen sie ihn, sollte er rostig sein, da er sonst feuergefährlich werden und/oder Schäden verursachen könnte.

Zündkerze

Ersetzen Sie die Zündkerze zu Beginn jeder Saison oder nach jeweils 100 Stunden Einsatz, was immer zuerst eintritt. Zündkerzentyp und -spalteinstellung sind im Motorhandbuch aufgeführt.

39

Page 39
Image 39
Husqvarna EU8024STE, EU5524ST, EU1130STE instruction manual Engine, Motor

EU1130STE, EU5524ST, EU8024STE specifications

Husqvarna is renowned for its cutting-edge outdoor power equipment, and among its impressive offerings are the EU8024STE, EU5524ST, and EU1130STE models. Each of these snow throwers is designed to provide exceptional performance and lasting durability, making them ideal for tackling winter weather challenges.

The Husqvarna EU8024STE is a powerful snow thrower designed for heavy-duty use. Equipped with a robust 24-inch clearing width, it is capable of handling large amounts of snow efficiently. Its advanced electric start feature ensures that you can quickly get to work, even in the coldest conditions. This model features a high-performance engine that delivers optimal power and speed, making quick work of thick snow drifts. The dual-stage system enhances its ability to throw snow at impressive distances, and the adjustable chute allows for precise snow placement.

Next in line is the EU5524ST, which offers a balance between power and maneuverability. With a 24-inch clearing width, this model is ideal for residential use. It is powered by a dependable engine that ensures reliable performance without sacrificing ease of use. The EU5524ST features an efficient single-stage design, which makes it lighter and more agile while still being able to clear snow effectively. The user-friendly controls and the ergonomic handle contribute to a more comfortable experience during extended use.

Lastly, the Husqvarna EU1130STE stands out with its impressive clearing capabilities. With a larger 30-inch clearing width, this model is perfect for larger driveways and commercial applications. The dual-stage system, combined with its powerful engine, allows it to handle heavy snowfalls with ease. The EU1130STE also includes impressive features such as heated handles for added comfort during operation and LED headlights, ensuring visibility even in low-light conditions. The adjustable skid shoes also allow users to customize the height for different surfaces, making it versatile for use on various terrains.

Overall, the Husqvarna EU8024STE, EU5524ST, and EU1130STE snow throwers each bring their unique strengths to the table, catering to different user needs. Their innovative features and reliable performance ensure that snow removal becomes a hassle-free task, empowering users to conquer winter's challenges with confidence and efficiency. Whether for residential or commercial use, these models reflect Husqvarna's commitment to quality and innovation in outdoor power equipment.