Step-by-step sawing instructions
1 |
2 |
3 |
4 |
5 |
22 |
1.1 Roll the log onto the log bed.
1.2 Fasten the log in place using the edge support. Place the edge support arms backwards and lock the block in place using the edge support side.
1.3 Set the rachet cam on either 1/4” or 1/8” increments using the rachet handle. The normal choice is the larger measurement.
1.4 Raise the stock so that a suitable slab size will be cut off. Normally the top end of the log is raised 1/4” or 1/2” (one or two clicks) above the bottom end so that the cut will parallel the grain.
1.5 Ram the spiked log grip into the butt end of the log to keep it from rotating. This should be done prior to each cut.
1.6. Place the saw feed line on the bolt with the spacer on the log grip carriage (not with electric feed).
1.7 Cut the slab off.
1.8 On larger logs it is customary to raise the log bed to cut off another,
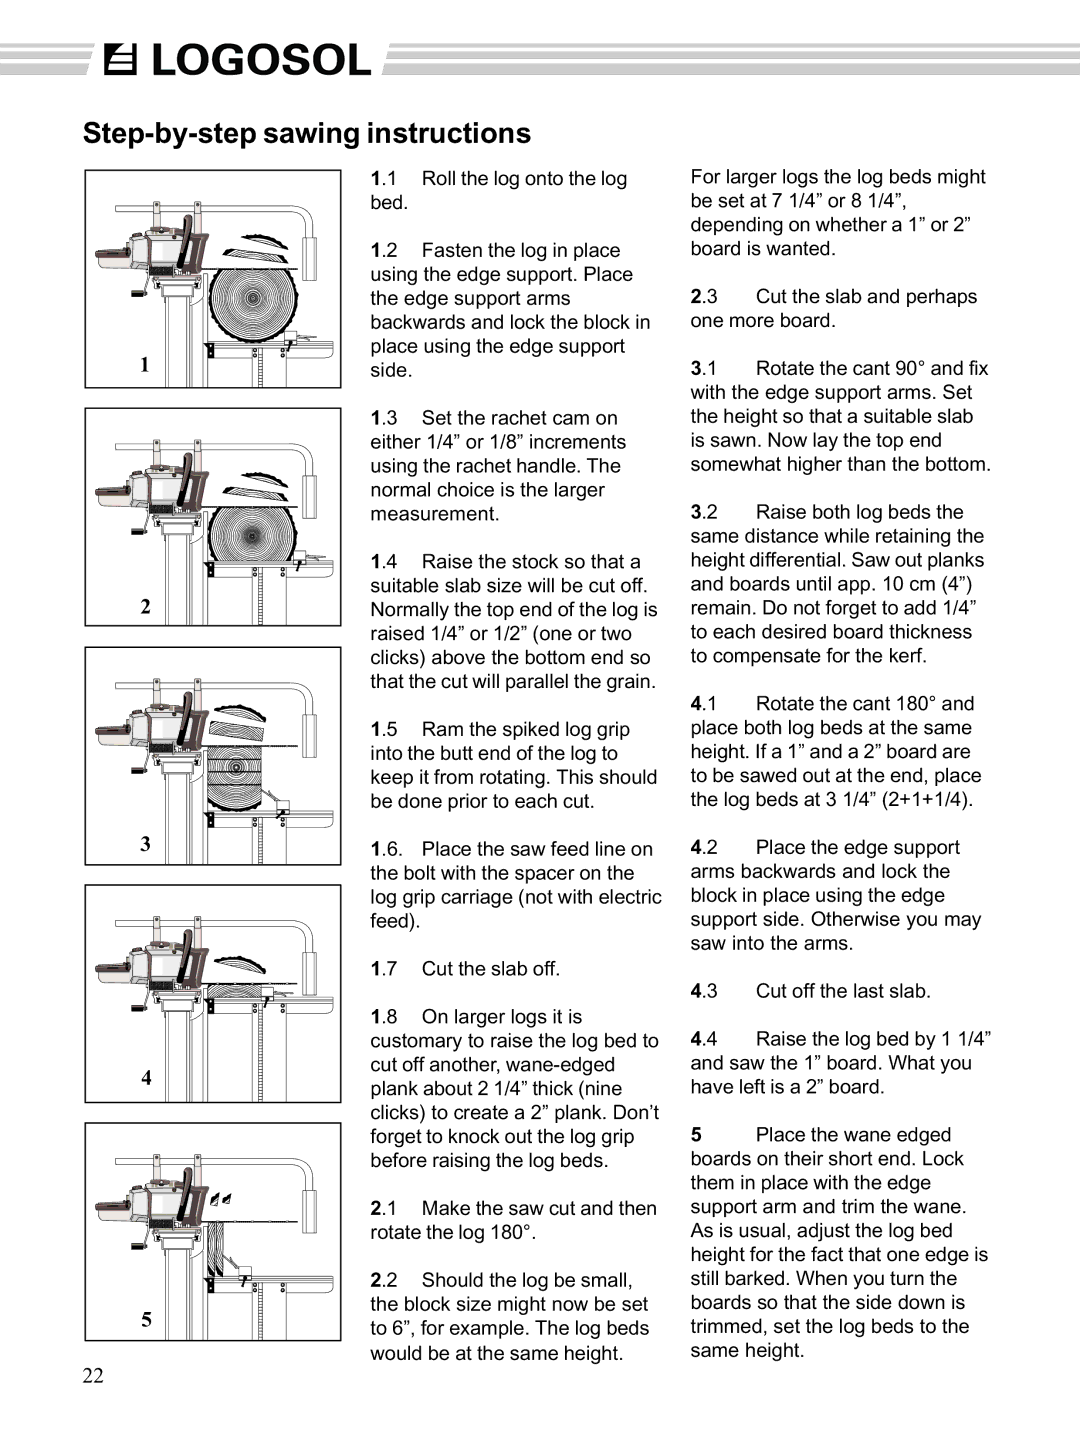
2.1 Make the saw cut and then rotate the log 180°.
2.2 Should the log be small, the block size might now be set to 6”, for example. The log beds would be at the same height.
For larger logs the log beds might be set at 7 1/4” or 8 1/4”, depending on whether a 1” or 2” board is wanted.
2.3 Cut the slab and perhaps one more board.
3.1 Rotate the cant 90° and fix with the edge support arms. Set the height so that a suitable slab is sawn. Now lay the top end somewhat higher than the bottom.
3.2 Raise both log beds the same distance while retaining the height differential. Saw out planks and boards until app. 10 cm (4”) remain. Do not forget to add 1/4” to each desired board thickness to compensate for the kerf.
4.1 Rotate the cant 180° and place both log beds at the same height. If a 1” and a 2” board are to be sawed out at the end, place the log beds at 3 1/4” (2+1+1/4).
4.2 Place the edge support arms backwards and lock the block in place using the edge support side. Otherwise you may saw into the arms.
4.3 Cut off the last slab.
4.4 Raise the log bed by 1 1/4” and saw the 1” board. What you have left is a 2” board.
5Place the wane edged boards on their short end. Lock them in place with the edge support arm and trim the wane. As is usual, adjust the log bed height for the fact that one edge is still barked. When you turn the boards so that the side down is trimmed, set the log beds to the same height.