I-O Display Systems Basic I/O Product manual Installation, Module Wiring Analog Inputs, 2-15Vol.2

Models: Basic I/O Product

1 81
Download 81 pages 15.59 Kb
Page 69
Image 69
Module Wiring

Installation 2

Module Wiring

Analog Inputs:

Modules should NEVER Be installed or removed while power is applied to the BASIC I/O AD. Following insertion in their respective sockets, modules should be secured with the captive screw.

Note: Analog Modules Normally Run hot to the touch

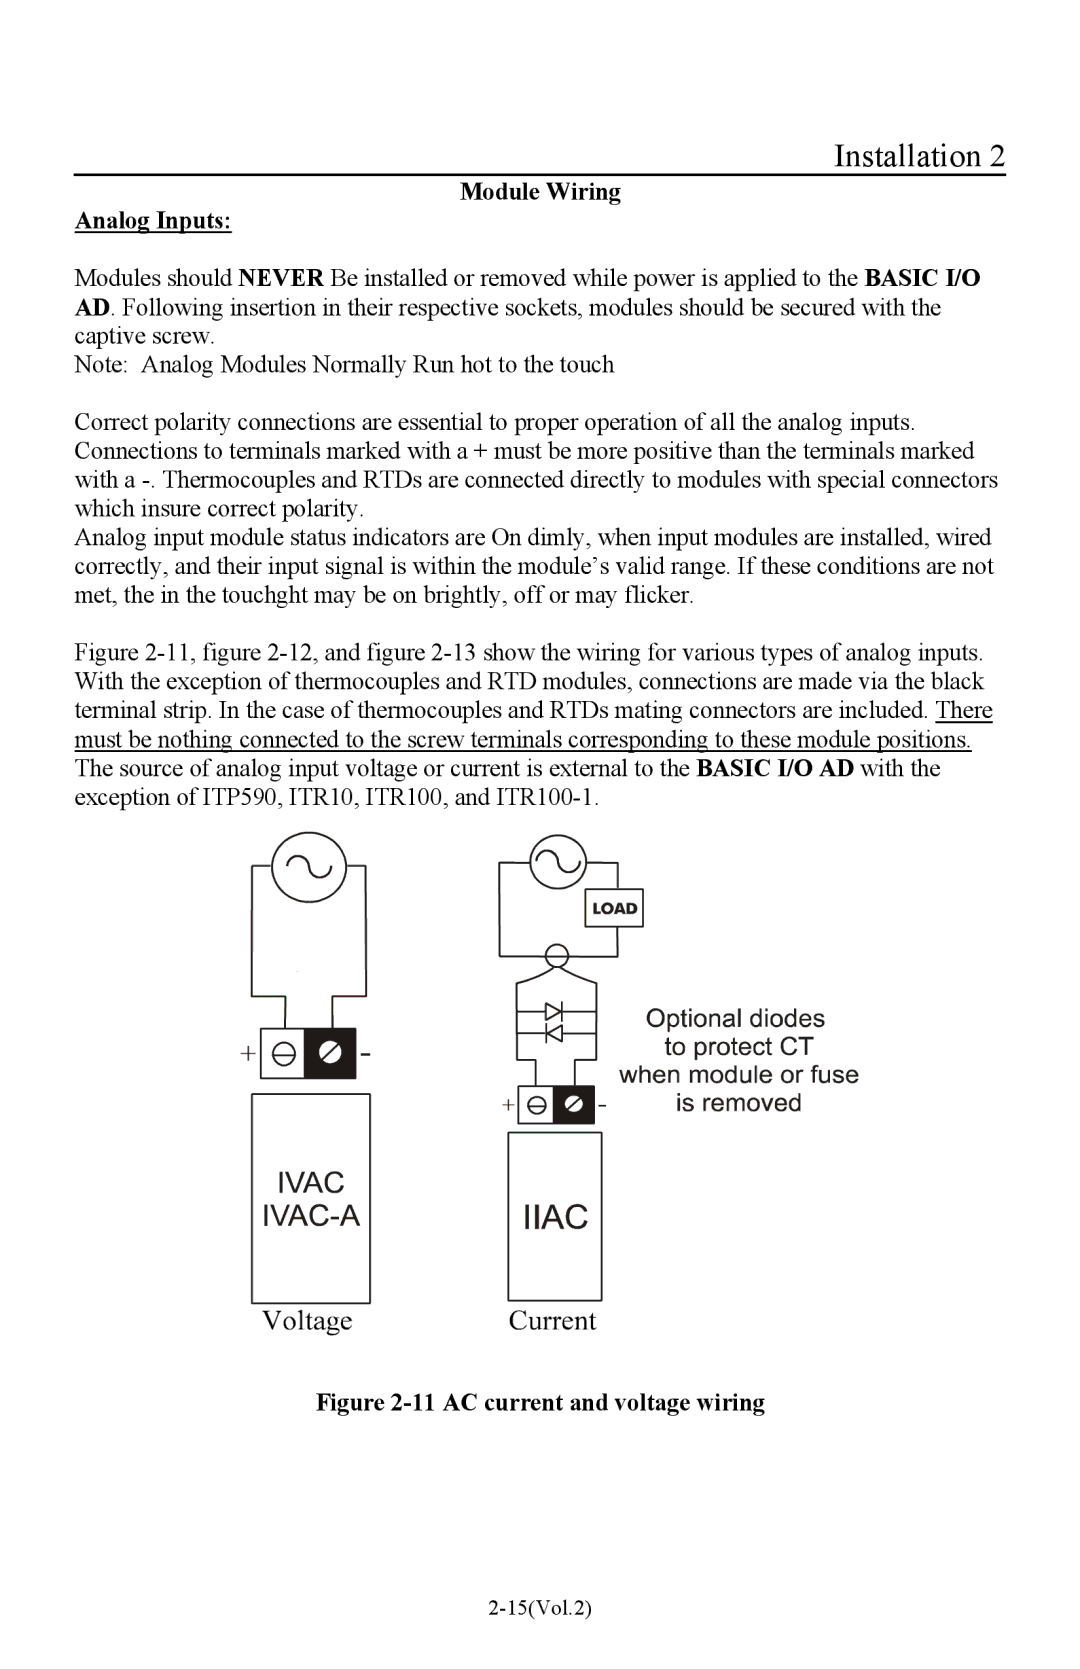
Correct polarity connections are essential to proper operation of all the analog inputs. Connections to terminals marked with a + must be more positive than the terminals marked with a -. Thermocouples and RTDs are connected directly to modules with special connectors which insure correct polarity.

Analog input module status indicators are On dimly, when input modules are installed, wired correctly, and their input signal is within the module’s valid range. If these conditions are not met, the in the touchght may be on brightly, off or may flicker.

Figure 2-11, figure 2-12, and figure 2-13 show the wiring for various types of analog inputs. With the exception of thermocouples and RTD modules, connections are made via the black terminal strip. In the case of thermocouples and RTDs mating connectors are included. There must be nothing connected to the screw terminals corresponding to these module positions.

The source of analog input voltage or current is external to the BASIC I/O AD with the exception of ITP590, ITR10, ITR100, and ITR100-1.

Figure 2-11 AC current and voltage wiring

2-15(Vol.2)

Page 69
Image 69
I-O Display Systems Basic I/O Product manual Installation, Module Wiring Analog Inputs, 11 AC current and voltage wiring