2
Follow these steps for installing chilled water tank with a cold only faucet.
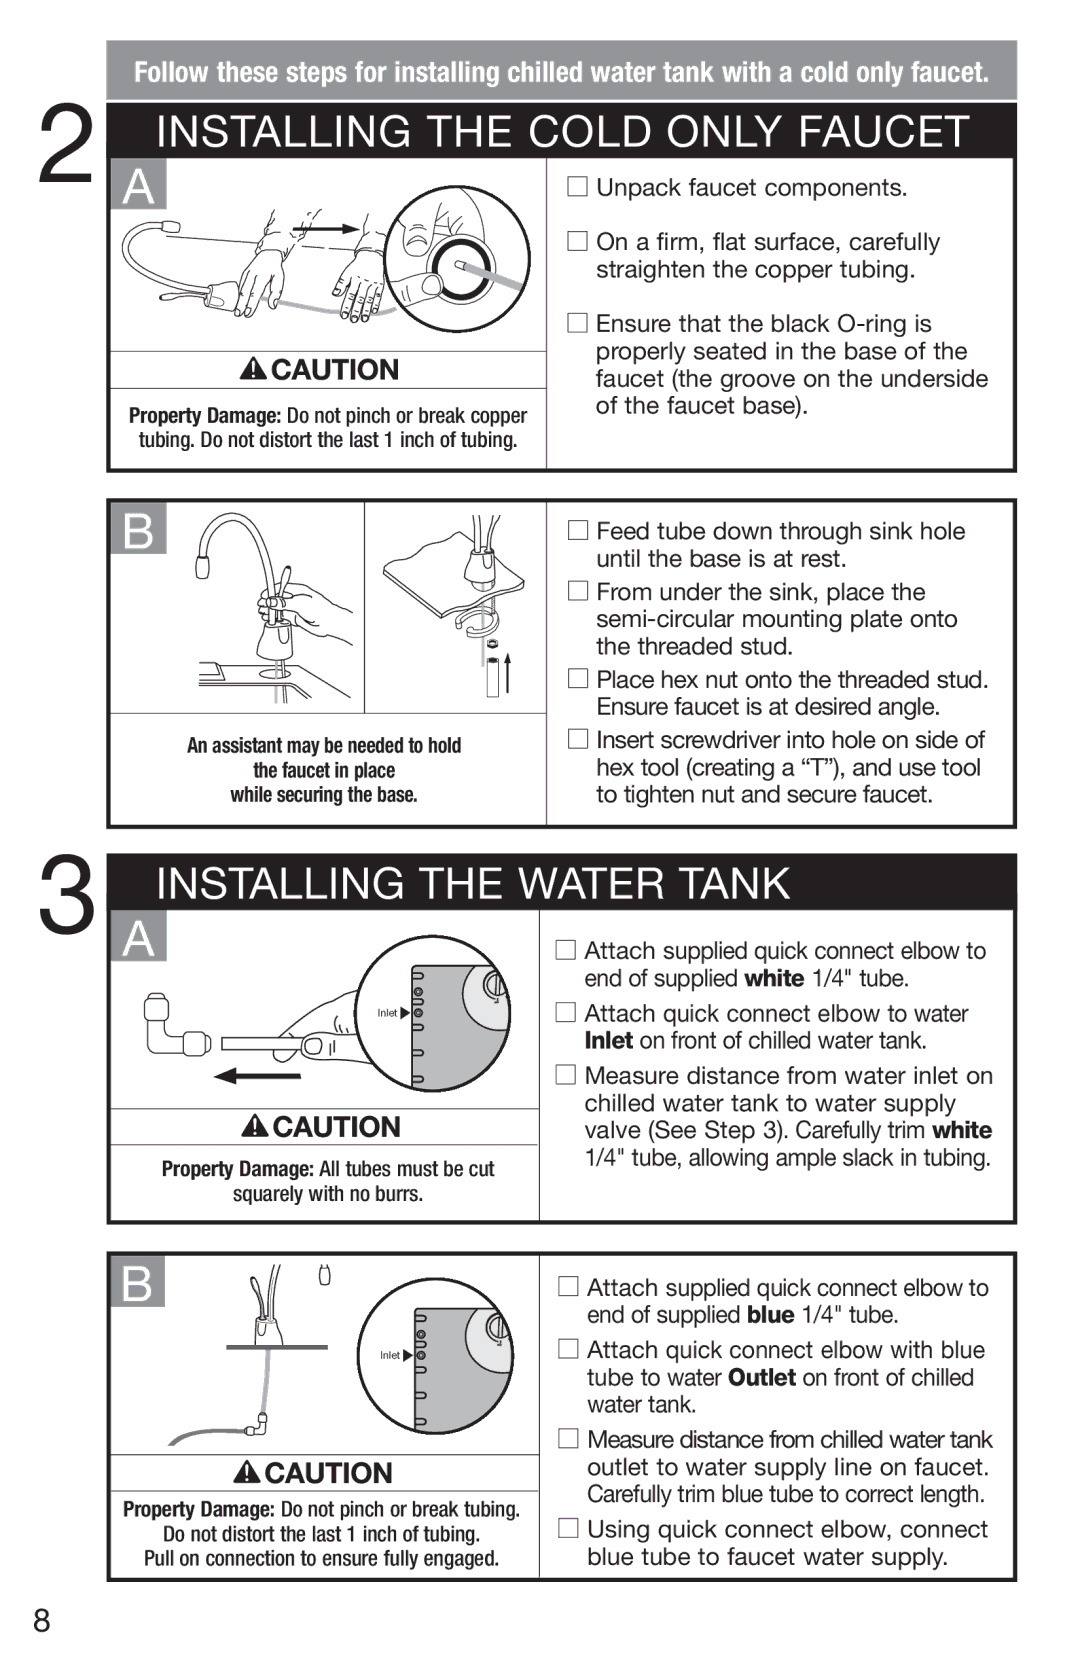
INSTALLING THE COLD ONLY FAUCET
A
Property Damage: Do not pinch or break copper tubing. Do not distort the last 1 inch of tubing.
■Unpack faucet components.
■On a firm, flat surface, carefully straighten the copper tubing.
■Ensure that the black
B
An assistant may be needed to hold
the faucet in place
while securing the base.
■Feed tube down through sink hole until the base is at rest.
■From under the sink, place the
■Place hex nut onto the threaded stud. Ensure faucet is at desired angle.
■Insert screwdriver into hole on side of hex tool (creating a “T”), and use tool to tighten nut and secure faucet.
3
INSTALLING THE WATER TANK
A
Inlet ![]()
![]()
Property Damage: All tubes must be cut
squarely with no burrs.
■Attach supplied quick connect elbow to end of supplied white 1/4" tube.
■Attach quick connect elbow to water Inlet on front of chilled water tank.
■Measure distance from water inlet on chilled water tank to water supply valve (See Step 3). Carefully trim white 1/4" tube, allowing ample slack in tubing.
B
Inlet ![]()
![]()
Property Damage: Do not pinch or break tubing.
Do not distort the last 1 inch of tubing.
Pull on connection to ensure fully engaged.
■Attach supplied quick connect elbow to end of supplied blue 1/4" tube.
■Attach quick connect elbow with blue tube to water Outlet on front of chilled water tank.
■Measure distance from chilled water tank outlet to water supply line on faucet. Carefully trim blue tube to correct length.
■Using quick connect elbow, connect blue tube to faucet water supply.
8