2 Setting Up the Chassis
Install the Server Board
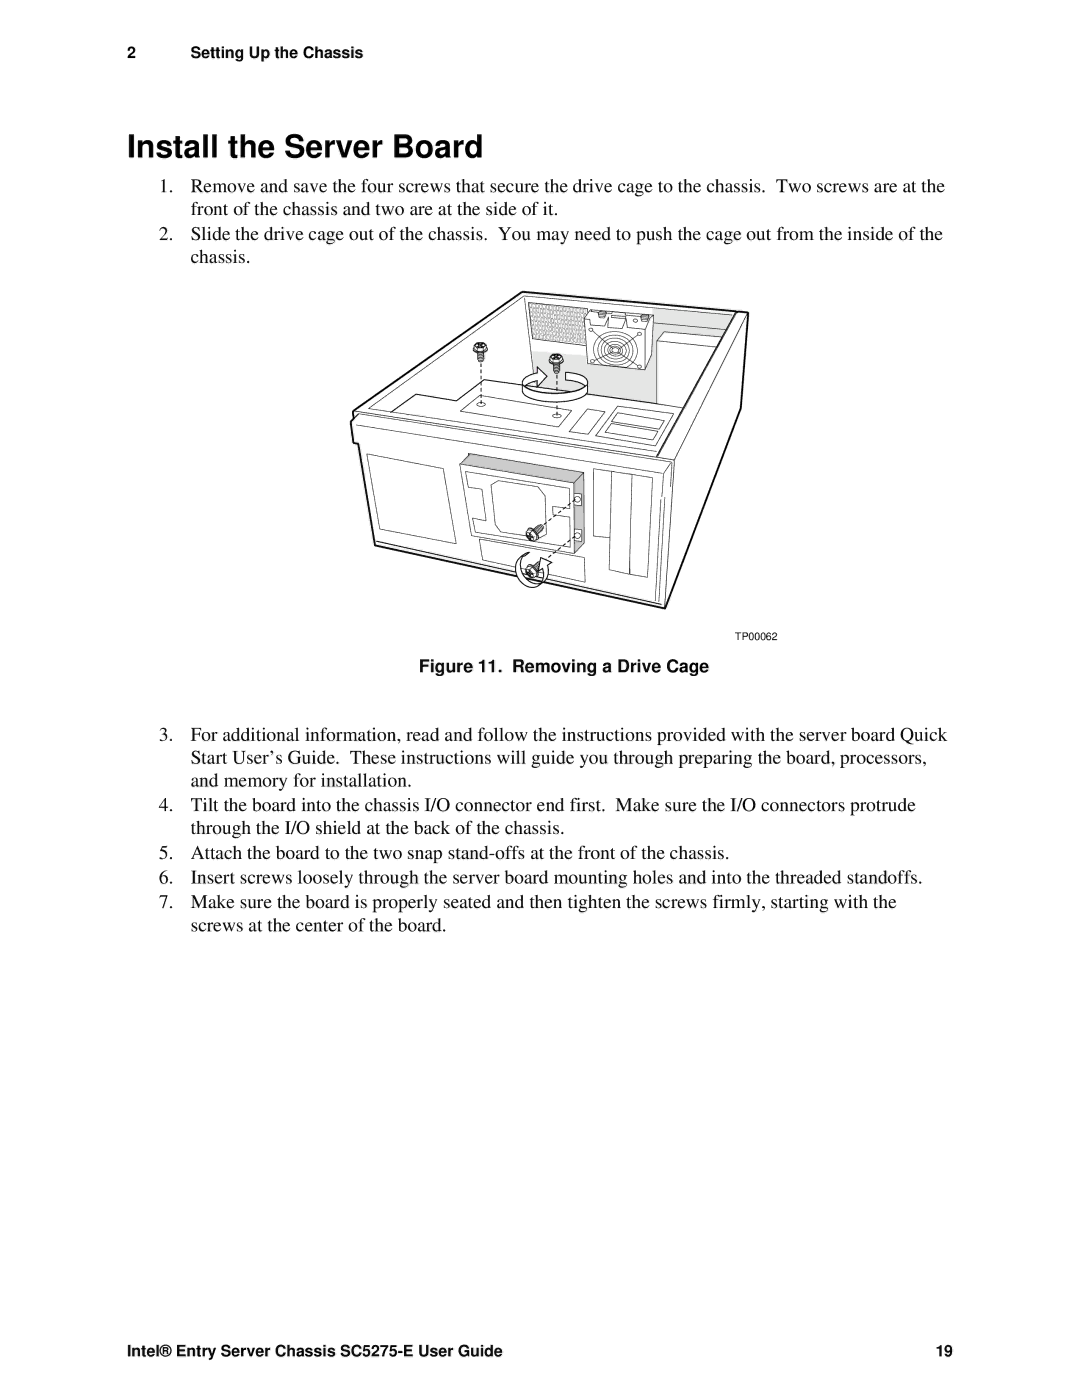
1.Remove and save the four screws that secure the drive cage to the chassis. Two screws are at the front of the chassis and two are at the side of it.
2.Slide the drive cage out of the chassis. You may need to push the cage out from the inside of the chassis.
TP00062
Figure 11. Removing a Drive Cage
3.For additional information, read and follow the instructions provided with the server board Quick Start User’s Guide. These instructions will guide you through preparing the board, processors, and memory for installation.
4.Tilt the board into the chassis I/O connector end first. Make sure the I/O connectors protrude through the I/O shield at the back of the chassis.
5.Attach the board to the two snap
6.Insert screws loosely through the server board mounting holes and into the threaded standoffs.
7.Make sure the board is properly seated and then tighten the screws firmly, starting with the screws at the center of the board.
Intel® Entry Server Chassis | 19 |