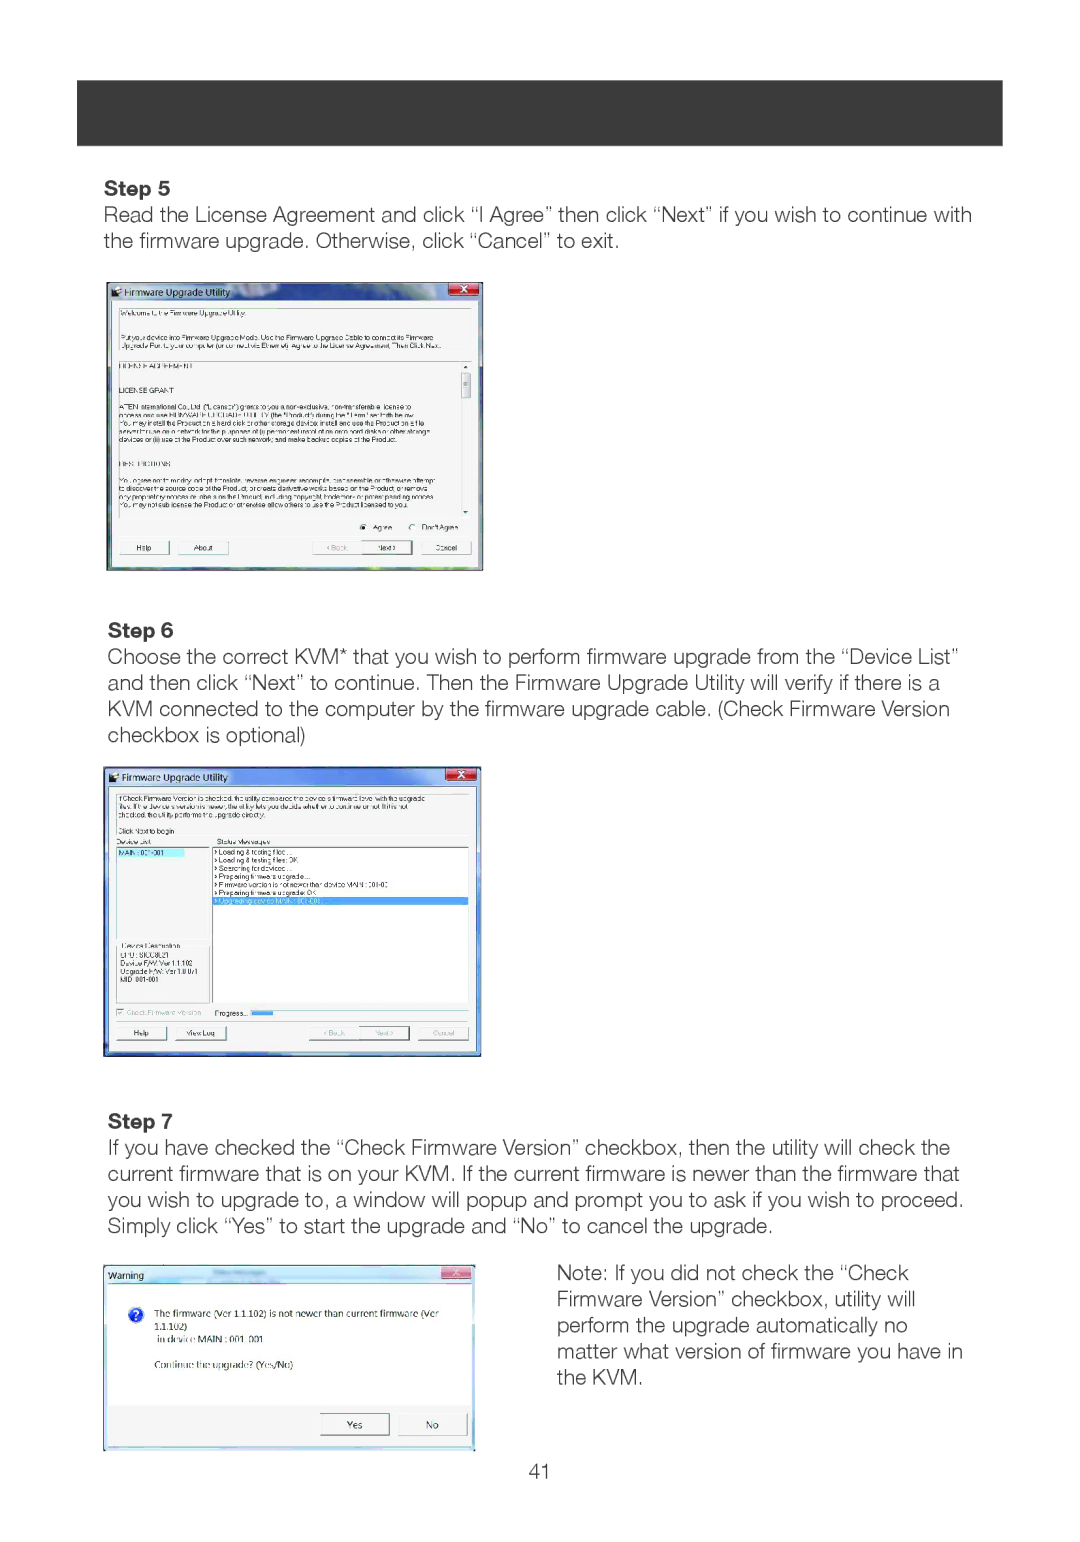
Step 5
Read the License Agreement and click “I Agree” then click “Next” if you wish to continue with the firmware upgrade. Otherwise, click “Cancel” to exit.
Step 6
Choose the correct KVM* that you wish to perform firmware upgrade from the “Device List” and then click “Next” to continue. Then the Firmware Upgrade Utility will verify if there is a KVM connected to the computer by the firmware upgrade cable. (Check Firmware Version checkbox is optional)
Step 7
If you have checked the “Check Firmware Version” checkbox, then the utility will check the current firmware that is on your KVM. If the current firmware is newer than the firmware that you wish to upgrade to, a window will popup and prompt you to ask if you wish to proceed. Simply click “Yes” to start the upgrade and “No” to cancel the upgrade.
Note: If you did not check the “Check Firmware Version” checkbox, utility will perform the upgrade automatically no matter what version of firmware you have in the KVM.
41
