Comfort PLUS Whirlpool Bath
Suction Cover/Strainer Maintenance
Clean the suction cover/strainer of hair and debris when necessary.
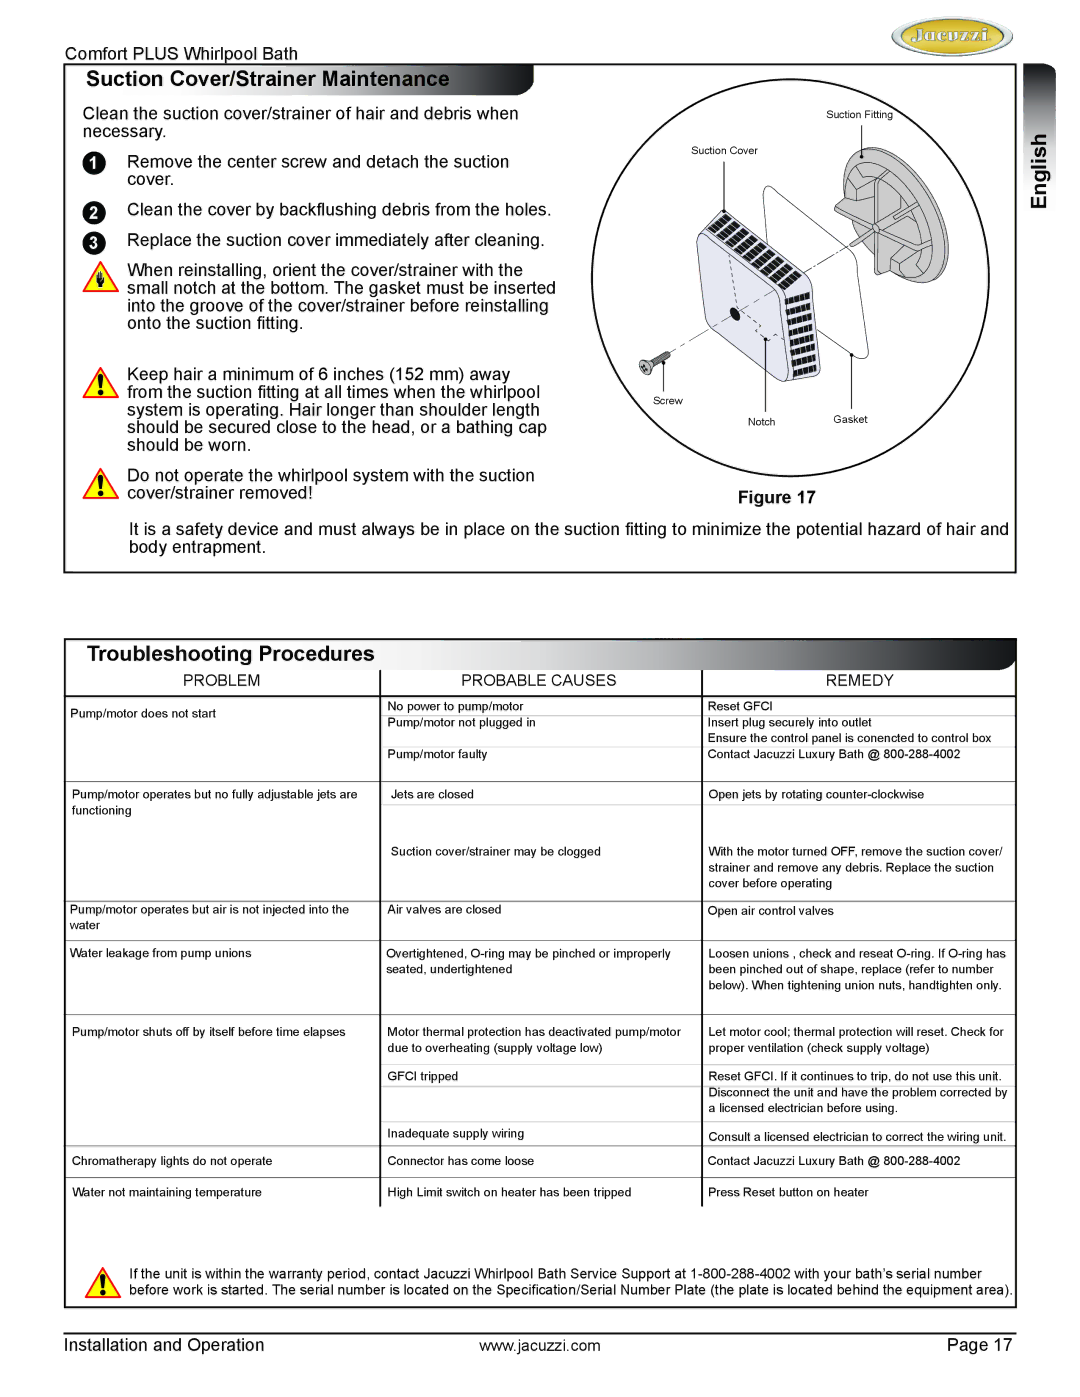
1Remove the center screw and detach the suction cover.
2Clean the cover by backflushing debris from the holes.
3Replace the suction cover immediately after cleaning.
When reinstalling, orient the cover/strainer with the small notch at the bottom. The gasket must be inserted into the groove of the cover/strainer before reinstalling onto the suction fitting.
Keep hair a minimum of 6 inches (152 mm) away from the suction fitting at all times when the whirlpool system is operating. Hair longer than shoulder length should be secured close to the head, or a bathing cap should be worn.
Do not operate the whirlpool system with the suction cover/strainer removed!
Suction Fitting
Suction Cover
Screw
NotchGasket
Figure 17
English
It is a safety device and must always be in place on the suction fitting to minimize the potential hazard of hair and body entrapment.
Troubleshooting Procedures
PROBLEM | PROBABLE CAUSES | REMEDY | |
|
|
| |
Pump/motor does not start | No power to pump/motor | Reset GFCI | |
Pump/motor not plugged in | Insert plug securely into outlet | ||
| |||
|
| Ensure the control panel is conencted to control box | |
| Pump/motor faulty | Contact Jacuzzi Luxury Bath @ | |
|
|
| |
Pump/motor operates but no fully adjustable jets are | Jets are closed | Open jets by rotating | |
functioning |
|
| |
Suction cover/strainer may be clogged | With the motor turned OFF, remove the suction cover/ | ||
| |||
|
| strainer and remove any debris. Replace the suction | |
|
| cover before operating | |
|
|
| |
Pump/motor operates but air is not injected into the | Air valves are closed | Open air control valves | |
water |
|
| |
|
|
| |
Water leakage from pump unions | Overtightened, | Loosen unions , check and reseat | |
| seated, undertightened | been pinched out of shape, replace (refer to number | |
|
| below). When tightening union nuts, handtighten only. | |
|
|
| |
Pump/motor shuts off by itself before time elapses | Motor thermal protection has deactivated pump/motor | Let motor cool; thermal protection will reset. Check for | |
| due to overheating (supply voltage low) | proper ventilation (check supply voltage) | |
|
|
| |
| GFCI tripped | Reset GFCI. If it continues to trip, do not use this unit. | |
|
| Disconnect the unit and have the problem corrected by | |
|
| a licensed electrician before using. | |
|
|
| |
| Inadequate supply wiring | Consult a licensed electrician to correct the wiring unit. | |
Chromatherapy lights do not operate | Connector has come loose | Contact Jacuzzi Luxury Bath @ | |
|
|
| |
Water not maintaining temperature | High Limit switch on heater has been tripped | Press Reset button on heater | |
|
|
|
If the unit is within the warranty period, contact Jacuzzi Whirlpool Bath Service Support at
Installation and Operation | www.jacuzzi.com | Page 17 |