Quick Start
tivity switch to +4dBV (switch IN) or
Do NOT make connections to both the XLR and ¼″ analog connectors; use one or the other.
b.If you are connecting digital signals (i.e., from a digital console or workstation, or from the digital outputs of a CD or DVD player or processor), use appropriate cabling to make a connection between the device and the rear panel AES/EBU (XLR) or S/PDIF (phono) input of the speaker designated to carry the LEFT channel (i.e., the left speaker in a stereo setup). Then use appropriate cabling to make a connection between the rear panel AES/EBU (XLR) or S/PDIF (phono) output of the left speaker and the rear panel AES/EBU or S/PDIF input of the speaker designated to carry the RIGHT channel (i.e., the right speaker in a stereo setup). (See page 24 in this manual for a wiring diagram.)
When using digital audio inputs, the rear panel DIP switch settings determine which channel of the stereo AES/EBU or S/PDIF signal will be reproduced by each speaker.
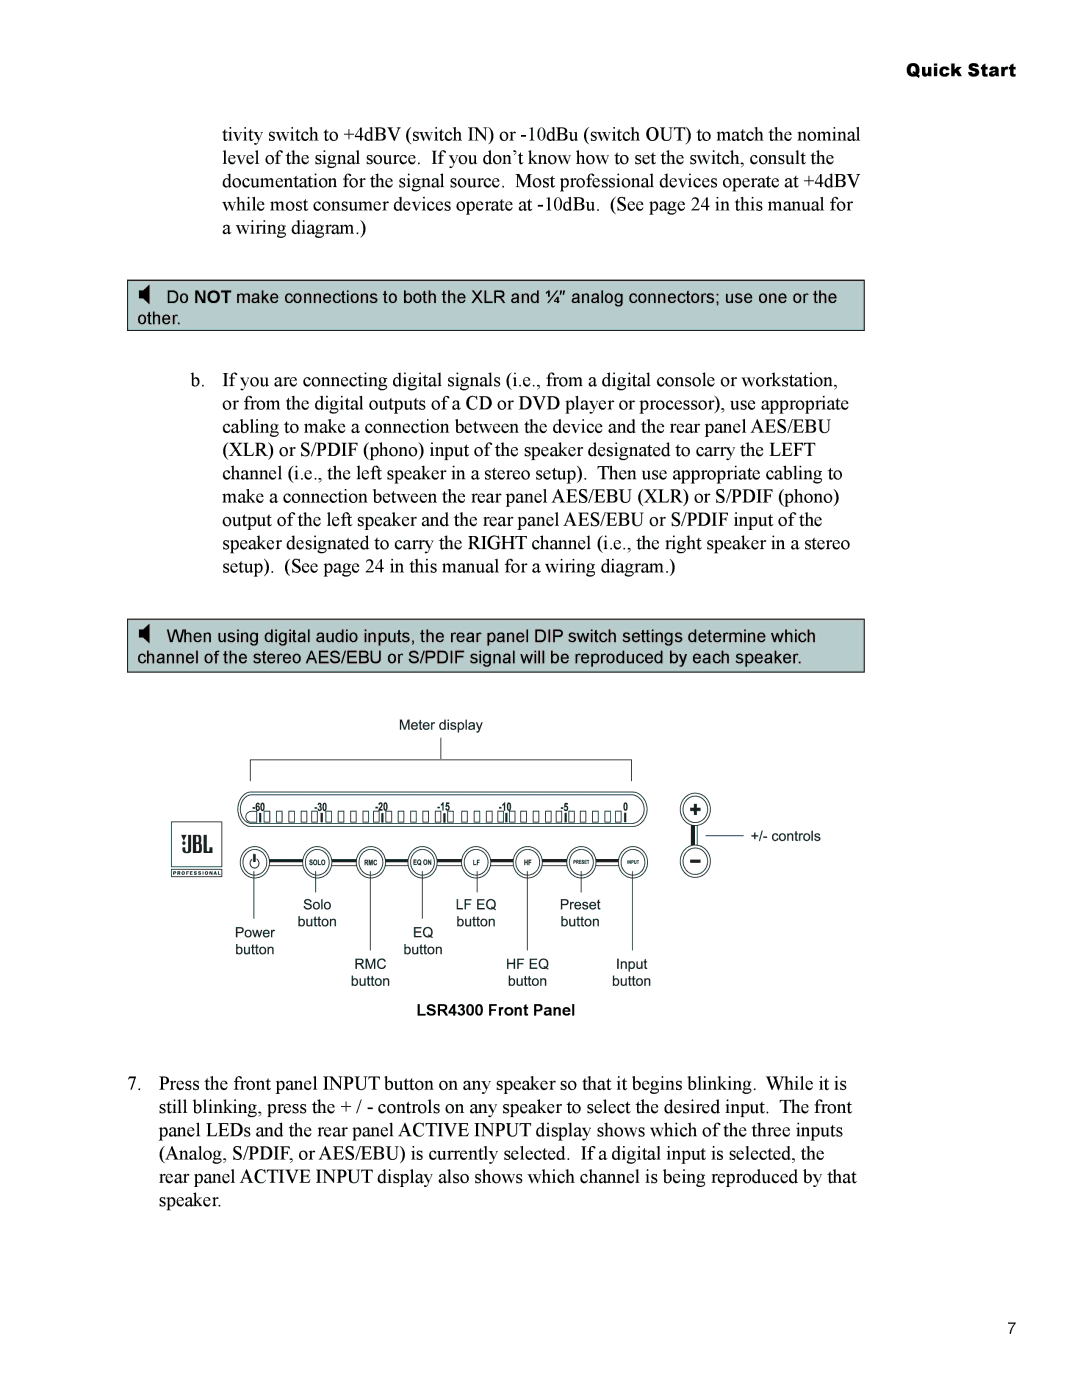
LSR4300 Front Panel
7.Press the front panel INPUT button on any speaker so that it begins blinking. While it is still blinking, press the + / - controls on any speaker to select the desired input. The front panel LEDs and the rear panel ACTIVE INPUT display shows which of the three inputs (Analog, S/PDIF, or AES/EBU) is currently selected. If a digital input is selected, the rear panel ACTIVE INPUT display also shows which channel is being reproduced by that speaker.
7