
F 3 specifications
The Jotul F 3 is a classic wood stove that embodies the perfect blend of traditional design and modern engineering. Renowned for its efficiency and durability, this model has become a favorite among homeowners looking for an effective heating solution with aesthetic appeal.One of the standout features of the Jotul F 3 is its efficient combustion system. This stove employs a unique primary and secondary combustion system that allows for a cleaner burn, producing minimal emissions. This technology not only enhances the stove's efficiency but also contributes to a reduced environmental footprint, making it an excellent choice for eco-conscious consumers.
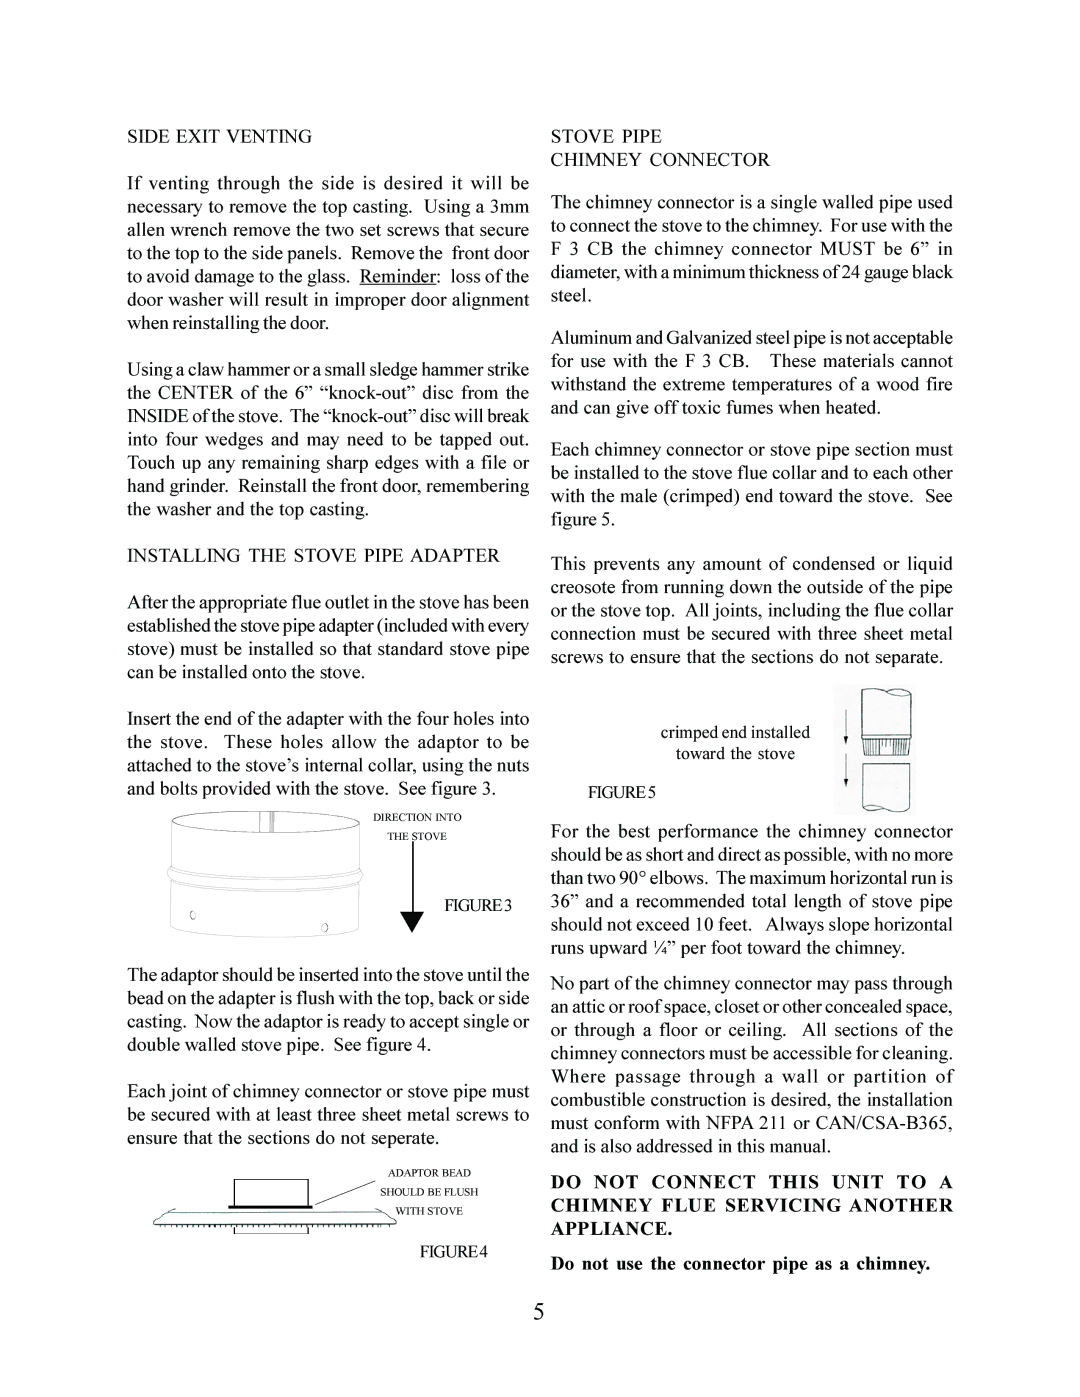
In terms of design, the Jotul F 3 is crafted from cast iron, a material known for its longevity and heat retention properties. This construction allows the stove to radiate warmth long after the fire has died down, providing consistent heating throughout the day and evening. The stove is available in several finishes, including classic black and a striking blue-black enamel, enabling it to seamlessly fit into various interior styles, from rustic to contemporary.
The Jotul F 3 also includes a large glass window that offers an unobstructed view of the flames, enhancing the cozy ambiance of any room. The airwash system keeps the glass clean, ensuring a clear view of the fire while minimizing the need for frequent cleaning.
With a heating capacity of up to 1,800 square feet, the Jotul F 3 is ideal for both small and medium-sized spaces. Its compact size does not compromise on performance, and it features a sizable firebox that allows for extended burn times, meaning less frequent refueling.
Another notable characteristic of the Jotul F 3 is its user-friendly design. The stove includes easy-to-use controls for adjusting the airflow, allowing users to optimize the burn rate and heat output based on their preferences.
In conclusion, the Jotul F 3 is a versatile and efficient wood stove that combines classic aesthetics with modern technology. Its high combustion efficiency, durable cast iron construction, and elegant design make it a sought-after choice for anyone seeking warmth and beauty in their home. With its commitment to both functionality and style, the Jotul F 3 stands out as an exemplary heating solution that will serve homeowners for years to come.