Saving Everio Camera Images to DVD
You can easily create data discs by connecting the burner to an Everio camera.
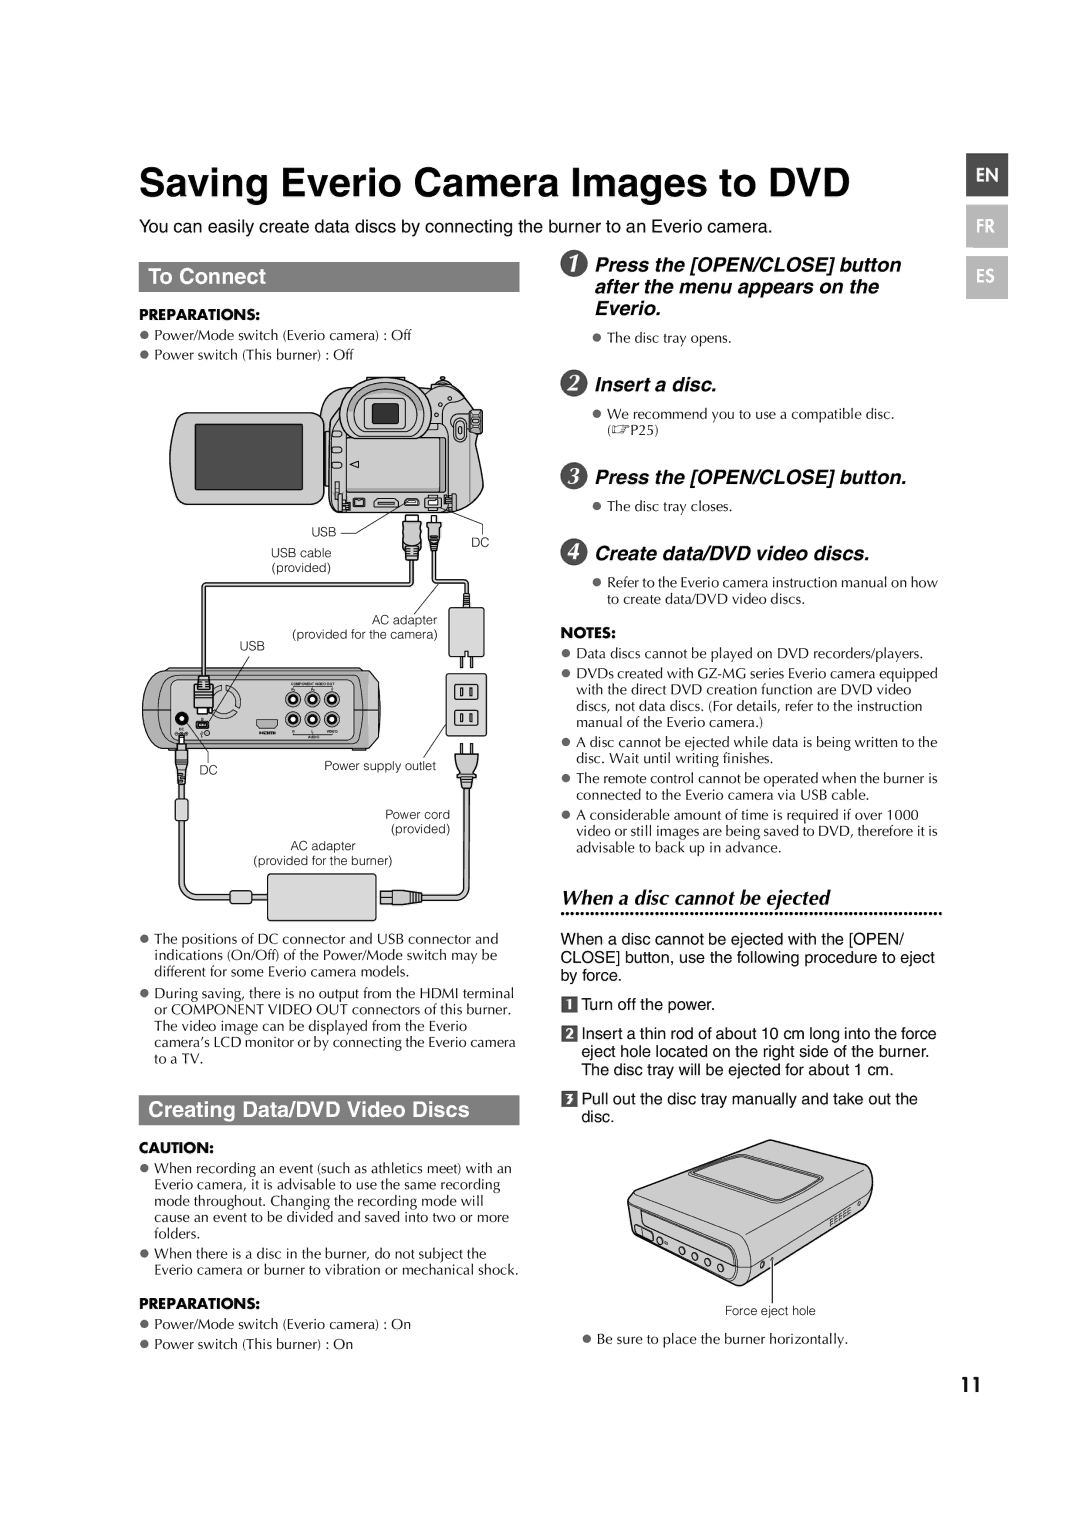
To Connect |
| A Press the [OPEN/CLOSE] button | |
| after the menu appears on the | ||
|
| ||
PREPARATIONS: |
| Everio. | |
z Power/Mode switch (Everio camera) : Off |
| z The disc tray opens. | |
z Power switch (This burner) : Off |
|
| |
|
| B Insert a disc. | |
|
| z We recommend you to use a compatible disc. | |
|
| (0P25) | |
|
| C Press the [OPEN/CLOSE] button. | |
|
| z The disc tray closes. | |
USB | DC | D Create data/DVD video discs. | |
USB cable | |||
| |||
(provided) |
| z Refer to the Everio camera instruction manual on how | |
|
| ||
|
| to create data/DVD video discs. |
EN |
FR |
ES |
AC adapter
(provided for the camera)
USB
| COMPONENT VIDEO OUT | ||
| PR | PB | Y |
DC | R | L | VIDEO |
| |||
AUDIO
DC | Power supply outlet |
| |
| Power cord |
| (provided) |
| AC adapter |
| (provided for the burner) |
NOTES:
zData discs cannot be played on DVD recorders/players.
zDVDs created with
zA disc cannot be ejected while data is being written to the disc. Wait until writing finishes.
zThe remote control cannot be operated when the burner is connected to the Everio camera via USB cable.
zA considerable amount of time is required if over 1000 video or still images are being saved to DVD, therefore it is advisable to back up in advance.
When a disc cannot be ejected
............................................................................
zThe positions of DC connector and USB connector and indications (On/Off) of the Power/Mode switch may be different for some Everio camera models.
zDuring saving, there is no output from the HDMI terminal or COMPONENT VIDEO OUT connectors of this burner. The video image can be displayed from the Everio camera’s LCD monitor or by connecting the Everio camera to a TV.
Creating Data/DVD Video Discs
CAUTION:
zWhen recording an event (such as athletics meet) with an Everio camera, it is advisable to use the same recording mode throughout. Changing the recording mode will cause an event to be divided and saved into two or more folders.
zWhen there is a disc in the burner, do not subject the Everio camera or burner to vibration or mechanical shock.
PREPARATIONS:
zPower/Mode switch (Everio camera) : On
zPower switch (This burner) : On
When a disc cannot be ejected with the [OPEN/ CLOSE] button, use the following procedure to eject by force.
aTurn off the power.
bInsert a thin rod of about 10 cm long into the force eject hole located on the right side of the burner. The disc tray will be ejected for about 1 cm.
cPull out the disc tray manually and take out the disc.
Force eject hole
zBe sure to place the burner horizontally.
11