20![]()
![]()
![]()
![]()
![]()


 RECORDING
 Advanced
 Features
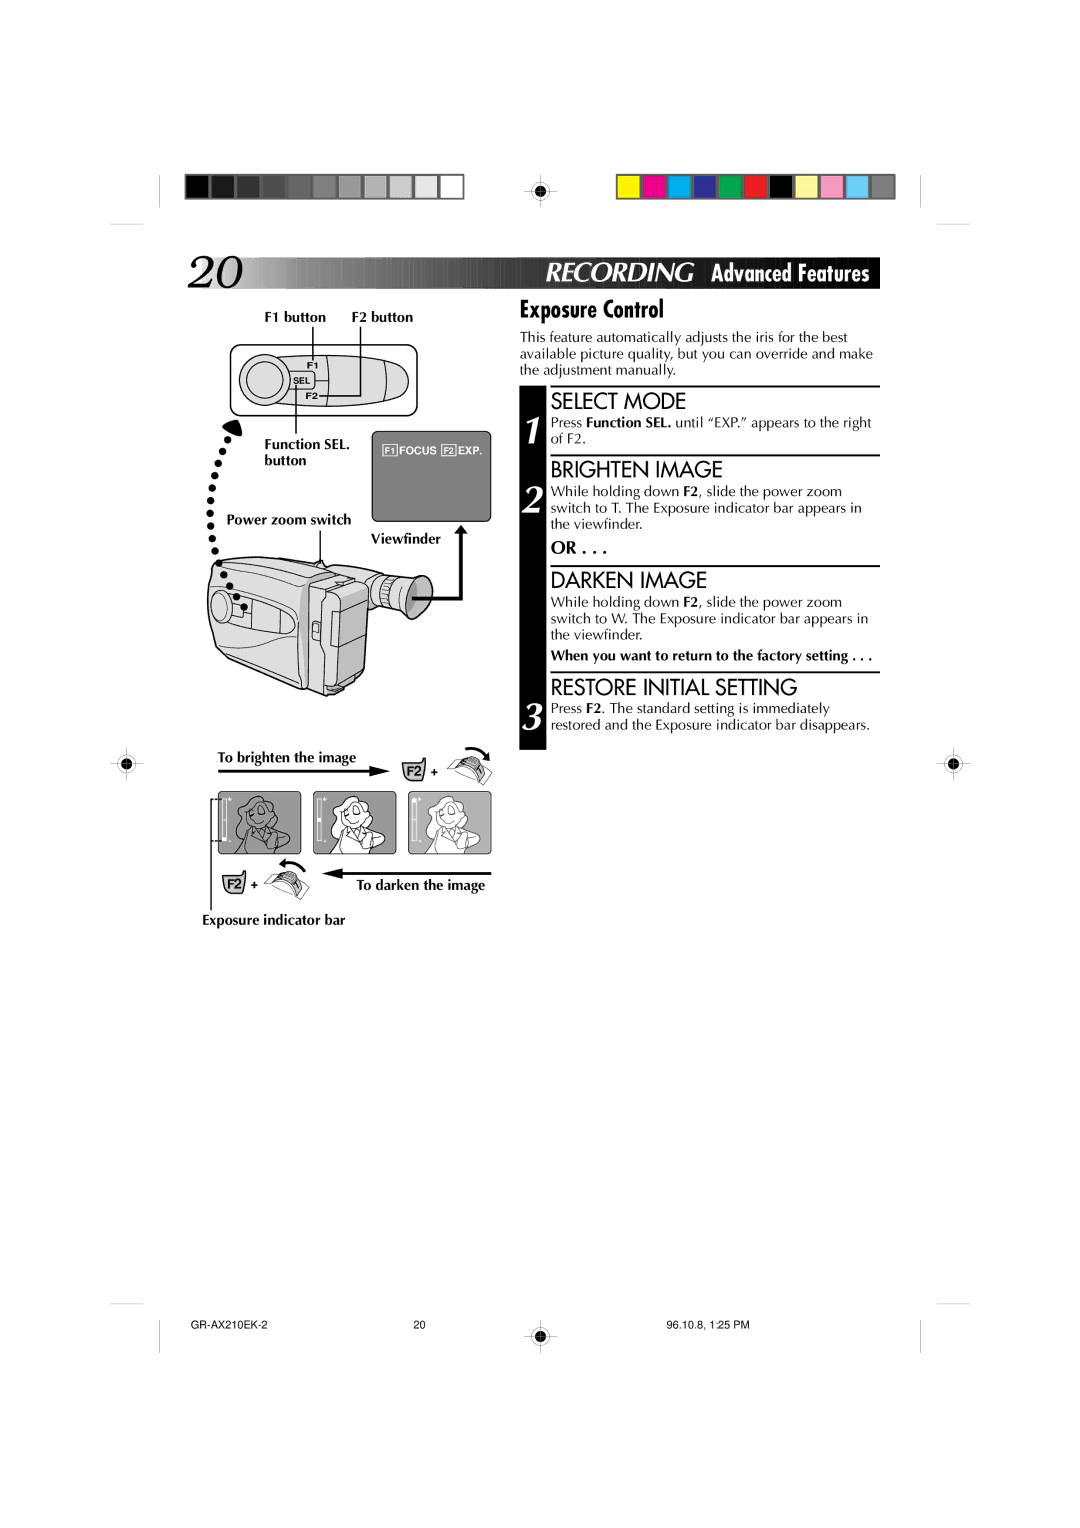
F1 button | F2 button | Exposure Control | ||||||
|
|
|
|
|
|
| This feature automatically adjusts the iris for the best | |
|
|
|
|
|
|
| available picture quality, but you can override and make | |
| F1 |
|
| the adjustment manually. | ||||
SEL |
|
|
|
|
| |||
|
|
|
|
|
|
| ||
|
|
|
|
|
| |||
| F2 |
|
|
|
|
| SELECT MODE | |
|
|
|
|
|
|
|
| Press Function SEL. until “EXP.” appears to the right |
|
|
|
|
|
| 1 of F2. | ||
Function SEL. |
| F1 FOCUS F2 EXP. | ||||||
button |
|
|
| BRIGHTEN IMAGE | ||||
|
|
|
|
|
|
|
| |
Power zoom switch
Viewfinder
2 While holding down F2, slide the power zoom switch to T. The Exposure indicator bar appears in the viewfinder.
OR . . .
DARKEN IMAGE
While holding down F2, slide the power zoom switch to W. The Exposure indicator bar appears in the viewfinder.
When you want to return to the factory setting . . .
RESTORE INITIAL SETTING
3 Press F2. The standard setting is immediately restored and the Exposure indicator bar disappears.
To brighten the image
F2 +
+
+ | + |
![]()
![]() -
-
-
-
F2 + | To darken the image |
Exposure indicator bar |
|
20 |
96.10.8, 1:25 PM