8![]()
![]()
![]()
![]()
![]()
![]()
![]()
![]()
![]()
![]()
![]()
![]()
![]()
![]()
![]()
![]()
![]()
![]()
![]()


 GETTING
 STARTED
 (cont.)
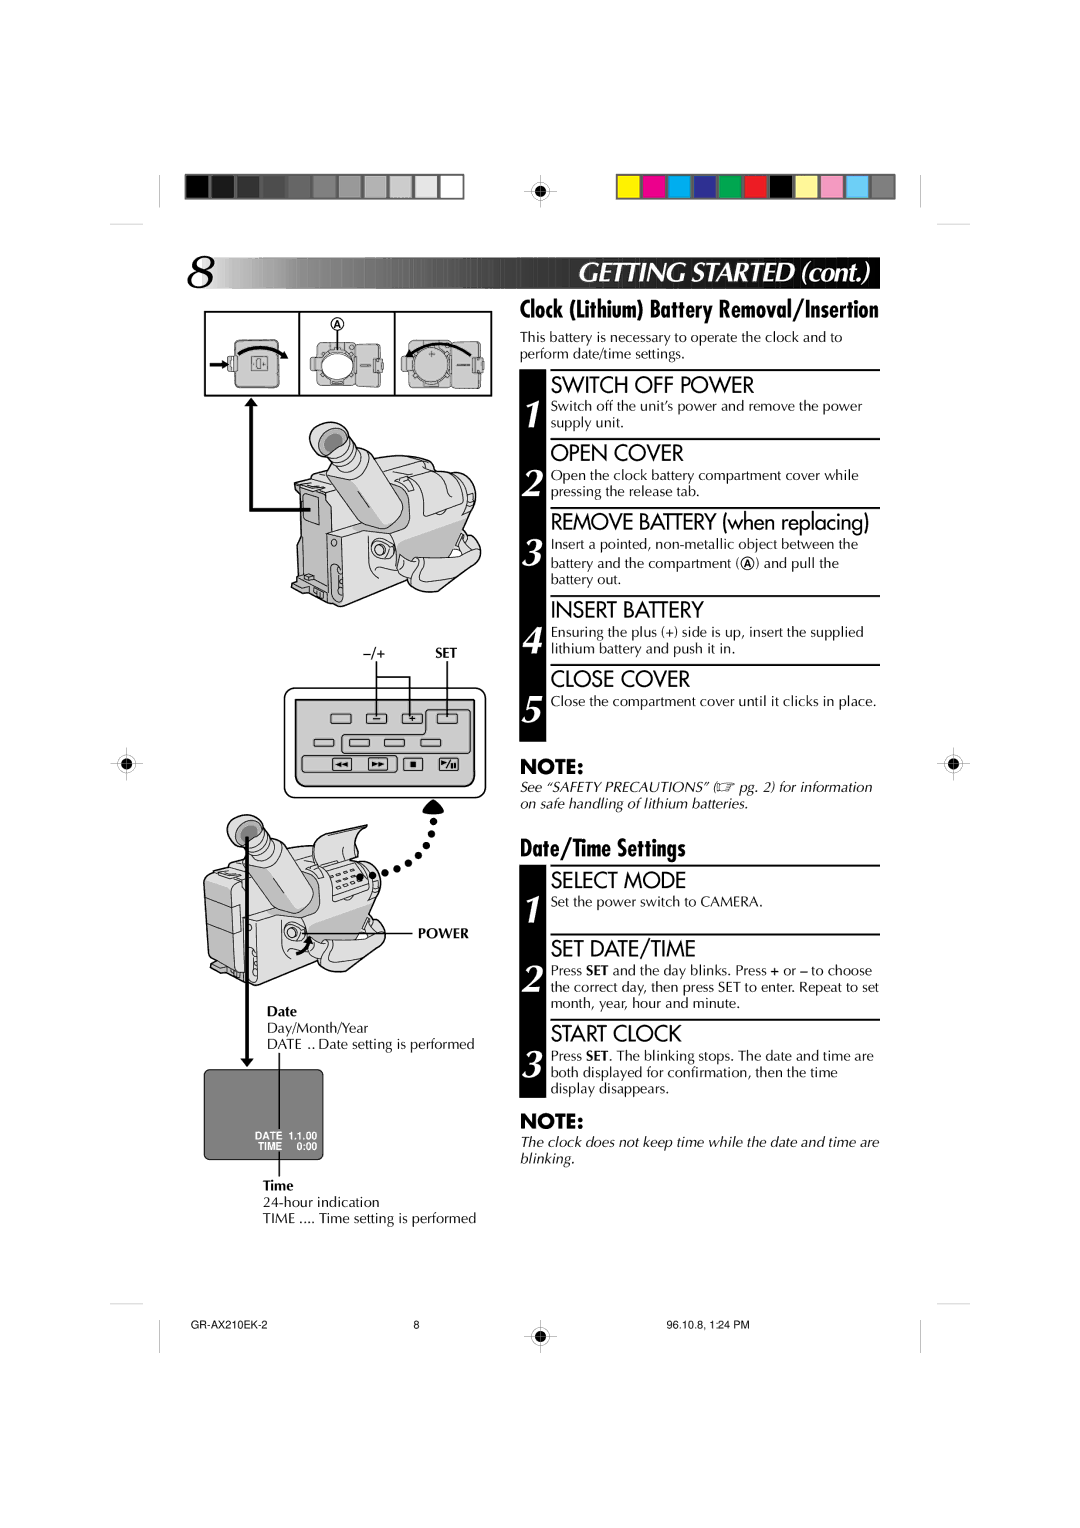
A
POWER
Date Day/Month/Year
DATE .. Date setting is performed
Clock (Lithium) Battery Removal/Insertion
This battery is necessary to operate the clock and to perform date/time settings.
SWITCH OFF POWER
1 Switch off the unit’s power and remove the power supply unit.
OPEN COVER
2 Open the clock battery compartment cover while pressing the release tab.
REMOVE BATTERY (when replacing)
3 Insert a pointed,
INSERT BATTERY
4 Ensuring the plus (+) side is up, insert the supplied lithium battery and push it in.
CLOSE COVER
5 Close the compartment cover until it clicks in place.
NOTE:
See “SAFETY PRECAUTIONS” (☞ pg. 2) for information on safe handling of lithium batteries.
Date/Time Settings
SELECT MODE
1 Set the power switch to CAMERA.
SET DATE/TIME
2 Press SET and the day blinks. Press + or – to choose the correct day, then press SET to enter. Repeat to set month, year, hour and minute.
START CLOCK
3 Press SET. The blinking stops. The date and time are both displayed for confirmation, then the time display disappears.
DATE 1.1.00
TIME 0:00
Time
TIME .... Time setting is performed
NOTE:
The clock does not keep time while the date and time are blinking.
8 |
96.10.8, 1:24 PM