BACK LIGHT Button

EN 47

Backlight Compensation

Backlight compensation brightens the subject quickly.

Manual White Balance Adjustment

Adjust the white balance manually when shooting under various types of lighting.

Press BACK LIGHT. The indicator is displayed

and the subject is brightened. If pressed again, disappears and

the brightness returns to the previous level.

Using the BACK LIGHT Button may cause the light around the subject to become too bright and the subject to become white.

Backlight compensation is also available when the Power Switch is set to “A”.

Lock Button

MENU Wheel

White paper

Power Switch

White Balance Adjustment

The white balance that refers to the correctness of colour reproduction under various lighting. If the white balance is correct, all other colours will be accurately reproduced.

The white balance is usually adjusted automatically. However, more advanced camcorder operators control this function manually to achieve a more professional colour/tint reproduction.

(Factory-preset: AUTO)

AUTO: White balance is adjusted automatically.

MWB: Adjust the white balance manually when shooting under various types of lighting. ( “Manual White Balance Adjustment”)

FINE: Outdoors on a sunny day.

CLOUD: Outdoors on a cloudy day.

HALOGEN: A video light or similar type of lighting is used.

For the setting, refer to “Changing The Menu Settings” ( pg. 31).

The selected mode indicator except “AUTO” appears.

To return to automatic white balance…

Set “u” to “AUTO”. ( pg. 31, 34) Or, set the Power Switch to “A”.

NOTE:

White balance cannot be used when “r” is set to “SEPIA” or “MONOTONE”. ( pg. 33)

1

Set the Power Switch to “M” while pressing down


2

the Lock Button located on the switch.


Open the LCD monitor fully, or pull out the


3

viewfinder fully.


Set “u” to “MWB”. ( pg. 31, 34)


4

The

indication blinks slowly.


Hold a sheet of plain white paper in front of the

FEATURES


subject. Adjust zoom or position yourself so that

5

the white paper fills the screen.


Press the MENU Wheel in until

begins


blinking rapidly.


ADVANCED


When the setting is completed,

resumes

6

normal blinking.


Press the MENU Wheel in twice. The Menu


Screen closes and the Manual White Balance


indicator

is displayed.


NOTES:

In step 4, it may be difficult to focus on the white paper. In such a case, adjust focus manually.

( pg. 45)

A subject can be shot under various types of lighting conditions indoors (natural, fluorescent, candlelight, etc.). Because the colour temperature is different depending on the light source, the subject tint will differ depending on the white balance settings. Use this function for a more natural result.

Once you adjust white balance manually, the setting is retained even if the power is turned off or the battery removed.

Page 47
Image 47
JVC GR-DV5000, GR-DV4000 instruction manual Backlight Compensation, Backlight compensation brightens the subject quickly

GR-DV4000, GR-DV5000 specifications

The JVC GR-DV5000 and GR-DV4000 are compact digital camcorders that emerged in the early 2000s, representing a significant advancement in consumer video technology. Designed for both amateur and semi-professional videographers, these models are equipped with a variety of features and technologies that enhance their usability and video quality.

One of the main highlights of the GR-DV5000 is its 3CCD technology. Unlike traditional single-chip systems, the 3CCD setup uses three separate charge-coupled devices to capture light, which significantly improves color accuracy and depth. This technology allows for vibrant, true-to-life colors, making it an excellent choice for capturing critical moments in life such as weddings or family events. The GR-DV4000, while slightly lower in specification, also showcases commendable performance, providing a good balance of features and affordability.

Both camcorders feature a 10x optical zoom lens, allowing users to get close to their subjects without compromising image quality. This zoom capability is crucial for remote shots, ensuring versatility in various shooting environments, from expansive outdoor scenes to intimate indoor gatherings. The digital zoom feature extends this further, but for professional results, the optical zoom is always preferred.

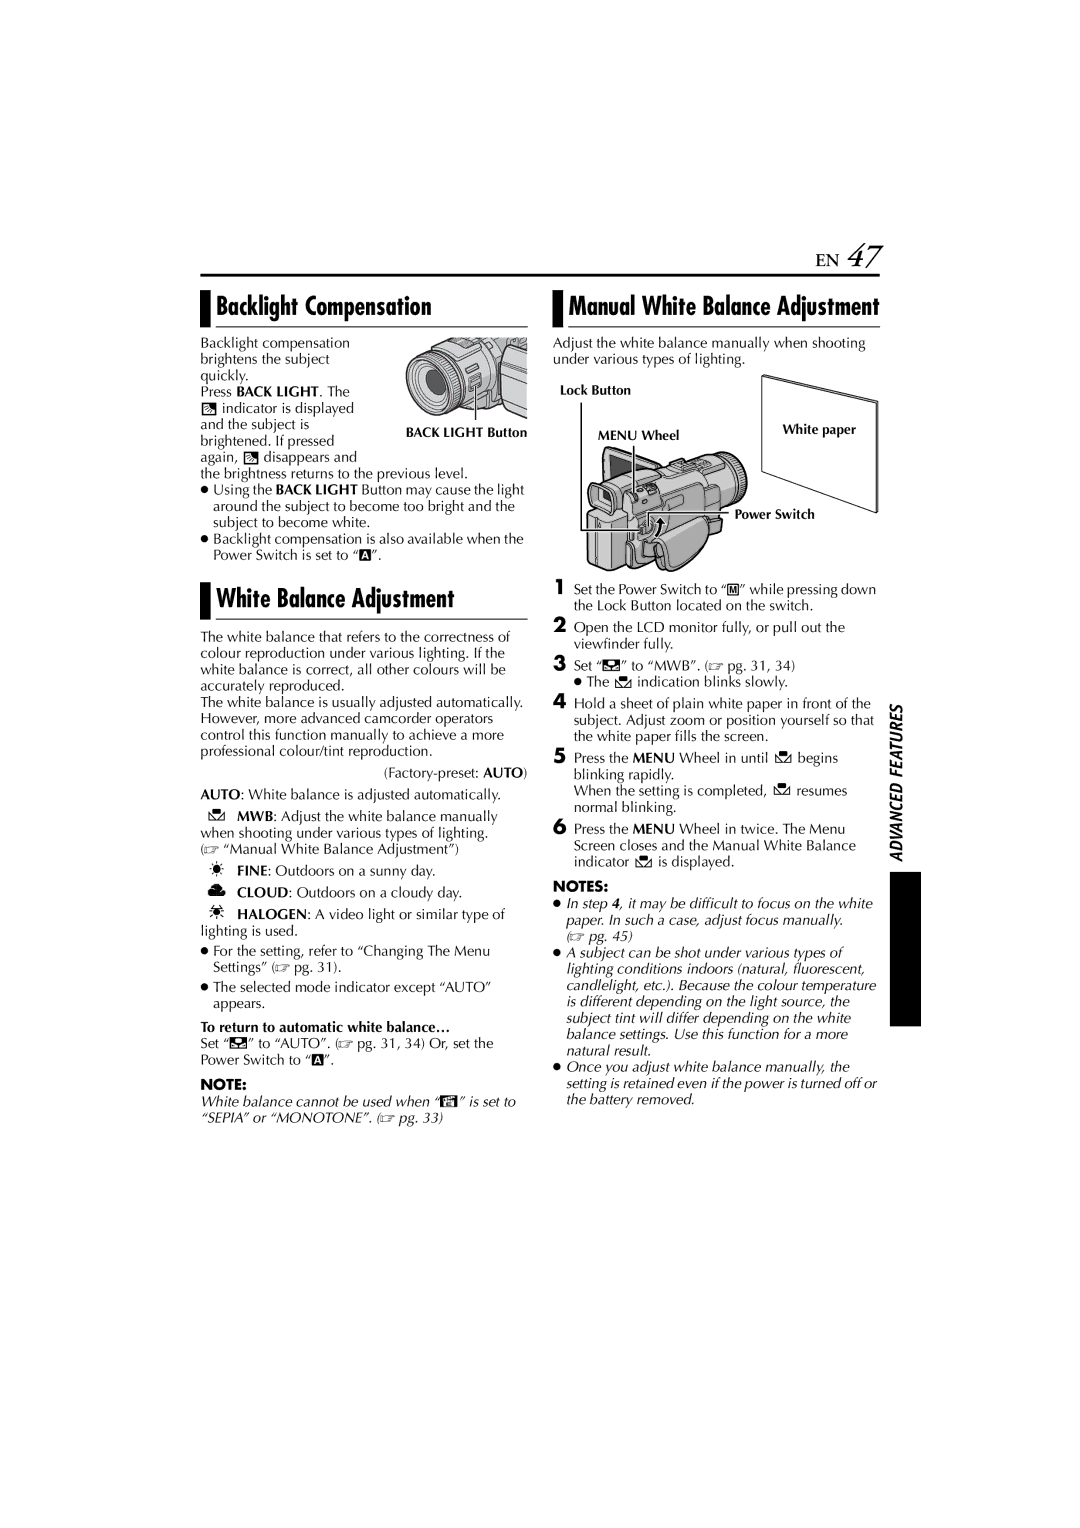
The GR-DV5000 comes with enhanced manual controls that give videographers more creative freedom. Users can adjust the focus, exposure, and white balance settings manually, which is particularly beneficial when shooting in challenging lighting conditions. On the other hand, the GR-DV4000 focuses more on ease of use, making it perfect for casual users who want to point and shoot without delving deeply into technical settings.

In terms of connectivity and storage, both models utilize MiniDV tapes, which were popular for their capacity to store high-quality video. While this format may seem outdated, it provides reliable playback and archiving without the complications sometimes associated with digital storage.

The LCD screen on both camcorders facilitates easy framing and playback of footage, while the ergonomic design ensures comfort during extended use. The JVC GR-DV5000 also features a built-in stabilization system to help reduce shake during handheld shooting, further enhancing video quality.

In summary, the JVC GR-DV5000 and GR-DV4000 are remarkable camcorders that showcase the technological advancements of their time. Their standout features, such as 3CCD technology, optical zoom, and user-friendly controls, make them valuable tools for capturing memorable moments with clarity and precision. Whether for a professional project or casual use, these camcorders have cemented their place in the history of digital video recording.