48 EN | FEATURES FOR RECORDING (cont.) |
6 Press + or – to select |
|
|
|
|
|
|
|
| |
|
| V I DEO |
|
|
|
|
| ||
“NAVI.DEL.”, and press | SOUND MODE – | STEREO |
|
| |||||
| |||||||||
| 1 2 b i t MODE – | SOUND 1 | |||||||
SET/SELECT. The Sub | SYNCHRO | – | ± 0 . 0 |
|
| ||||
REC MODE | – |
|
|
|
|
| |||
|
|
|
|
| |||||
Menu appears. |
|
| COPY – OFF | ||||||
NAV I . DEL . |
|
|
|
|
|
| |||
7 |
| BLANK SRCH |
By pressing + or | S / AV I NPUT – OFF | |
|
![]() RETURN
RETURN
Select “IMAGE SEL.” to
delete the currently displayed thumbnail image.
Select “TAPE SEL.” to delete all thumbnail images for the tape which contains the currently displayed image.
Select “ALL” to delete all thumbnail images stored in the memory card at once.
8 Press SET/SELECT. The NAVIGATION screen appears.
9 Press + or – to select | 2 6 .12 . 0 4 1 5 : 0 0 |
“EXECUTE”, and press SET/ | EXECUTE |
RETURN | |
SELECT. |
|
●Turn the SHUTTLE
SEARCH Ring to the left (3) to display the previous page. Turn the SHUTTLE SEARCH Ring to the right (5) to display the next page.
●To cancel deletion, select “RETURN”.
●Thumbnail images cannot be deleted during video playback.
CAUTION:
Do not remove the memory card or perform any other operation (such as turning off the camcorder) during deletion. Also, be sure to use the provided AC Power Adapter/Charger, as the memory card may be corrupted if the battery becomes exhausted during deletion. If the memory card becomes corrupted, initialise it.
●Before shooting newly over a recorded tape, be sure to delete all thumbnail images of the previous recording from the relevant memory card.
●If you copy thumbnail images from one memory card to another via a PC, NAVIGATION Search does not work with the copied memory card.


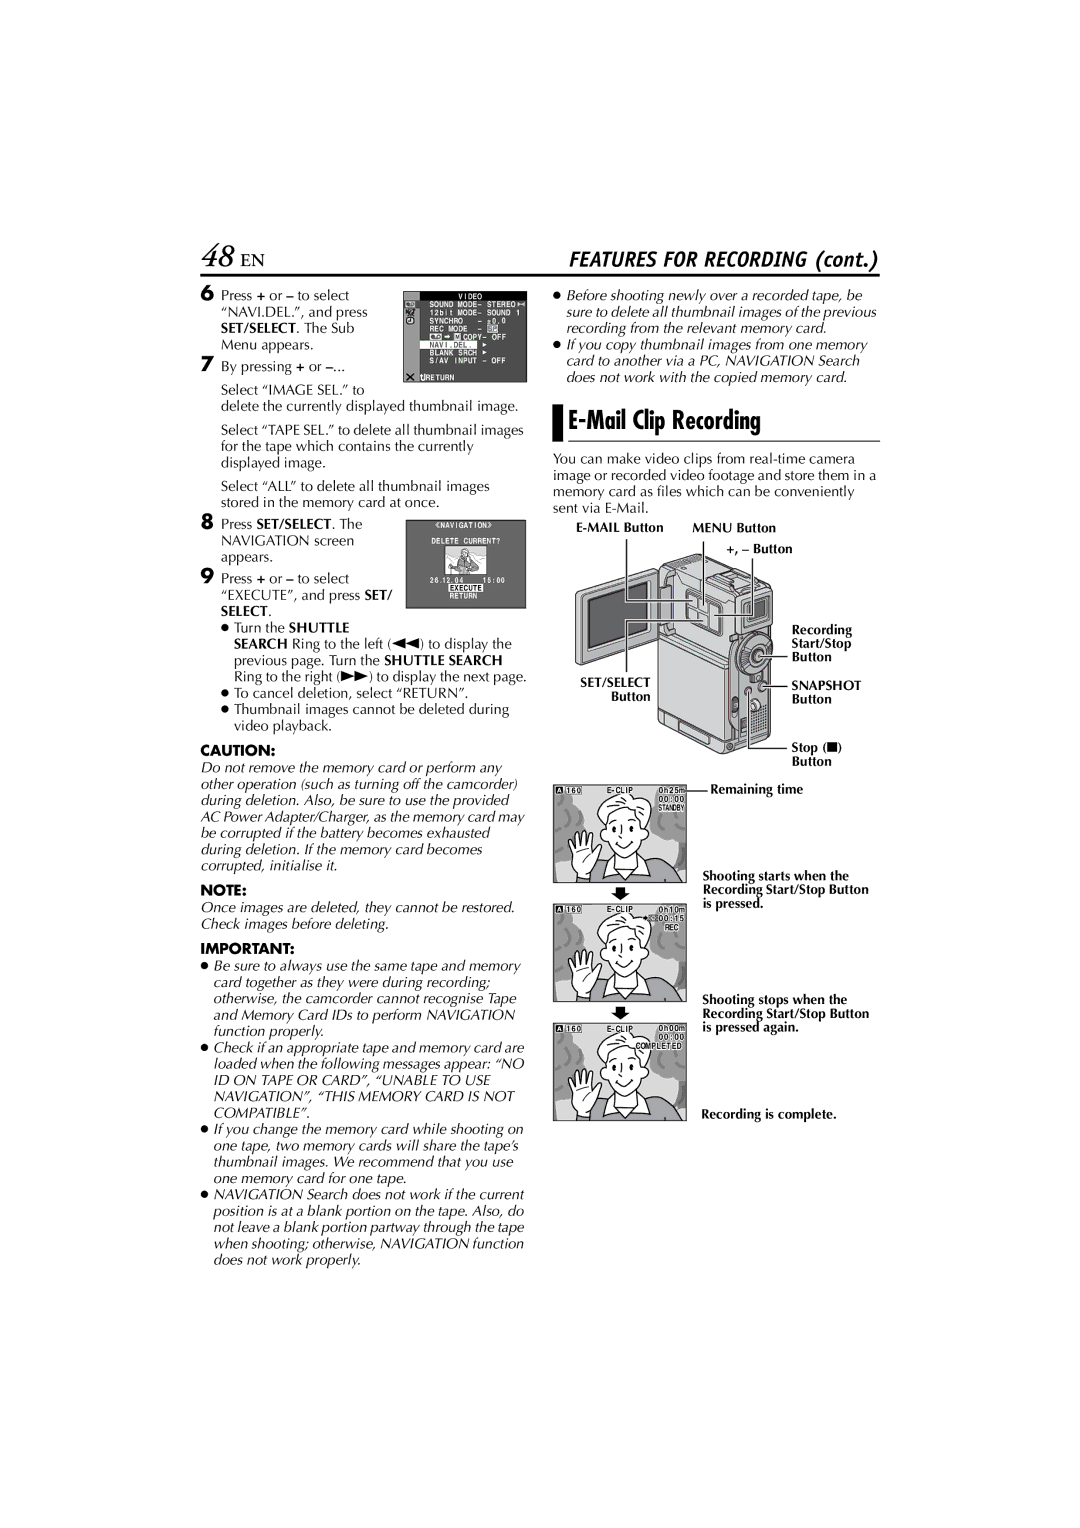
E-Mail Clip Recording
You can make video clips from
+, – Button |
Recording |
Start/Stop |
Button |
SET/SELECT |
|
| SNAPSHOT |
Button |
|
| Button |
|
|
| Stop (8) |
|
|
| Button |
1 6 0 | 0h2 | 5m | Remaining time |
| 00 : | 00 |
|
| STANDBY |
| |
NOTE:
Once images are deleted, they cannot be restored. Check images before deleting.
IMPORTANT:
● Be sure to always use the same tape and memory |
card together as they were during recording; |
otherwise, the camcorder cannot recognise Tape |
and Memory Card IDs to perform NAVIGATION |
function properly. |
● Check if an appropriate tape and memory card are |
loaded when the following messages appear: “NO |
ID ON TAPE OR CARD”, “UNABLE TO USE |
NAVIGATION”, “THIS MEMORY CARD IS NOT |
1 6 0 | 0h1: 10m | ||
|
| 00 : 1 | 5 |
|
| REC |
|
1 6 0 | 0h0 | 0m | |
|
| 00 : | 00 |
|
| COMPLETED | |
Shooting starts when the Recording Start/Stop Button is pressed.
Shooting stops when the Recording Start/Stop Button is pressed again.
COMPATIBLE”. |
● If you change the memory card while shooting on |
one tape, two memory cards will share the tape’s |
thumbnail images. We recommend that you use |
one memory card for one tape. |
● NAVIGATION Search does not work if the current |
position is at a blank portion on the tape. Also, do |
not leave a blank portion partway through the tape |
when shooting; otherwise, NAVIGATION function |
does not work properly. |
Recording is complete.