Chapter 3 Screen Descriptions - [CAMERA REGISTRATION] Screen
[CAMERA REGISTRATION] Screen
% &
"
#
$
'
(
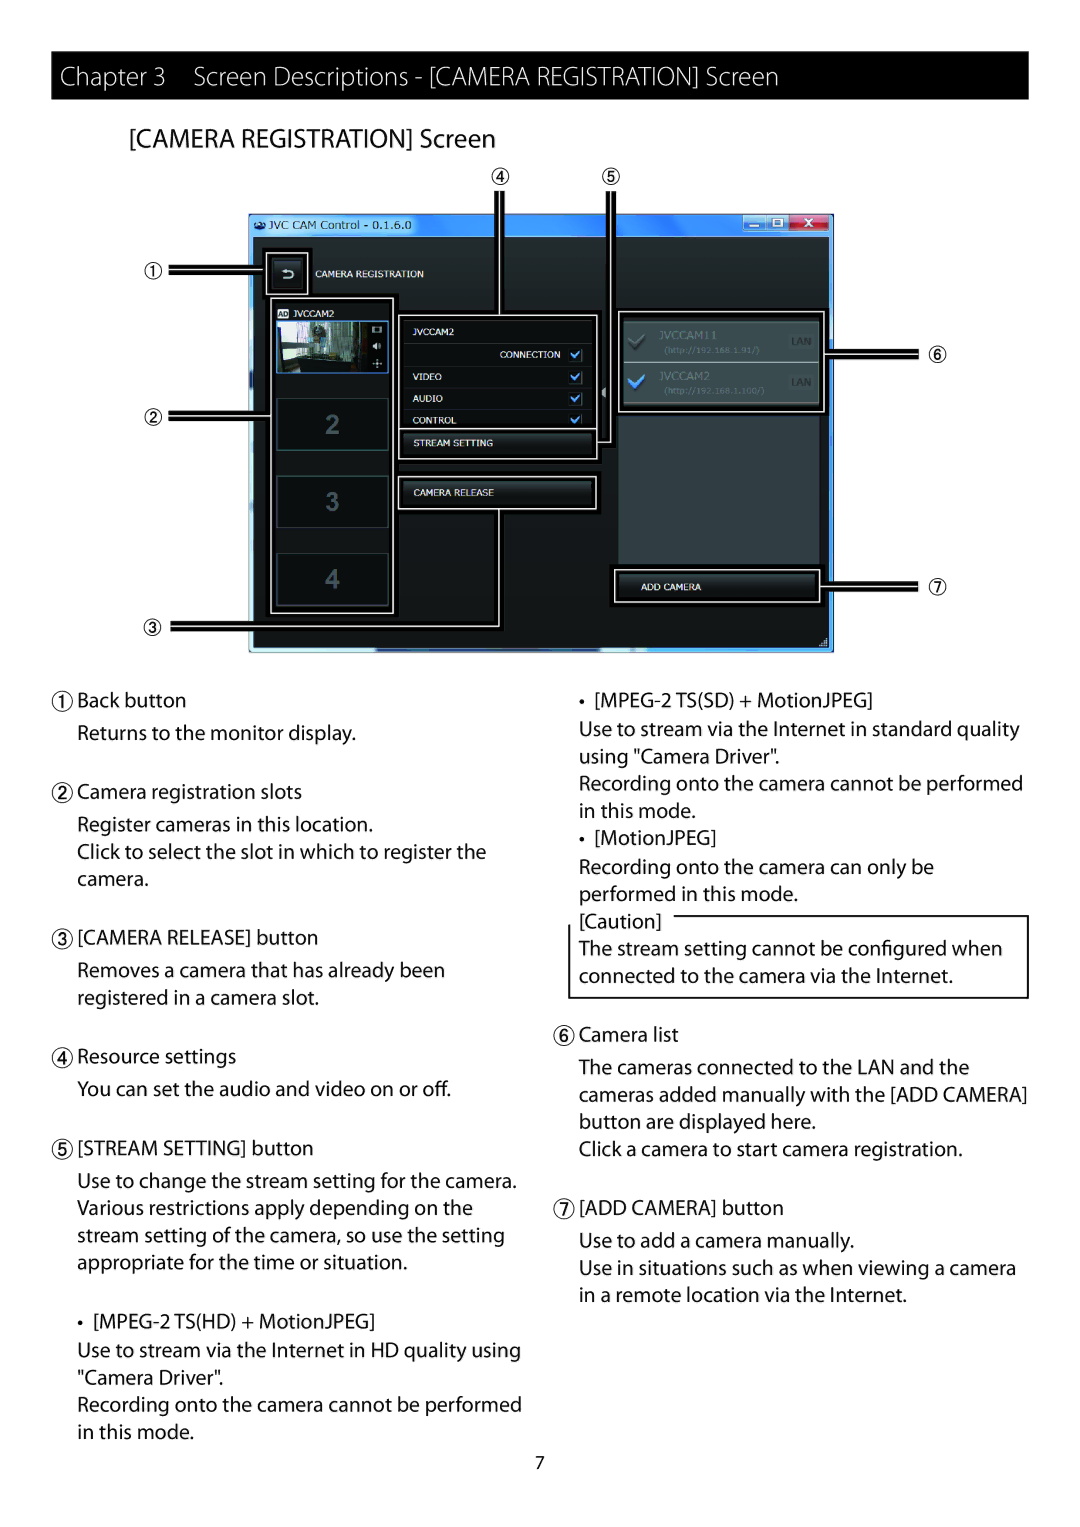
"Back button
Returns to the monitor display.
#Camera registration slots
Register cameras in this location.
Click to select the slot in which to register the camera.
$[CAMERA RELEASE] button
Removes a camera that has already been registered in a camera slot.
%Resource settings
You can set the audio and video on or off.
&[STREAM SETTING] button
Use to change the stream setting for the camera. Various restrictions apply depending on the stream setting of the camera, so use the setting appropriate for the time or situation.
••
Use to stream via the Internet in HD quality using "Camera Driver".
Recording onto the camera cannot be performed in this mode.
••
Use to stream via the Internet in standard quality using "Camera Driver".
Recording onto the camera cannot be performed in this mode.
•• [MotionJPEG]
Recording onto the camera can only be performed in this mode.
[Caution]
The stream setting cannot be configured when connected to the camera via the Internet.
'Camera list
The cameras connected to the LAN and the cameras added manually with the [ADD CAMERA] button are displayed here.
Click a camera to start camera registration.
([ADD CAMERA] button
Use to add a camera manually.
Use in situations such as when viewing a camera in a remote location via the Internet.
7
