Necessary Settings before Use
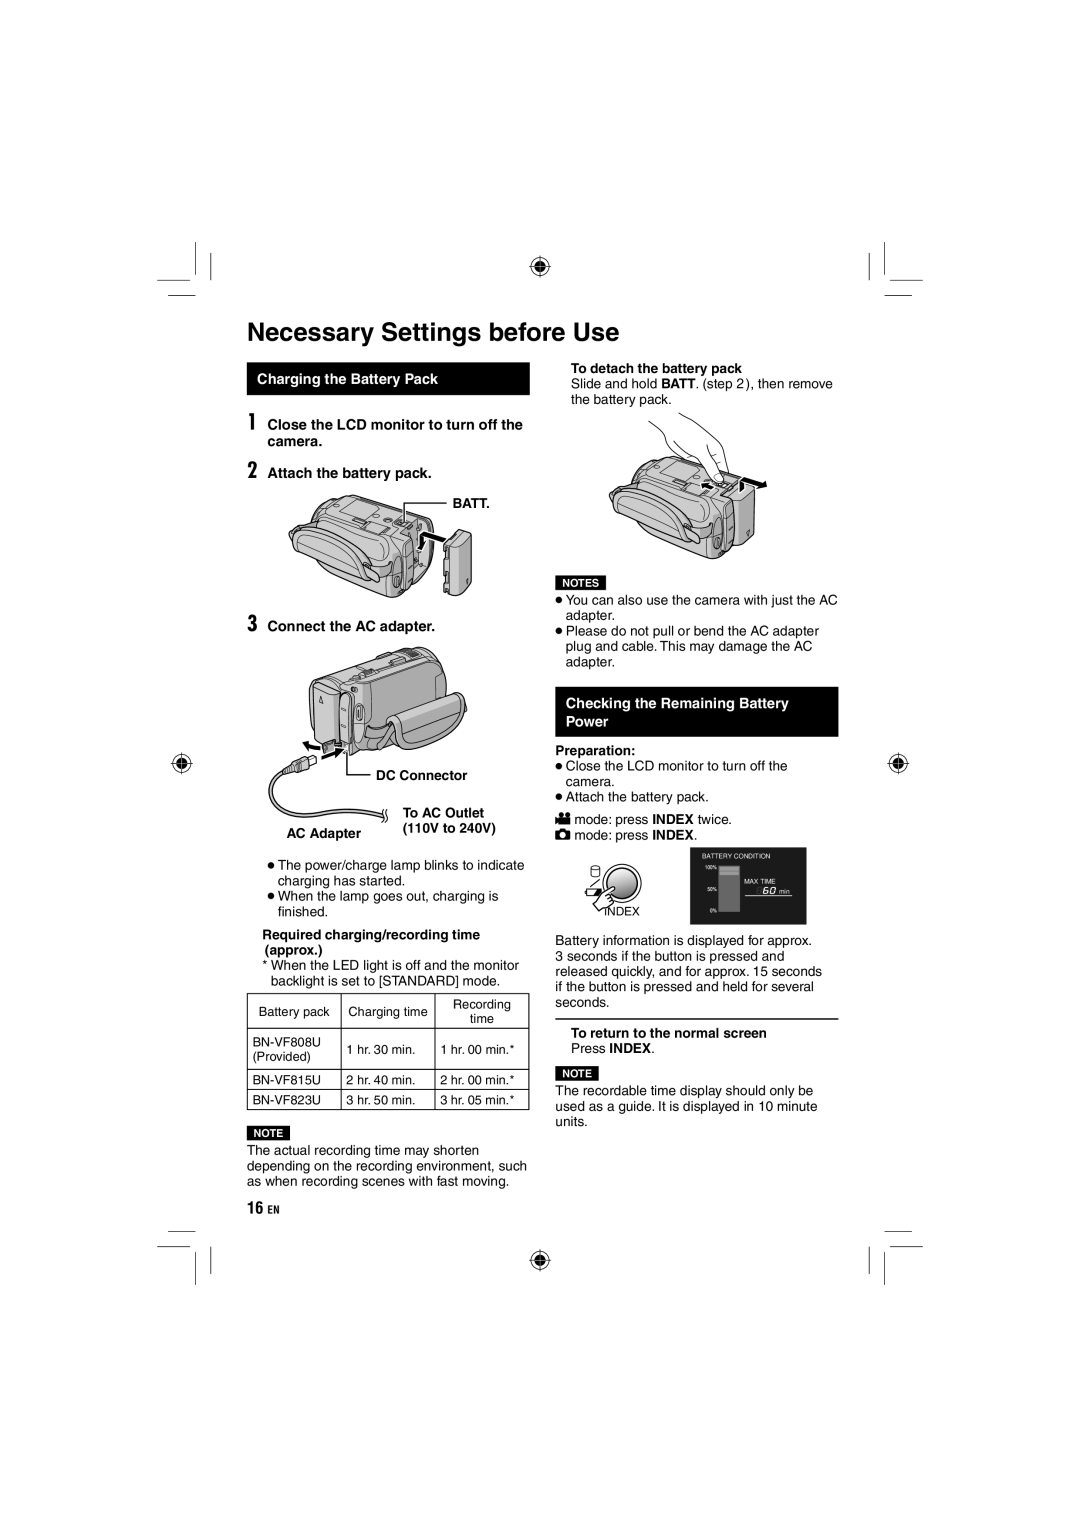
⬛ To detach the battery pack
Charging the Battery PackSlide and hold BATT. (step 2), then remove the battery pack.
1 Close the LCD monitor to turn off the camera.
2 Attach the battery pack.
BATT.
3 Connect the AC adapter.
 DC Connector
| To AC Outlet |
AC Adapter | (110V to 240V) |
|
•The power/charge lamp blinks to indicate charging has started.
•When the lamp goes out, charging is fi nished.
⬛Required charging/recording time (approx.)
*When the LED light is off and the monitor backlight is set to [STANDARD] mode.
Battery pack | Charging time | Recording | |
time | |||
|
| ||
1 hr. 30 min. | 1 hr. 00 min.* | ||
(Provided) | |||
|
| ||
|
|
| |
2 hr. 40 min. | 2 hr. 00 min.* | ||
| 3 hr. 50 min. | 3 hr. 05 min.* | |
|
|
|
NOTE
The actual recording time may shorten depending on the recording environment, such as when recording scenes with fast moving.
16EN
NOTES
•You can also use the camera with just the AC adapter.
•Please do not pull or bend the AC adapter plug and cable. This may damage the AC adapter.
Checking the Remaining Battery Power
Preparation:
•Close the LCD monitor to turn off the camera.
•Attach the battery pack.
!mode: press INDEX twice.
# mode: press INDEX.
BATTERY CONDITION
MAX TIME
![]()
![]()
![]() min
min
INDEX
Battery information is displayed for approx.
3 seconds if the button is pressed and released quickly, and for approx. 15 seconds if the button is pressed and held for several seconds.
⬛To return to the normal screen Press INDEX.
NOTE
The recordable time display should only be used as a guide. It is displayed in 10 minute units.