Still Image Recording
Preparation: Open the LCD monitor to turn on the camera.
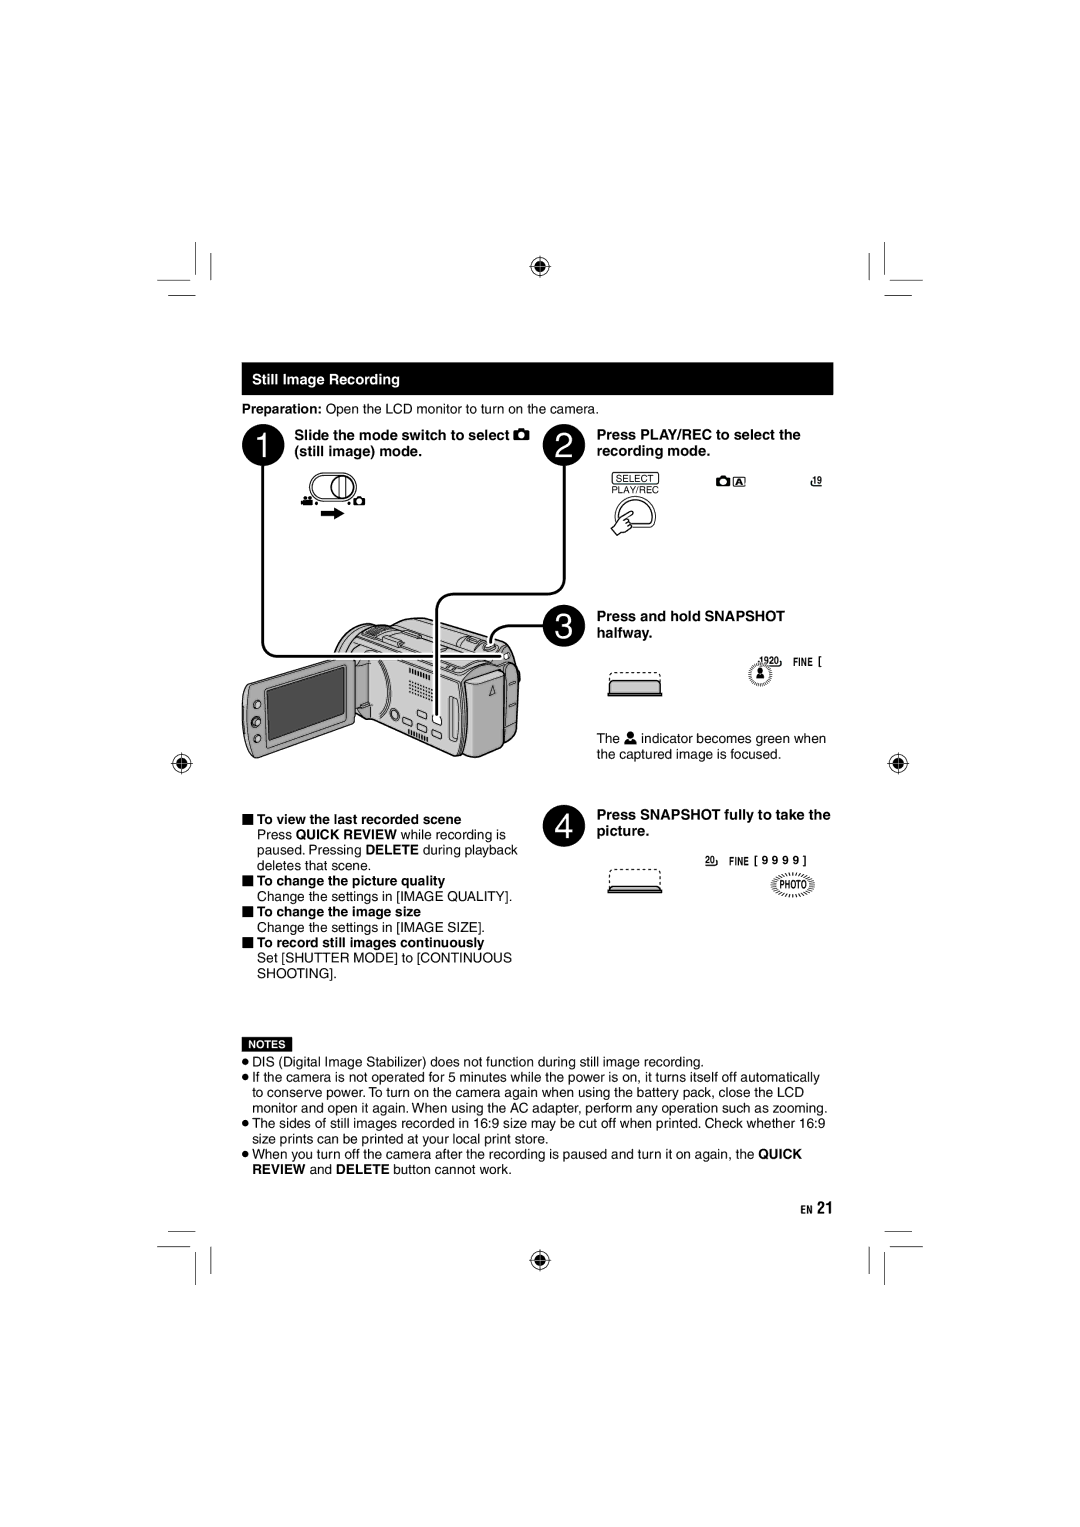
Slide the mode switch to select #
(still image) mode.
⬛To view the last recorded scene
Press QUICK REVIEW while recording is paused. Pressing DELETE during playback deletes that scene.
⬛To change the picture quality
Change the settings in [IMAGE QUALITY].
⬛To change the image size
Change the settings in [IMAGE SIZE].
⬛To record still images continuously Set [SHUTTER MODE] to [CONTINUOUS SHOOTING].
NOTES
Press PLAY/REC to select the recording mode.
SELECT | 19 |
PLAY/REC |
|
Press and hold SNAPSHOT halfway.
![]() 1920 FINE [
1920 FINE [
The ? indicator becomes green when the captured image is focused.
Press SNAPSHOT fully to take the picture.
20FINE [ 9 9 9 9 ]
![]() PHOTO
PHOTO![]()
•DIS (Digital Image Stabilizer) does not function during still image recording.
•If the camera is not operated for 5 minutes while the power is on, it turns itself off automatically to conserve power. To turn on the camera again when using the battery pack, close the LCD monitor and open it again. When using the AC adapter, perform any operation such as zooming.
•The sides of still images recorded in 16:9 size may be cut off when printed. Check whether 16:9 size prints can be printed at your local print store.
•When you turn off the camera after the recording is paused and turn it on again, the QUICK REVIEW and DELETE button cannot work.
EN 21