Necessary Settings before Use
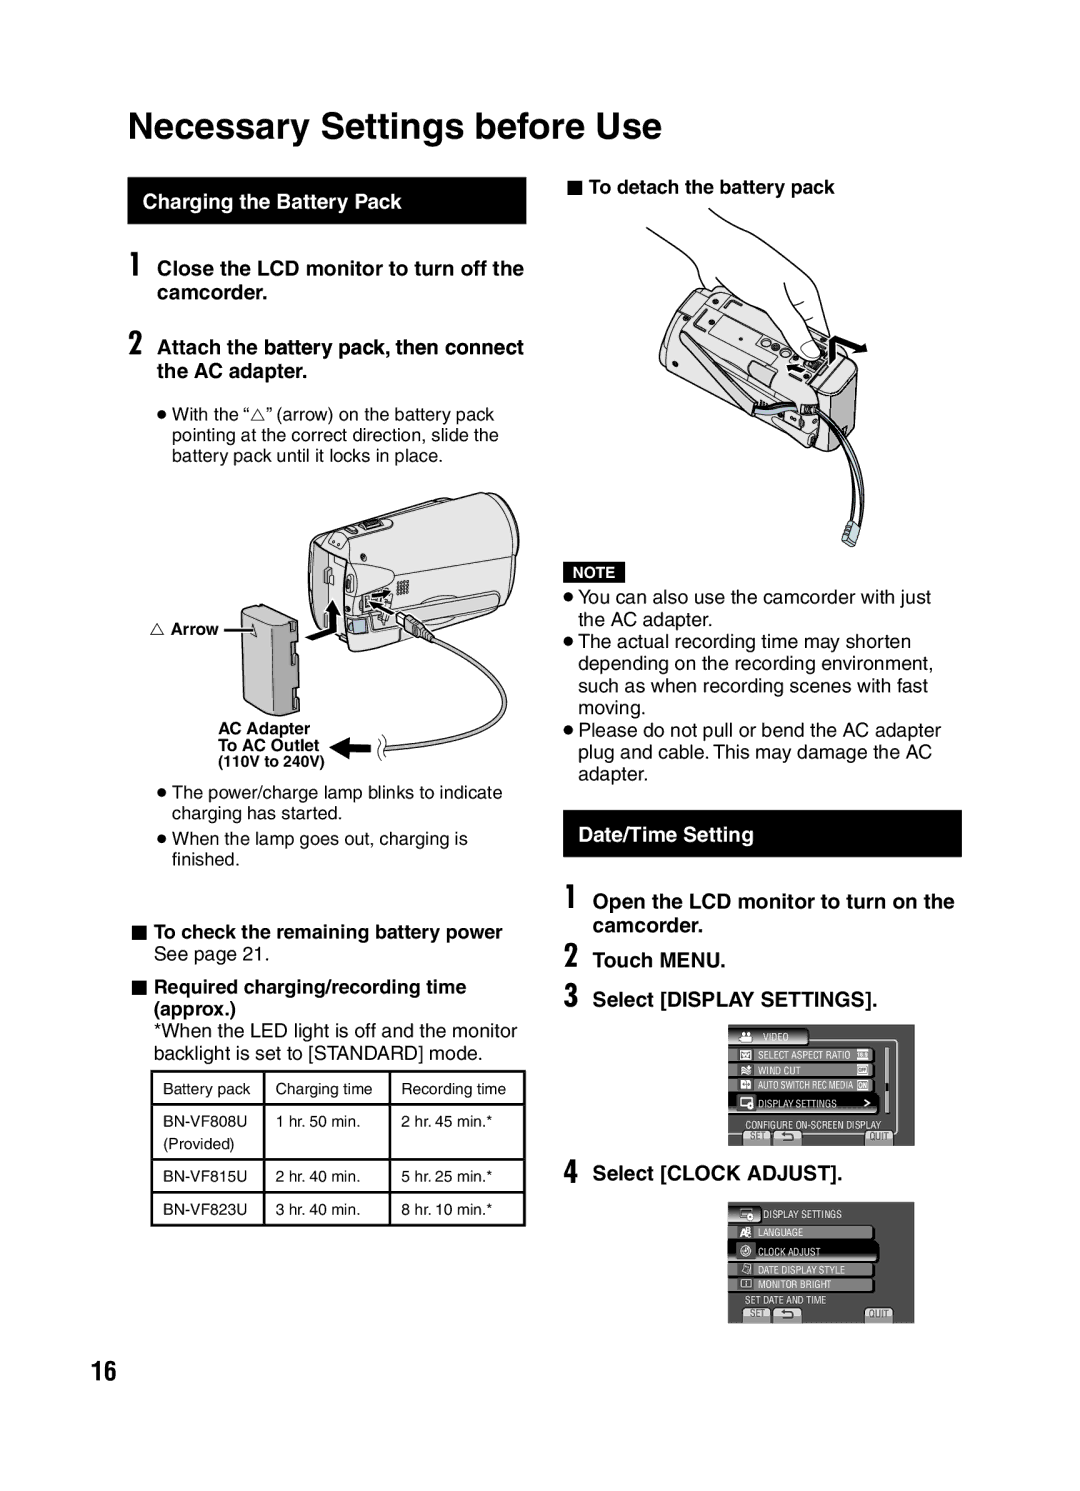
| LTo detach the battery pack | |
Charging the Battery Pack | ||
| ||
|
|
1 Close the LCD monitor to turn off the camcorder.
2 Attach the battery pack, then connect the AC adapter.
•With the “” (arrow) on the battery pack pointing at the correct direction, slide the battery pack until it locks in place.
Arrow 
AC Adapter
To AC Outlet
(110V to 240V)
•The power/charge lamp blinks to indicate charging has started.
•When the lamp goes out, charging is finished.
LTo check the remaining battery power See page 21.
LRequired charging/recording time (approx.)
*When the LED light is off and the monitor backlight is set to [STANDARD] mode.
Battery pack | Charging time | Recording time |
|
|
|
1 hr. 50 min. | 2 hr. 45 min.* | |
(Provided) |
|
|
|
|
|
2 hr. 40 min. | 5 hr. 25 min.* | |
|
|
|
3 hr. 40 min. | 8 hr. 10 min.* | |
|
|
|
NOTE
•You can also use the camcorder with just the AC adapter.
•The actual recording time may shorten depending on the recording environment, such as when recording scenes with fast moving.
•Please do not pull or bend the AC adapter plug and cable. This may damage the AC adapter.
Date/Time Setting
1 Open the LCD monitor to turn on the camcorder.
2 Touch MENU.
3 Select [DISPLAY SETTINGS].
VIDEO
![]() SELECT ASPECT RATIO
SELECT ASPECT RATIO ![]()
![]()
![]() WIND CUT
WIND CUT
AUTO SWITCH REC MEDIA ![]()
![]() DISPLAY SETTINGS
DISPLAY SETTINGS
CONFIGURE
SET ![]() QUIT
QUIT
4 Select [CLOCK ADJUST].
![]() DISPLAY SETTINGS
DISPLAY SETTINGS
9LANGUAGE
:CLOCK ADJUST
;DATE DISPLAY STYLE B MONITOR BRIGHT SET DATE AND TIME
SETQUIT
16