– Buttons, Connectors and Indicators – |
|
Remote control | Basic Connections |
| A Check contents |
[^] | Make sure the package contains all of the accessories listed in |
“Specifications”. | |
| B Situate recorder |
Place the recorder on a stable, horizontal surface.
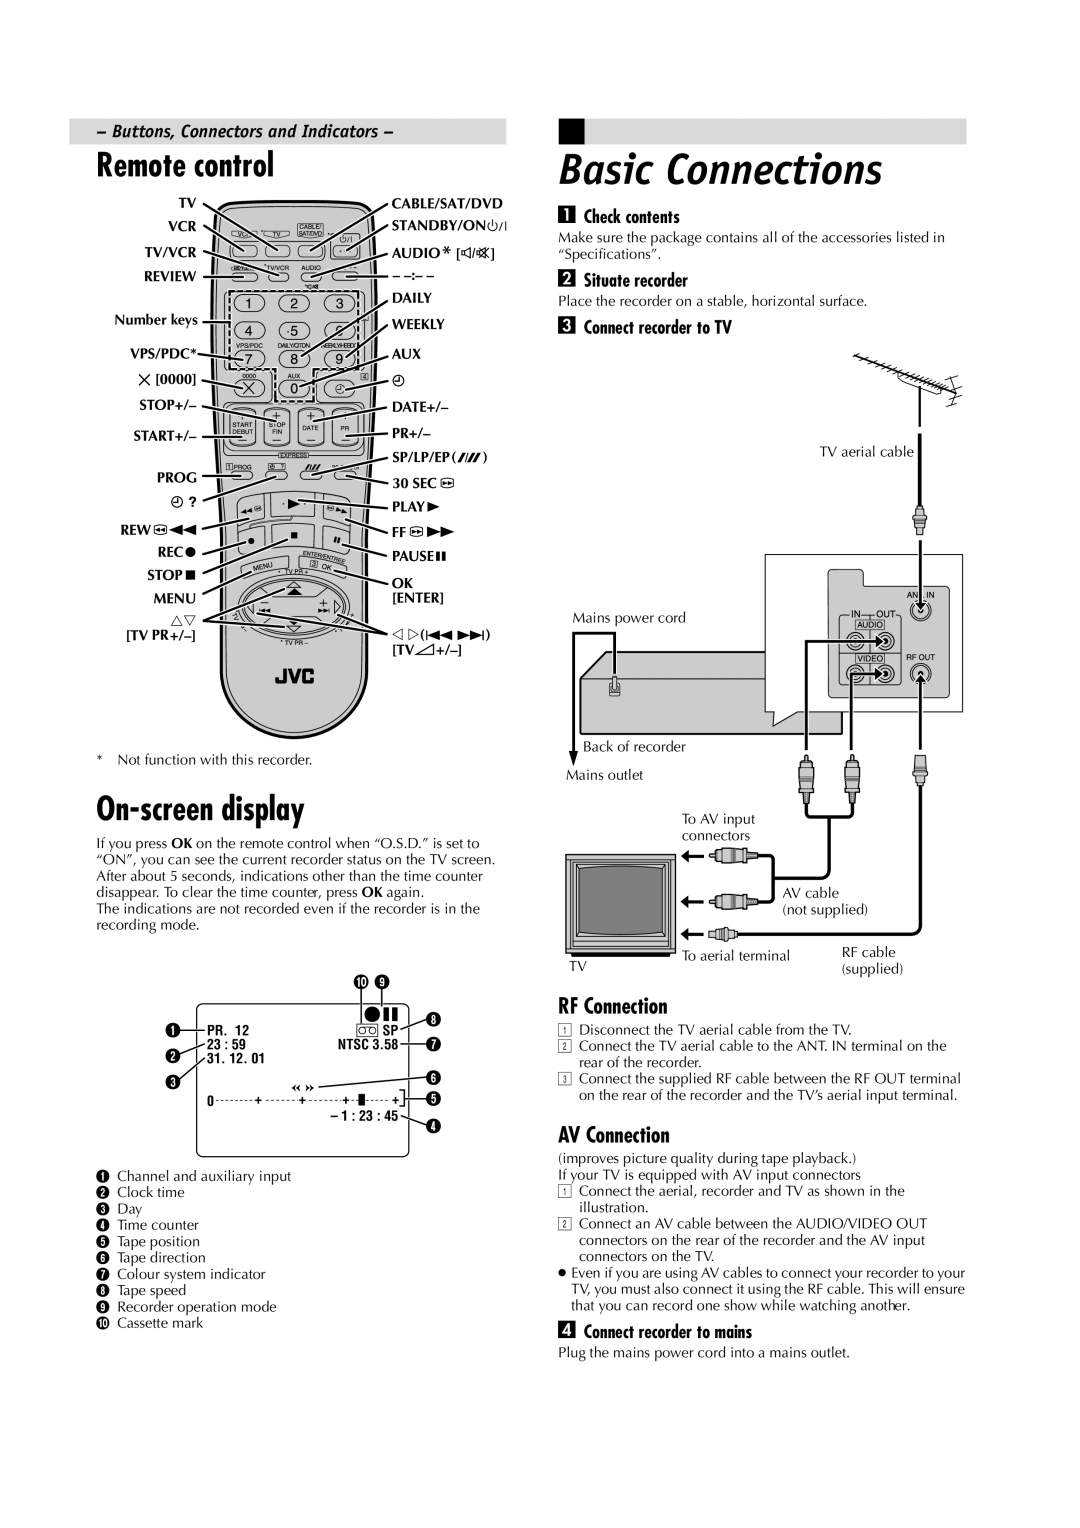
Number keys | C Connect recorder to TV |
|
TV aerial cable
* Not function with this recorder.
On-screen display
If you press OK on the remote control when “O.S.D.” is set to “ON”, you can see the current recorder status on the TV screen. After about 5 seconds, indications other than the time counter disappear. To clear the time counter, press OK again.
The indications are not recorded even if the recorder is in the recording mode.
|
|
| J I |
|
| |
A |
| PR. 12 |
| SP |
| H |
|
|
| ||||
|
|
|
| |||
|
|
|
| |||
B | 23 : 59 | NTSC 3.58 |
| G | ||
| ||||||
31. 12. 01 |
|
|
|
| ||
C![]() F
F
0 + + + |
| + |
|
| E |
|
|
| |||
– 1 : 23 : 45 |
| D | |||
AChannel and auxiliary input B Clock time
C Day
D Time counter E Tape position F Tape direction
G Colour system indicator H Tape speed
I Recorder operation mode J Cassette mark
Mains power cord
Back of recorder |
Mains outlet |
To AV input |
|
connectors |
|
AV cable |
|
(not supplied) | |
To aerial terminal | RF cable |
TV | (supplied) |
RF Connection
ADisconnect the TV aerial cable from the TV.
BConnect the TV aerial cable to the ANT. IN terminal on the rear of the recorder.
CConnect the supplied RF cable between the RF OUT terminal on the rear of the recorder and the TV’s aerial input terminal.
AV Connection
(improves picture quality during tape playback.) If your TV is equipped with AV input connectors
AConnect the aerial, recorder and TV as shown in the illustration.
BConnect an AV cable between the AUDIO/VIDEO OUT connectors on the rear of the recorder and the AV input connectors on the TV.
●Even if you are using AV cables to connect your recorder to your TV, you must also connect it using the RF cable. This will ensure that you can record one show while watching another.
DConnect recorder to mains
Plug the mains power cord into a mains outlet.