36


 EDITING
 (cont.)


Random As- semble Editing
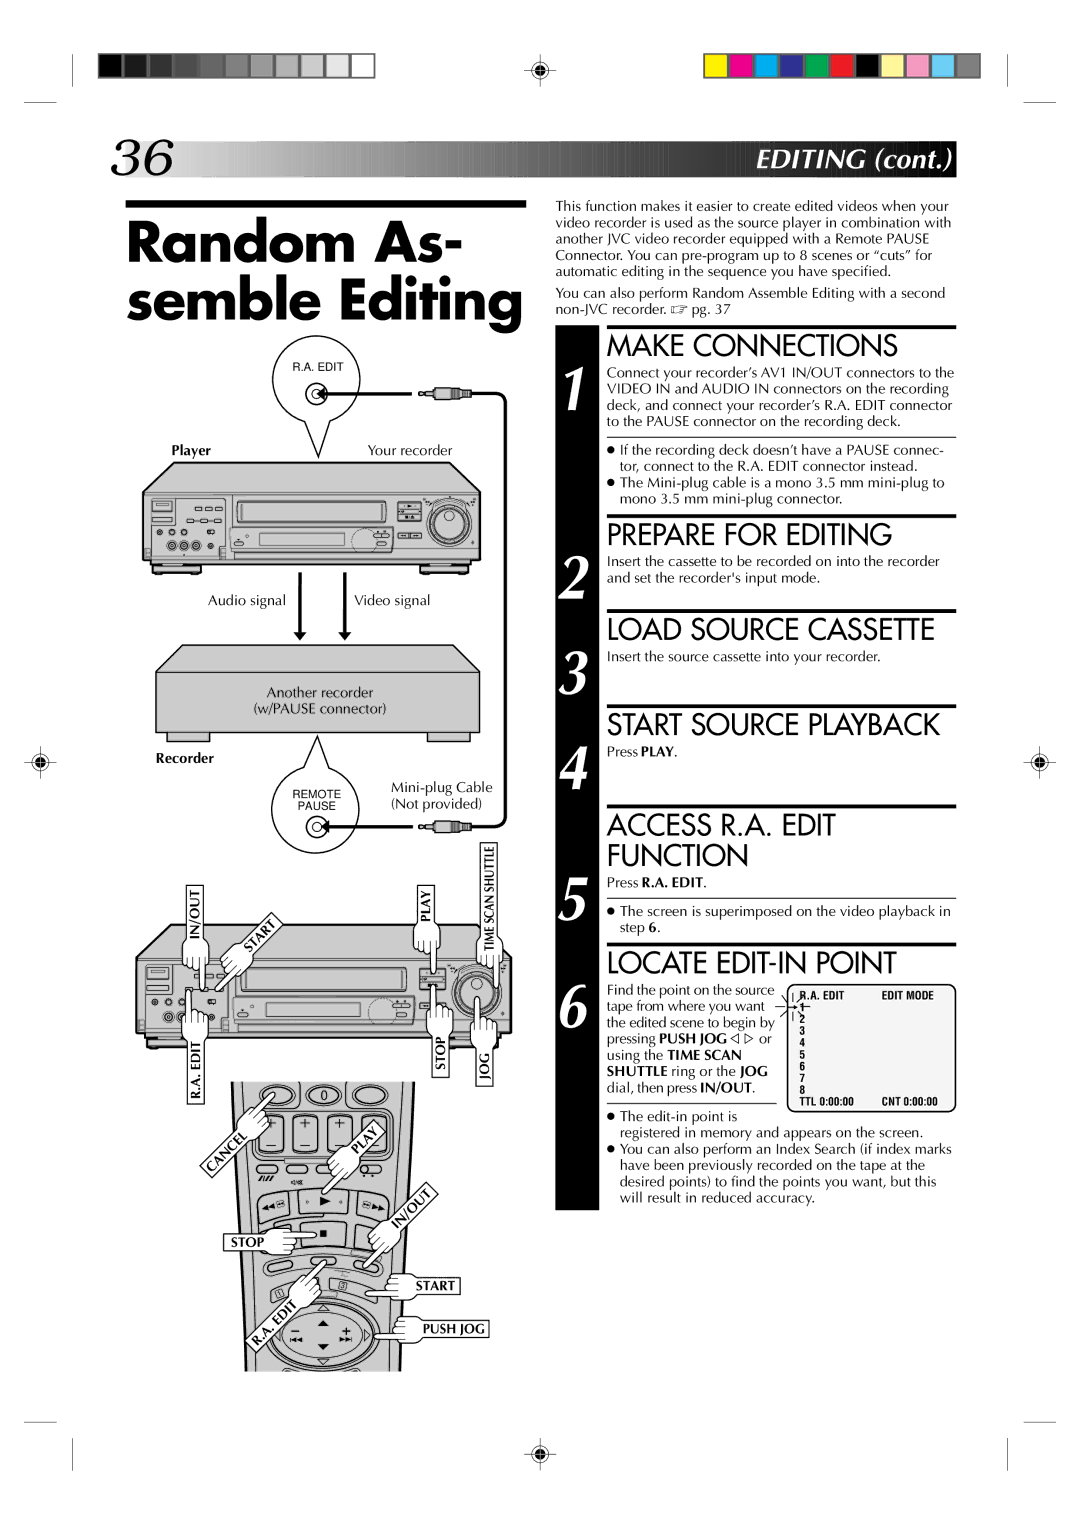
R.A. EDIT
Player | Your recorder |
|
|
| 8 |
•• • • • •• | •• • • • •• | ||
• • | • • | • • | • • |
Audio signal | Video signal |
Another recorder
(w/PAUSE connector)
Recorder
REMOTE | ||||||||
(Not provided) | ||||||||
PAUSE | ||||||||
|
|
|
|
|
|
|
| |
|
| IN/OUT |
| PLAY | TIMESCAN SHUTTLE |
|
|
|
| START |
|
|
|
|
|
| 8 |
• • • • • | • • • • • | • |
|
|
|
• | • • |
|
|
| |
• • • • | • • • • |
|
|
|
|
|
| R.A.EDIT |
| STOP | JOG |
|
|
|
| 0 |
|
|
|
| CANCEL | PLAY |
|
|
|
|
|
| |
|
|
|
| IN/OUT |
|
STOP ![]()
![]()
This function makes it easier to create edited videos when your video recorder is used as the source player in combination with another JVC video recorder equipped with a Remote PAUSE Connector. You can
You can also perform Random Assemble Editing with a second
MAKE CONNECTIONS
1 Connect your recorder’s AV1 IN/OUT connectors to the VIDEO IN and AUDIO IN connectors on the recording deck, and connect your recorder’s R.A. EDIT connector to the PAUSE connector on the recording deck.
●If the recording deck doesn’t have a PAUSE connec- tor, connect to the R.A. EDIT connector instead.
●The
| PREPARE FOR EDITING | ||||||||
| Insert the cassette to be recorded on into the recorder | ||||||||
2 and set the recorder's input mode. |
| ||||||||
| LOAD SOURCE CASSETTE | ||||||||
3 Insert the source cassette into your recorder. |
| ||||||||
| START SOURCE PLAYBACK | ||||||||
4 Press PLAY. |
|
|
|
|
|
|
| ||
| ACCESS R.A. EDIT |
| |||||||
5 | FUNCTION |
|
|
|
|
|
|
| |
Press R.A. EDIT. |
|
|
|
|
|
|
| ||
|
|
|
|
|
|
| |||
● The screen is superimposed on the video playback in | |||||||||
step 6. |
|
|
|
|
|
|
| ||
|
|
|
|
|
|
|
| ||
| LOCATE | ||||||||
| Find the point on the source |
|
|
|
| R.A. EDIT | EDIT MODE | ||
|
|
|
|
| |||||
| tape from where you want |
|
| = | 1 |
|
| ||
|
|
|
|
| |||||
6 the edited scene to begin by |
|
| 2 |
|
| ||||
|
|
| |||||||
3 |
|
| |||||||
| pressing PUSH JOGÞ%or | 4 |
|
| |||||
| using the TIME SCAN | 5 |
|
| |||||
| SHUTTLE ring or the JOG | 6 |
|
| |||||
| 7 |
|
| ||||||
| dial, then press IN/OUT. |
|
| ||||||
| 8 |
|
| ||||||
|
|
|
|
|
|
| TTL 0:00:00 | CNT 0:00:00 | |
|
|
| |||||||
●The
registered in memory and appears on the screen.
●You can also perform an Index Search (if index marks have been previously recorded on the tape at the desired points) to find the points you want, but this
will result in reduced accuracy.
3
1
START
.EDIT .A R
PUSH JOG