40![]()
![]()
![]()
![]()
![]()
![]()
![]()
![]()
![]()
![]()
![]()
![]()
![]()
![]()
![]()
![]()
![]()
![]()
![]()
![]()
![]()
![]()
![]()
![]()
![]()
![]()
![]()
![]()
![]()
![]()
![]()
![]()
![]()
![]()
![]()
![]()
![]()
![]()
![]()
![]()
![]()
![]()
![]()


 EDITING
 (cont.)
Audio Dubbing
A. DUB | PLAY |
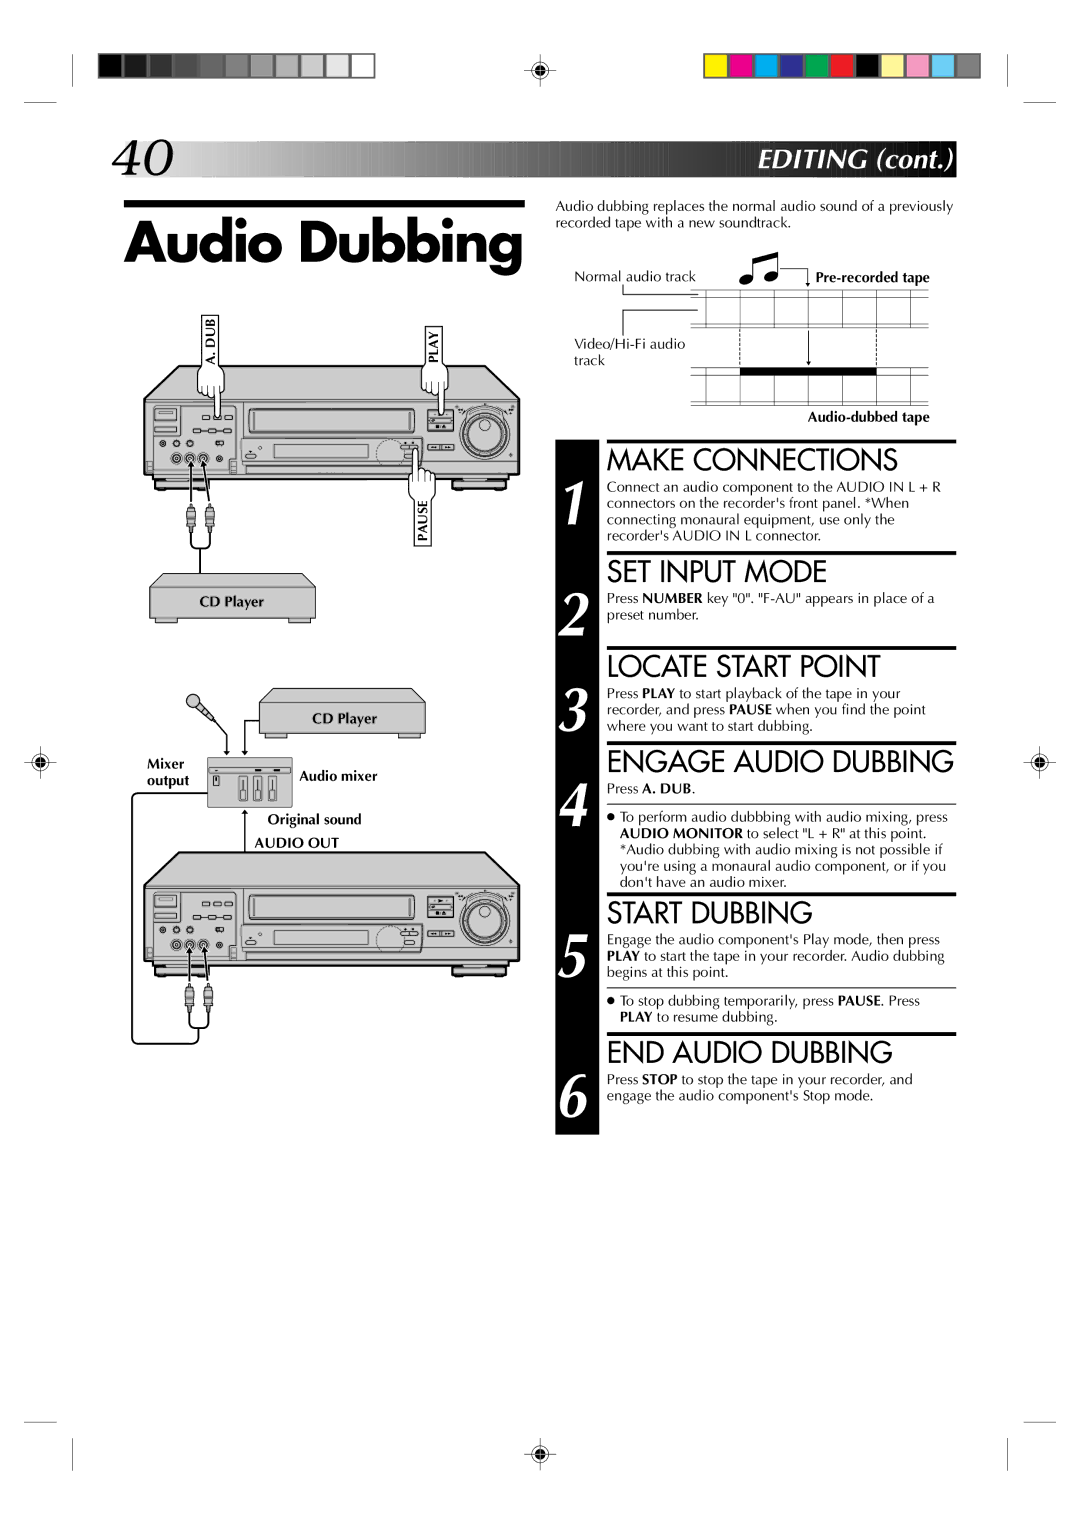
Audio dubbing replaces the normal audio sound of a previously recorded tape with a new soundtrack.
Normal audio track |
|
|
|
| |||||||
|
|
|
|
|
|
|
|
|
|
|
|
|
|
|
|
|
|
|
|
|
|
|
|
|
|
|
|
|
|
|
|
|
|
|
|
|
|
|
|
|
|
|
|
|
|
|
|
|
|
|
|
|
|
|
|
|
|
|
|
|
|
| 8 |
• • | • • • | • • | • • • |
• | • | • | • |
• • | • • | • • | • • |
|
|
| PAUSE |
CD Player
| CD Player |
Mixer | Audio mixer |
output | |
| Original sound |
| AUDIO OUT |
|
|
|
|
| 8 |
• • | • | • • | • • | • | • • |
• |
| • | • |
| • |
• • |
| • • | • • |
| • • |
1
2
3
4
5
6
MAKE CONNECTIONS
Connect an audio component to the AUDIO IN L + R connectors on the recorder's front panel. *When connecting monaural equipment, use only the recorder's AUDIO IN L connector.
SET INPUT MODE
Press NUMBER key "0".
LOCATE START POINT
Press PLAY to start playback of the tape in your recorder, and press PAUSE when you find the point where you want to start dubbing.
ENGAGE AUDIO DUBBING
Press A. DUB.
●To perform audio dubbbing with audio mixing, press AUDIO MONITOR to select "L + R" at this point. *Audio dubbing with audio mixing is not possible if you're using a monaural audio component, or if you don't have an audio mixer.
START DUBBING
Engage the audio component's Play mode, then press PLAY to start the tape in your recorder. Audio dubbing begins at this point.
●To stop dubbing temporarily, press PAUSE. Press PLAY to resume dubbing.
END AUDIO DUBBING
Press STOP to stop the tape in your recorder, and engage the audio component's Stop mode.