40![]()
![]()
![]() EN
EN![]()
![]()
![]()
![]()
![]()
![]()
![]()
![]()
![]()
![]()
![]()
![]()
![]()
![]()
![]()
![]()
![]()
![]()
![]()
![]()
![]()
![]()
![]()
![]()
![]()
![]()
![]()
![]()
![]()
![]()
![]()
![]()
![]()
![]()
![]()
![]()
![]()
![]()
![]()
![]()
![]()
![]()
![]()
![]()
![]()
![]()
![]()
![]()
![]()
![]()
![]()
![]()
![]()
![]()
![]()
![]()
![]()
![]()
![]()
![]()
![]()
![]()
![]()
![]()
![]()
![]()
![]()
![]()
![]()
![]()
![]()
![]()
![]() EDITING
EDITING![]() (cont.)
(cont.)![]()
![]()
![]()
Insert Editing
Recorder | Your recorder |
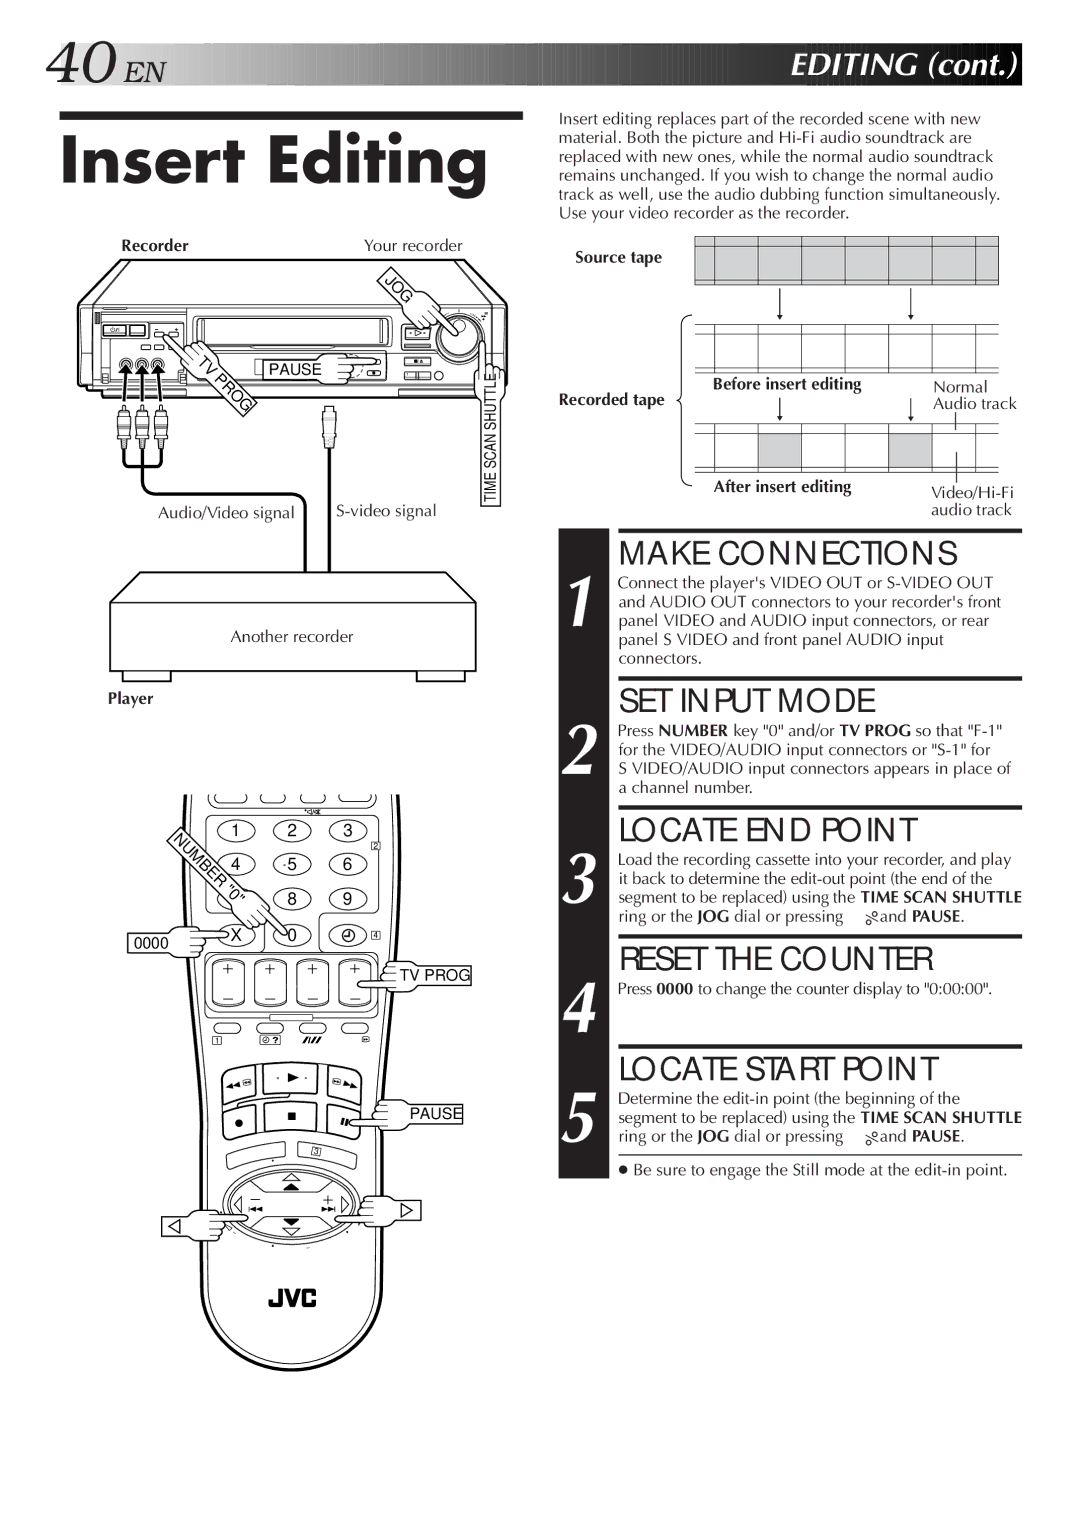
Insert editing replaces part of the recorded scene with new material. Both the picture and
Source tape
G
8
TV | PAUSE | |
PROG | ||
|
Audio/Video signal
65/8
q | 1 Á |
TIME SCAN SHUTTLE
Before insert editing |
|
| Normal | |||
Recorded tape |
|
|
| Audio track | ||
|
|
|
| |||
|
|
|
|
|
|
|
|
|
|
|
|
|
|
After insert editing | |
| audio track |
MAKE CONNECTIONS
Another recorder
Player
NUMBER | 1 | 2 | 3 |
|
| 2 | |
| 4 | 5 | 6 |
"0" | 8 | 9 | |
| 7 | ||
1 Connect the player's VIDEO OUT or
SET INPUT MODE
2 Press NUMBER key "0" and/or TV PROG so that
LOCATE END POINT
3 Load the recording cassette into your recorder, and play it back to determine the
0000 X 0
1
3
4
![]() TV PROG
TV PROG
PAUSE
RESET THE COUNTER
4 Press 0000 to change the counter display to "0:00:00".
LOCATE START POINT
5 Determine the
● Be sure to engage the Still mode at the
T | + |
V |
|
– | V |
T | |
| TV PROG – |