Using the Timers

Setting the Daily Timer

Once you have set the Daily Timer, the timer will be activated at the same time every day.

The Timer indicator ( ) and “DAILY” indicator on the display shows that the Daily Timer you have set is in effect.

You can set the Daily Timer whether the System is turned on or off.

Perform each setting within approx. 30 seconds. Other- wise, setting will be cleared and the procedure must be repeated from the beginning.

If you have made a mistake while setting the timer, press the CANCEL button on the Unit. However, this does not al- ways cancel the current setting. If the CANCEL button does not work, press the CLOCK/TIMER button on the Unit repeatedly until the display returns to the original dis- play, and start from the first step.

Using the Unit

1 Press the button to turn on the System. 2 Press the CLOCK/TIMER button until “ON

TIME” immediately after “TIMER” appears on the display.

At this time, “DAILY” indicator blinks and the Timer indica- tor ( ) lights up on the display.

Each time you press the button, the display changes as follows: TIMER =ON TIME* =REC =ON TIME =Clock setting display = Canceled = (back to the beginning)

*: This item should be selected for the Daily Timer setting.

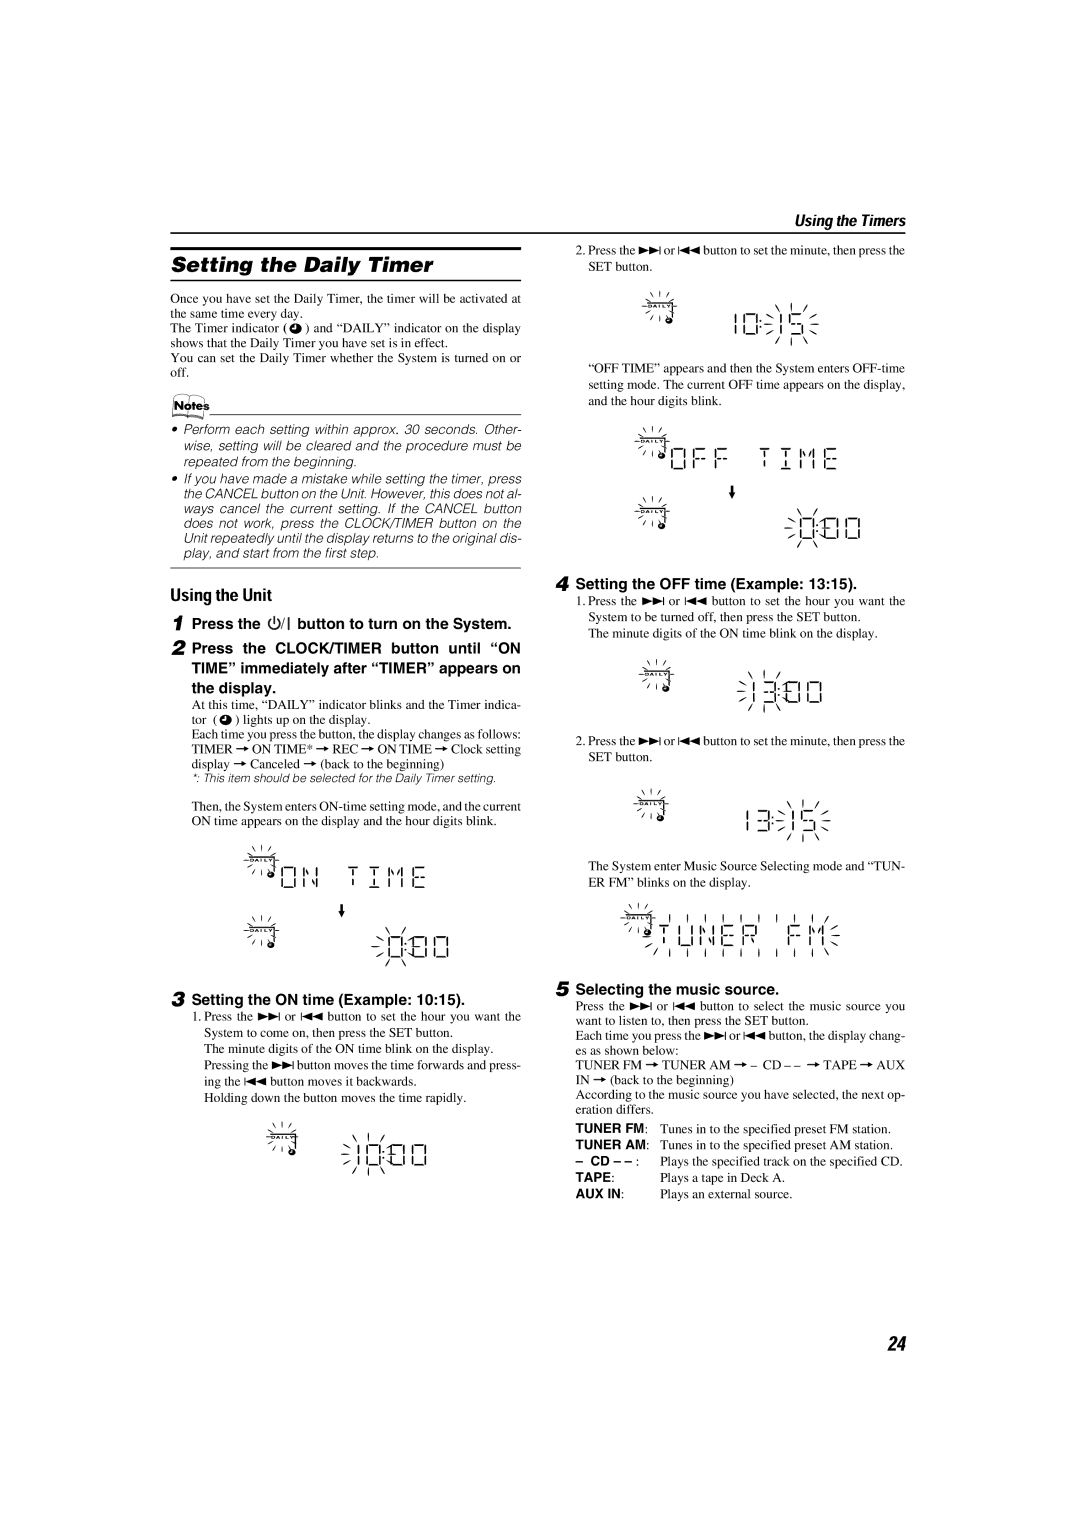
Then, the System enters ON-time setting mode, and the current ON time appears on the display and the hour digits blink.

2.Press the ¢or 4button to set the minute, then press the SET button.

“OFF TIME” appears and then the System enters OFF-time setting mode. The current OFF time appears on the display, and the hour digits blink.

4 Setting the OFF time (Example: 13:15).

1.Press the ¢ or 4 button to set the hour you want the System to be turned off, then press the SET button.

The minute digits of the ON time blink on the display.

2.Press the ¢or 4button to set the minute, then press the SET button.

The System enter Music Source Selecting mode and “TUN- ER FM” blinks on the display.

3 Setting the ON time (Example: 10:15).

1.Press the ¢ or 4 button to set the hour you want the System to come on, then press the SET button.

The minute digits of the ON time blink on the display. Pressing the ¢button moves the time forwards and press- ing the 4 button moves it backwards.

Holding down the button moves the time rapidly.

5 Selecting the music source.

Press the ¢ or 4 button to select the music source you want to listen to, then press the SET button.

Each time you press the ¢or 4button, the display chang- es as shown below:

TUNER FM =TUNER AM =– CD – – =TAPE = AUX IN = (back to the beginning)

According to the music source you have selected, the next op- eration differs.

TUNER FM: Tunes in to the specified preset FM station.

TUNER AM: Tunes in to the specified preset AM station.

CD – : Plays the specified track on the specified CD.

TAPE: Plays a tape in Deck A.

AUX IN: Plays an external source.

24

Page 27
Image 27
JVC LVT1014-003A, CA-MXKA6 manual Setting the Daily Timer, Setting the OFF time Example, Setting the on time Example

0303NYMCREBETEN, CA-MXKA6, LVT1014-003A specifications

JVC has long been recognized for its commitment to delivering high-quality audio and video equipment. Among its latest offerings are the models 0303NYMCREBETEN, LVT1014-003A, and CA-MXKA6, which cater to a variety of consumer needs with modern features and technologies.

The JVC 0303NYMCREBETEN is designed for versatility and performance. This model focuses on delivering powerful sound output, suitable for both casual listeners and audio enthusiasts. It incorporates advanced audio processing technologies to enhance music playback, ensuring that every note is clear and well-defined. The 0303NYMCREBETEN also boasts various connection options, including Bluetooth and USB, allowing users to easily access their music libraries from multiple sources. Its compact design makes it easy to fit in any space, without sacrificing audio quality.

Meanwhile, the LVT1014-003A serves as a remote control unit that complements JVC's audio-visual products. Designed for ease of use, this remote features a sleek and intuitive layout, allowing users to control functions effortlessly. With programmable keys and an ergonomic design, the LVT1014-003A enhances the overall user experience, making it simple to adjust settings, switch inputs, and navigate menus from the comfort of your couch. Its compatibility with various JVC devices ensures that users can conveniently manage their home entertainment systems.

The CA-MXKA6 is another excellent addition to JVC’s lineup, providing a powerful mini audio system that fits perfectly into smaller living spaces. It features dual speakers that deliver rich sound, along with a built-in CD player, radio tuner, and Bluetooth connectivity. This model excels in providing multiple playback options, making it a versatile choice for any music lover. The CA-MXKA6 also includes customizable equalizer settings, enabling users to tailor the sound to their preferences. Its modern design and LED display make it an attractive piece of equipment for any room.

In conclusion, JVC’s 0303NYMCREBETEN, LVT1014-003A, and CA-MXKA6 represent a blend of innovation and practicality. These products are ideal for consumers seeking high-quality audio performance, ease of use, and versatile features. Whether you are listening to your favorite tunes, controlling your media devices, or setting up an audio system, JVC provides solutions that meet a variety of needs while ensuring top-notch performance.