30![]()
![]()
![]() EN
EN ![]()
![]()
![]()
![]()
![]()
![]()
![]()
![]()
![]()
![]()
![]()
![]()
![]()
![]()
![]()
![]()
![]()
![]()
![]()
![]()
![]()
![]()
![]()
![]()
![]()
![]()
![]()
![]()
![]()
![]()
![]()
![]()
![]()
![]()
RECORDING![]()
![]() Advanced Features (Cont.)
Advanced Features (Cont.)![]()
Menus
The Recording Menu allows you to set these functions:
Recording Mode, Wide Mode, Zoom Magnification, Digital Image Stabilizer, Gain Up, Flash, Date/Time Menu, System Menu. The following selection procedure applies to Recording Mode, Wide Mode, Zoom Magnification, Stabilization, Gain Up and Flash.
Please refer to page 31, 32 for details.
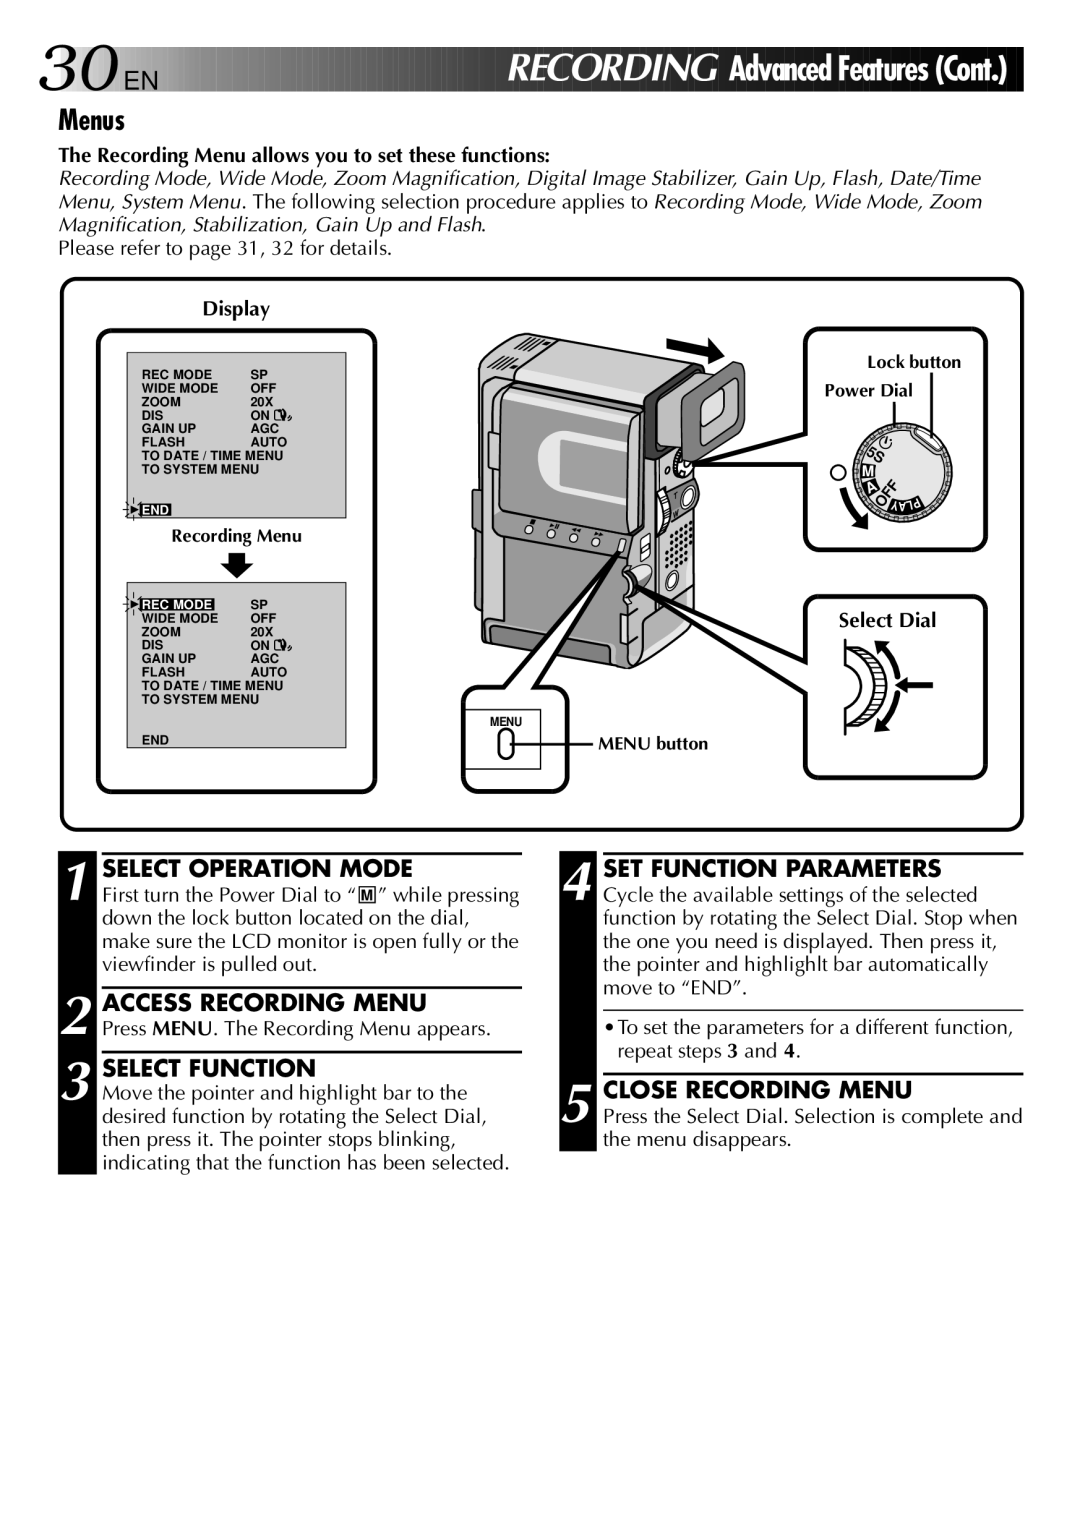
Display
REC MODE | SP |
WIDE MODE | OFF |
ZOOM | 20X |
DIS | ON |
GAIN UP | AGC |
FLASH | AUTO |
TO DATE / TIME MENU TO SYSTEM MENU
4END
Recording Menu
4 | REC MODE |
| SP |
| WIDE MODE |
| OFF |
| ZOOM | 20X | |
| DIS | ON | |
| GAIN UP | AGC | |
| FLASH | AUTO | |
TO DATE / TIME MENU TO SYSTEM MENU
END
MENU
Lock button
Power Dial
5S |
| |
M | OFFYA |
|
A | P | |
|
| |
| L | |
Select Dial
MENU button
1 SELECT OPERATION MODE
First turn the Power Dial to “ M ” while pressing down the lock button located on the dial, make sure the LCD monitor is open fully or the viewfinder is pulled out.
2 ACCESS RECORDING MENU Press MENU. The Recording Menu appears.
3 SELECT FUNCTION
Move the pointer and highlight bar to the desired function by rotating the Select Dial, then press it. The pointer stops blinking, indicating that the function has been selected.
4 SET FUNCTION PARAMETERS Cycle the available settings of the selected function by rotating the Select Dial. Stop when the one you need is displayed. Then press it, the pointer and highlighlt bar automatically move to “END”.
•To set the parameters for a different function, repeat steps 3 and 4.
5 CLOSE RECORDING MENU
Press the Select Dial. Selection is complete and the menu disappears.