64

 EN
EN 


 EDITIN
 G (Cont.)
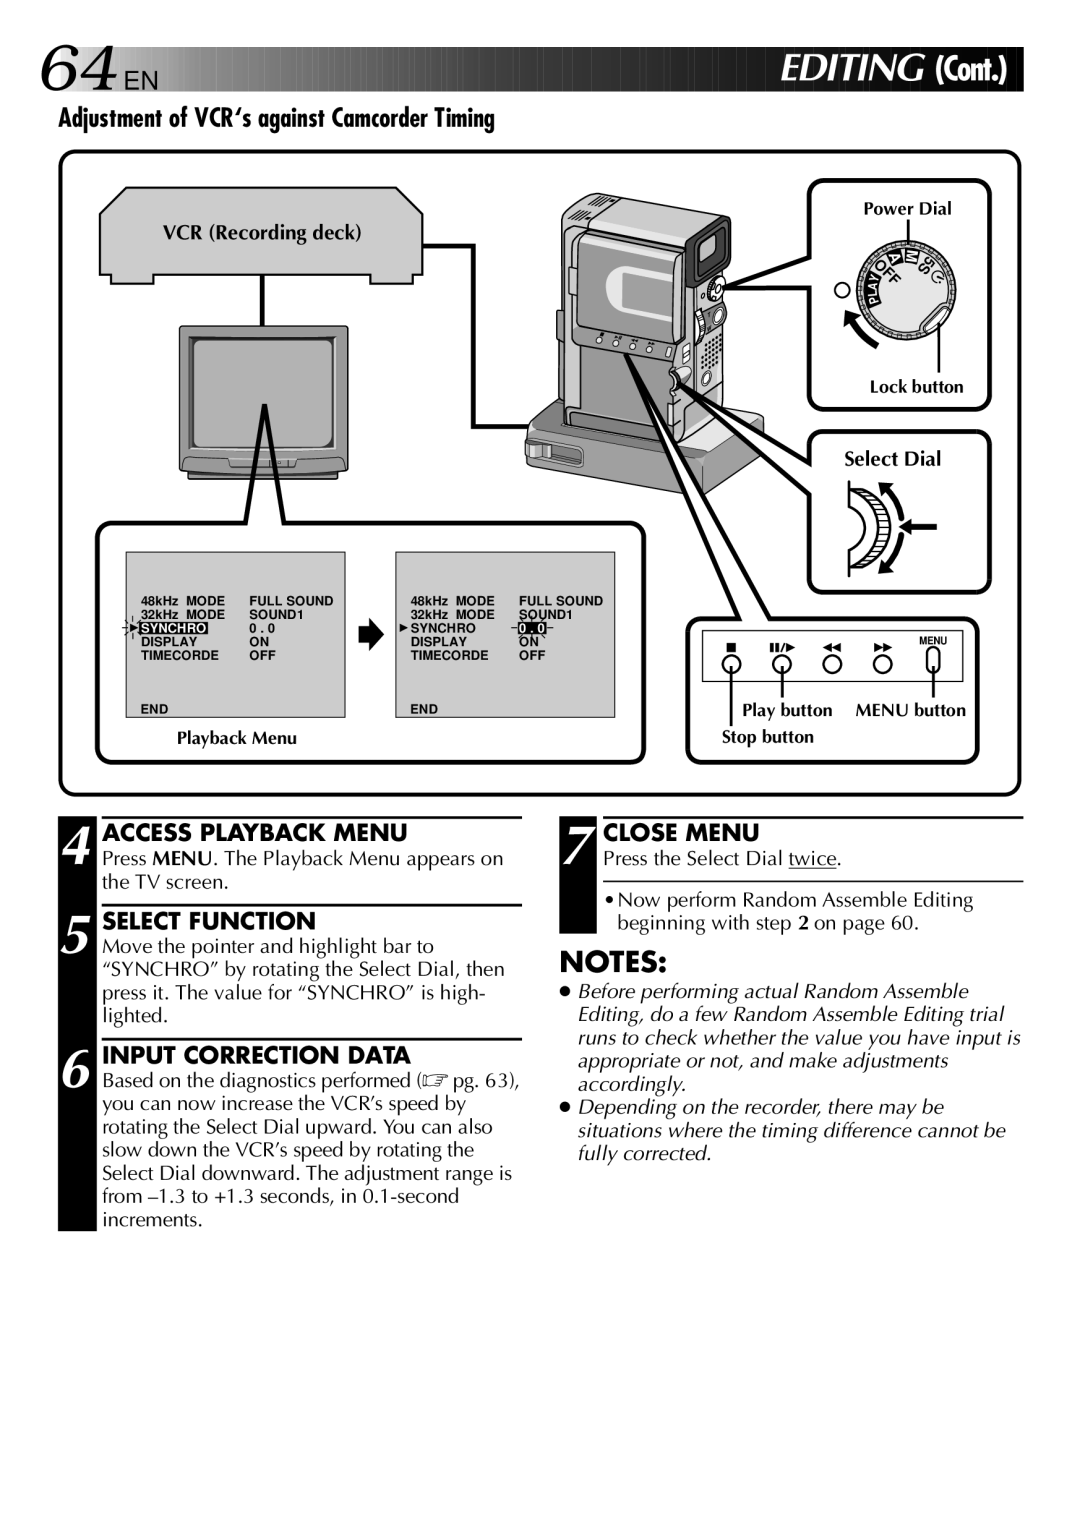
Adjustment of VCR‘s against Camcorder Timing
VCR (Recording deck)
Power Dial
| M |
A | 5S |
OFF |
|
Y |
|
A |
|
L |
|
P |
|
Lock button
Select Dial
| 48kHz MODE | FULL SOUND | |
| 32kHz MODE | SOUND1 | |
4 | SYNCHRO |
| 0 . 0 |
| DISPLAY |
| ON |
| TIMECORDE | OFF | |
END
Playback Menu
48kHz MODE | FULL SOUND | |
32kHz MODE | SOUND1 | |
4SYNCHRO | 0 . 0 |
|
DISPLAY | ON |
|
TIMECORDE | OFF | |
END |
|
|
MENU
Play button MENU button Stop button
4 ACCESS PLAYBACK MENU
Press MENU. The Playback Menu appears on the TV screen.
5 SELECT FUNCTION
Move the pointer and highlight bar to “SYNCHRO” by rotating the Select Dial, then press it. The value for “SYNCHRO” is high- lighted.
6 INPUT CORRECTION DATA
Based on the diagnostics performed (☞ pg. 63), you can now increase the VCR’s speed by rotating the Select Dial upward. You can also slow down the VCR’s speed by rotating the Select Dial downward. The adjustment range is from
7 CLOSE MENU
Press the Select Dial twice.
•Now perform Random Assemble Editing beginning with step 2 on page 60.
NOTES:
●Before performing actual Random Assemble Editing, do a few Random Assemble Editing trial runs to check whether the value you have input is appropriate or not, and make adjustments accordingly.
●Depending on the recorder, there may be situations where the timing difference cannot be fully corrected.