MENU OPERATION
FILE MENU
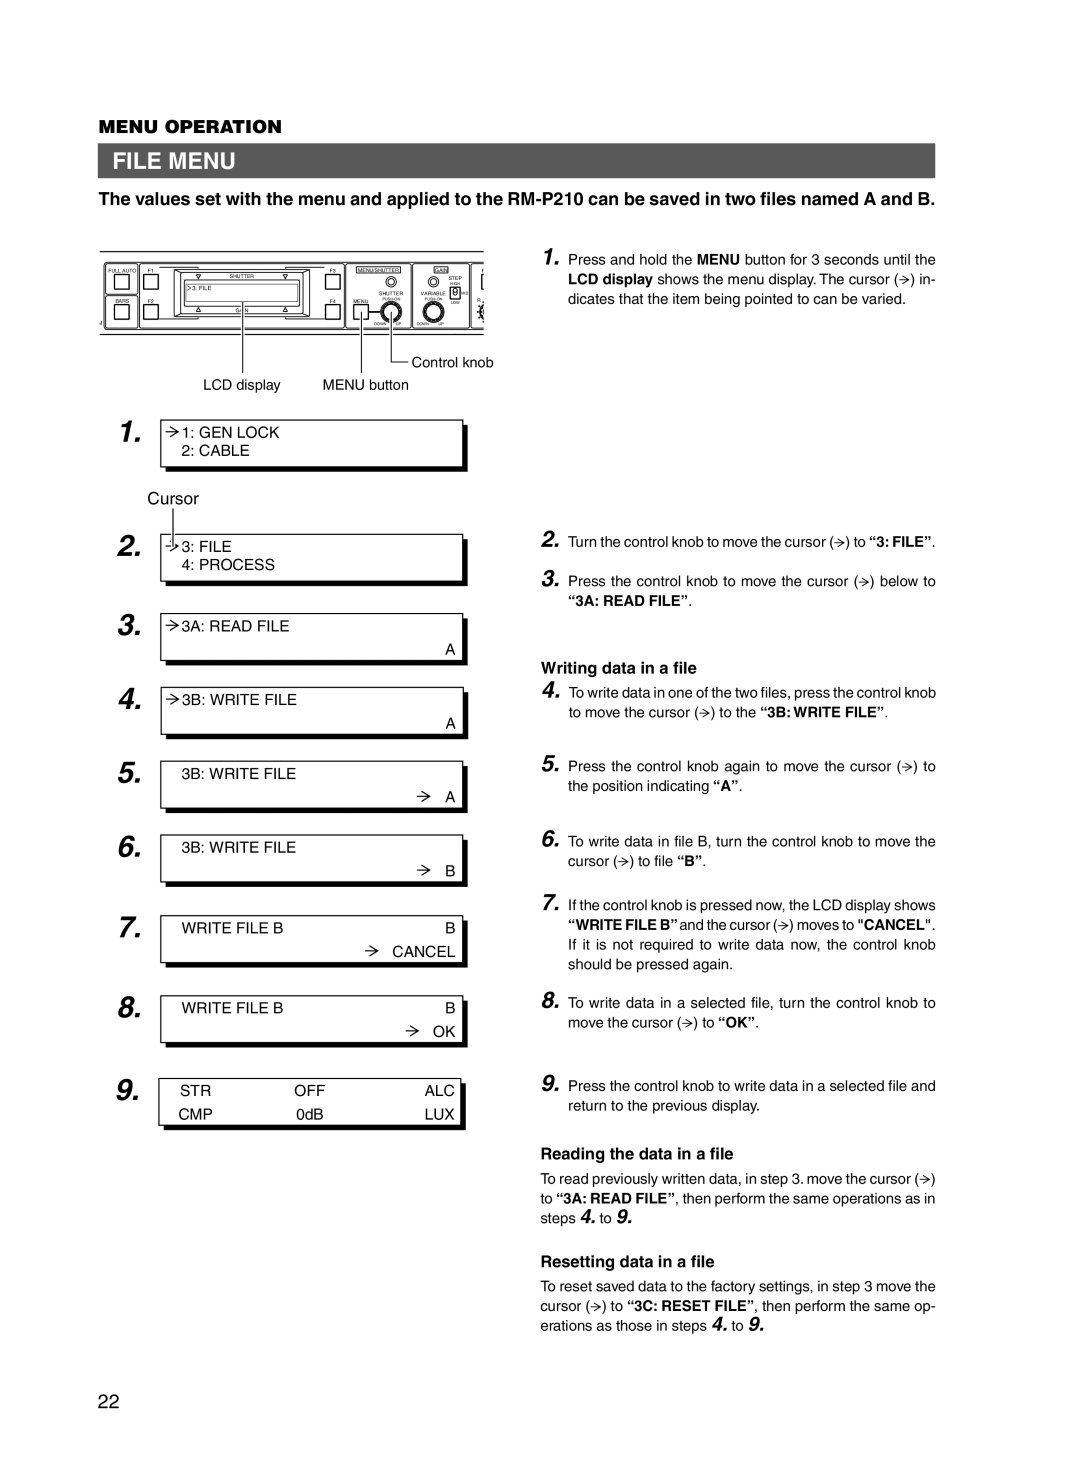
The values set with the menu and applied to the
FULL AUTO | F1 | F3 | MENU/SHUTTER | GAIN | P |
|
| SHUTTER |
|
| STEP |
|
|
|
|
| HIGH |
![]() 3. FILE
3. FILE
|
|
|
| SHUTTER | VARIABLE | MID |
BARS | F2 | F4 | MENU | R | ||
| LOW | |||||
| GAIN |
|
|
|
|
|
M |
|
|
| DOWN UP | DOWN UP |
|
|
|
|
|
| Control knob | |
| LCD display | MENU button |
|
| ||
1. Press and hold the MENU button for 3 seconds until the LCD display shows the menu display. The cursor (![]() ) in- dicates that the item being pointed to can be varied.
) in- dicates that the item being pointed to can be varied.
1.![]() 1: GEN LOCK
1: GEN LOCK
2:CABLE
Cursor
2.![]() 3: FILE
3: FILE
4:PROCESS
3.![]() 3A: READ FILE
3A: READ FILE
A
4.![]() 3B: WRITE FILE
3B: WRITE FILE
|
|
|
|
|
| A |
|
5. |
|
|
|
|
|
| |
|
| 3B: WRITE FILE |
|
| |||
|
|
|
|
|
| A |
|
6. |
|
|
|
|
|
| |
|
| 3B: WRITE FILE |
|
| |||
|
|
|
|
|
| B |
|
7. |
|
|
|
|
|
|
|
|
| WRITE FILE B |
| B |
| ||
|
|
|
|
|
| CANCEL |
|
8. |
|
|
|
|
|
|
|
|
| WRITE FILE B |
| B |
| ||
|
|
|
|
|
| OK |
|
9. |
|
|
|
|
|
|
|
|
|
| STR | OFF | ALC |
| |
|
|
| |||||
|
|
|
| CMP | 0dB | LUX |
|
2. Turn the control knob to move the cursor (![]() ) to “3: FILE”.
) to “3: FILE”.
3. Press the control knob to move the cursor (![]() ) below to “3A: READ FILE”.
) below to “3A: READ FILE”.
Writing data in a file
4. To write data in one of the two files, press the control knob to move the cursor (![]() ) to the “3B: WRITE FILE”.
) to the “3B: WRITE FILE”.
5. Press the control knob again to move the cursor (![]() ) to the position indicating “A”.
) to the position indicating “A”.
6. To write data in file B, turn the control knob to move the cursor (![]() ) to file “B”.
) to file “B”.
7. If the control knob is pressed now, the LCD display shows “WRITE FILE B” and the cursor (![]() ) moves to "CANCEL". If it is not required to write data now, the control knob should be pressed again.
) moves to "CANCEL". If it is not required to write data now, the control knob should be pressed again.
8. To write data in a selected file, turn the control knob to move the cursor (![]() ) to “OK”.
) to “OK”.
9. Press the control knob to write data in a selected file and return to the previous display.
Reading the data in a file
To read previously written data, in step 3. move the cursor (![]() ) to “3A: READ FILE”, then perform the same operations as in steps 4. to 9.
) to “3A: READ FILE”, then perform the same operations as in steps 4. to 9.
Resetting data in a file
To reset saved data to the factory settings, in step 3 move the cursor (![]() ) to “3C: RESET FILE”, then perform the same op- erations as those in steps 4. to 9.
) to “3C: RESET FILE”, then perform the same op- erations as those in steps 4. to 9.
22