MENU OPERATION
MENU SETUP METHOD
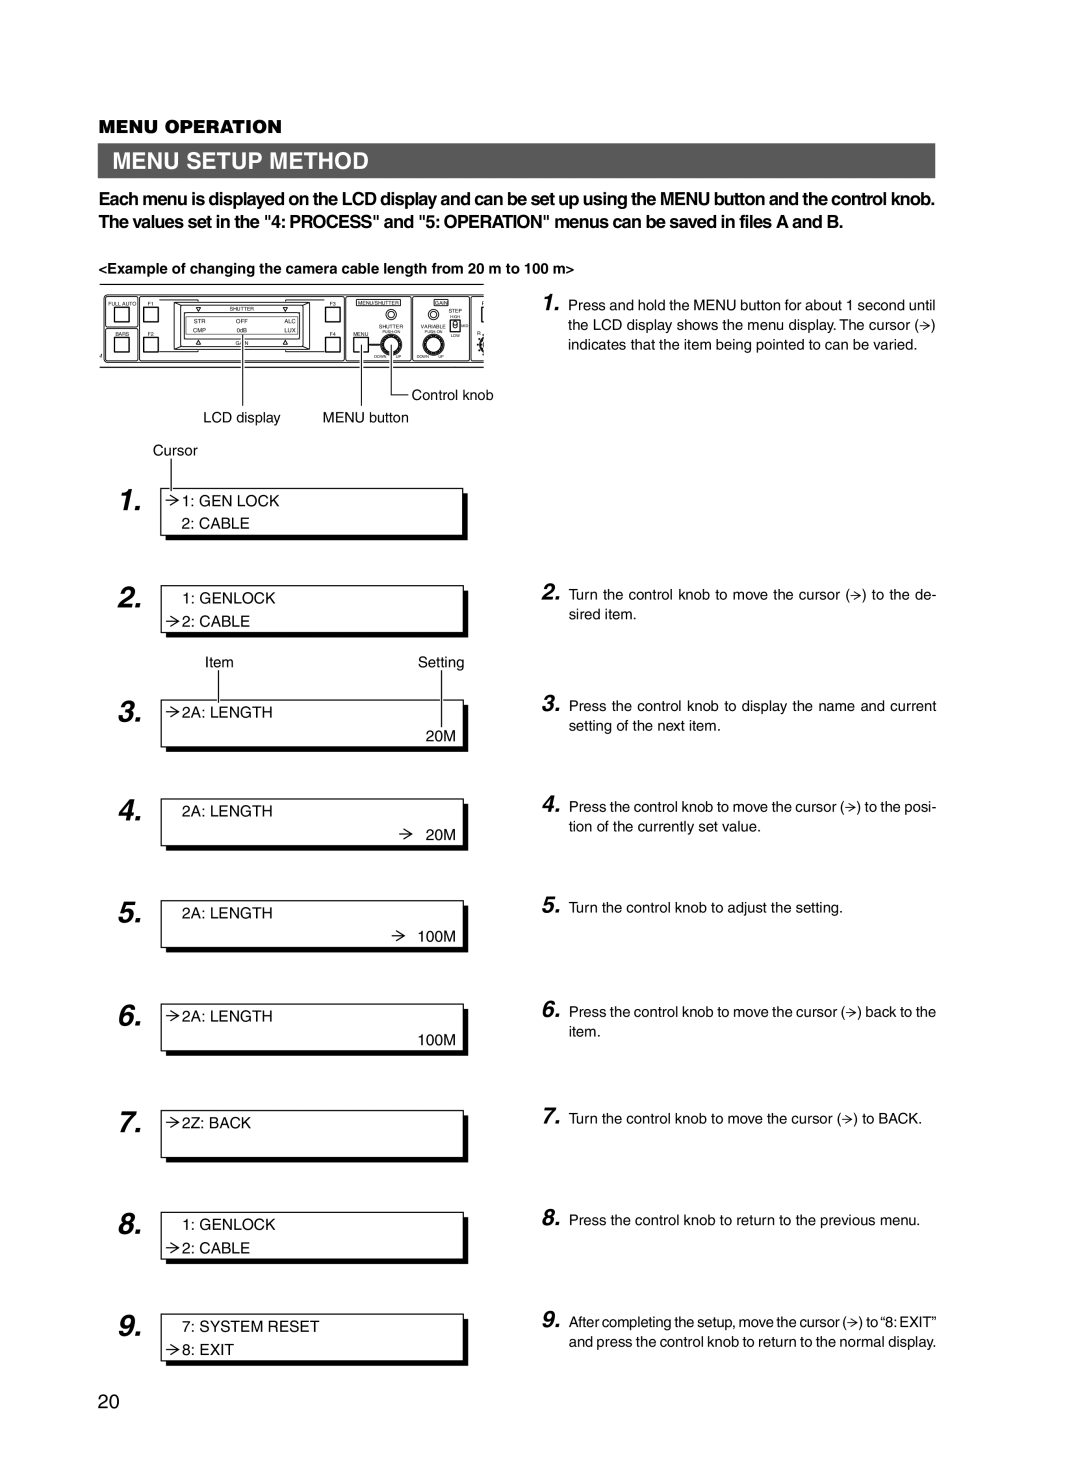
Each menu is displayed on the LCD display and can be set up using the MENU button and the control knob. The values set in the "4: PROCESS" and "5: OPERATION" menus can be saved in files A and B.
<Example of changing the camera cable length from 20 m to 100 m>
FULL AUTO | F1 | SHUTTER | F3 | MENU/SHUTTER | GAIN | P | |
|
|
|
|
| STEP | ||
| STR | OFF | ALC |
|
| HIGH |
|
|
| SHUTTER | VARIABLE | MID | |||
| CMP | 0dB | LUX |
| |||
BARS | MENU | R | |||||
F2 |
| F4 |
| LOW | |||
|
| GAIN |
|
|
|
|
|
M |
|
|
|
| DOWN UP | DOWN UP |
|
|
|
|
|
|
| Control knob | |
| LCD display | MENU button |
|
| |||
| Cursor |
|
|
|
|
|
|
1. Press and hold the MENU button for about 1 second until the LCD display shows the menu display. The cursor (![]() ) indicates that the item being pointed to can be varied.
) indicates that the item being pointed to can be varied.
1.
2.
3.
4.
5.
6.
7.
8.
9.
![]() 1: GEN LOCK
1: GEN LOCK
2:CABLE
1:GENLOCK
![]() 2: CABLE
2: CABLE
Item | Setting |
![]() 2A: LENGTH
2A: LENGTH
20M
2A: LENGTH
20M
2A: LENGTH
100M
![]() 2A: LENGTH
2A: LENGTH
100M
![]() 2Z: BACK
2Z: BACK
1:GENLOCK
![]() 2: CABLE
2: CABLE
7:SYSTEM RESET  8: EXIT
2. Turn the control knob to move the cursor (![]() ) to the de- sired item.
) to the de- sired item.
3. Press the control knob to display the name and current setting of the next item.
4. Press the control knob to move the cursor (![]() ) to the posi- tion of the currently set value.
) to the posi- tion of the currently set value.
5. Turn the control knob to adjust the setting.
6. Press the control knob to move the cursor (![]() ) back to the item.
) back to the item.
7. Turn the control knob to move the cursor (![]() ) to BACK.
) to BACK.
8. Press the control knob to return to the previous menu.
9. After completing the setup, move the cursor (![]() ) to “8: EXIT” and press the control knob to return to the normal display.
) to “8: EXIT” and press the control knob to return to the normal display.
20