
RX-6022VSL specifications
The JVC RX-6022VSL is a versatile audio receiver that caters to the demands of both audiophiles and casual listeners. Renowned for its blend of performance, functionality, and aesthetic appeal, the RX-6022VSL has become a favored choice for home theater setups and music enthusiasts alike.One of the standout features of the RX-6022VSL is its comprehensive support for various audio formats. It offers multiple audio inputs including digital coaxial and optical connections, allowing users to connect a range of devices, from CD players to gaming consoles. This flexibility ensures that all audio sources can be integrated seamlessly into one system.
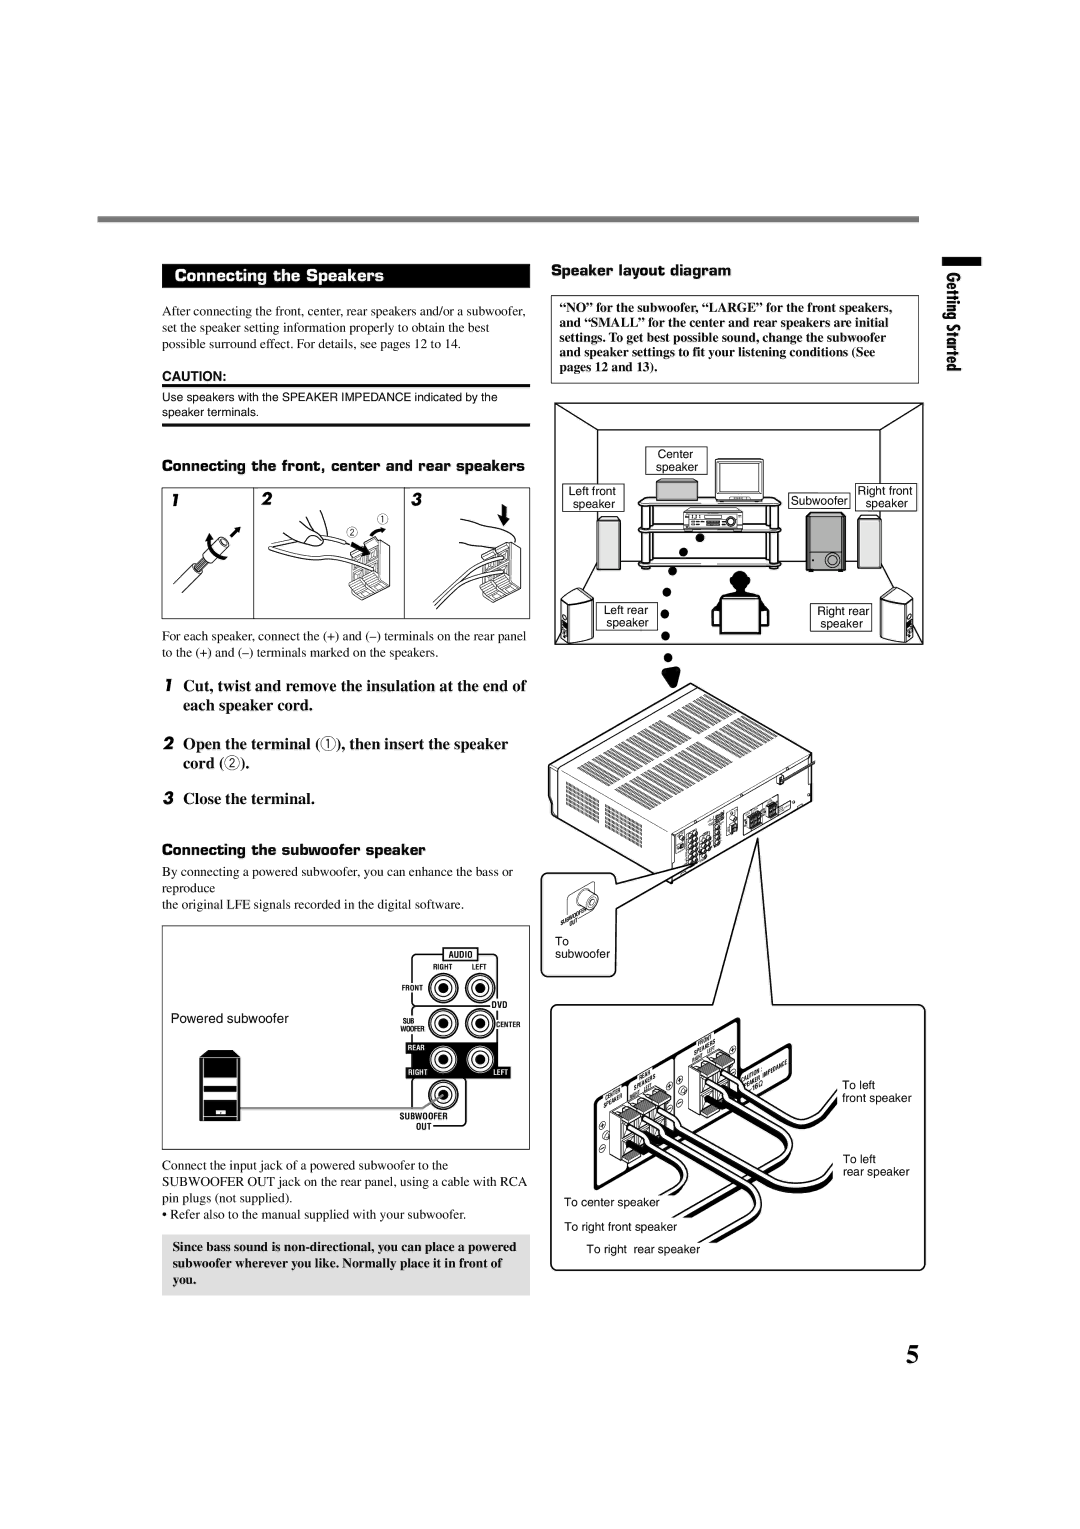
The RX-6022VSL is equipped with a robust 5.1-channel surround sound capability, supporting Dolby Digital and DTS decoding. This immersive audio experience allows users to enjoy their favorite movies and music with rich, dynamic sound, making it an essential addition to any home theater. The receiver delivers high-powered output with a total power of 100 watts per channel, ensuring that even large rooms can be filled with crisp and powerful audio.
In addition to traditional audio capabilities, the RX-6022VSL features advanced technologies that enhance the listening experience. The inclusion of a built-in AM/FM tuner allows users to access their favorite radio stations easily. Furthermore, the receiver supports various sound enhancement features, such as tone control and balance adjustment, enabling users to customize their audio experience to suit personal preferences.
The user-friendly interface of the RX-6022VSL is designed for ease of use. A dual-front display provides quick access to controls, while an intuitive remote control allows for convenient operation from a distance. Additionally, the receiver is equipped with an easy-to-use setup wizard that guides users through the initial configuration process, ensuring a hassle-free installation.
Design-wise, the JVC RX-6022VSL boasts a sleek and modern aesthetic, making it a stylish addition to any entertainment center. With an elegant black finish and well-organized front panel, it not only performs well but also complements the decor of any living space.
Overall, the JVC RX-6022VSL is a powerful and adaptable audio receiver that combines essential features with advanced technology. Its ability to provide high-quality sound, multiple connectivity options, and user-friendly design makes it a valuable choice for anyone looking to elevate their audio experience at home.