TROUBLESHOOTING EN 69


Before requesting service for a problem, use this chart and see if


When interlace scanned program is played back, progressive

you can solve the trouble yourself. Small problems are often easily


scan mode is selected.

solved, and this can save you the trouble of sending your unit off


] Press and hold PROGRESSIVE SCAN until q disappears

for repair.


from the front display panel. (A pg. 68)

Initializing (DVD Deck Only)


Playback does not start or stop immediately after playback is


started by pressing I.

Malfunction occurs on the unit.


On the front display panel, ANO DISCB appears.

] Press A to turn off the unit, press and hold A, then press o


The disc is loaded upside down.

for two seconds or more.


] Place the disc on the disc tray with the playback surface facing


General


down. (A pg. 10)


A disc not being compatible with the unit is loaded.


] Load a playable disc on the unit. (A pg. 7)

No power is supplied to the unit.


A dirty disc is loaded.

The AC power plug is disconnected from the AC outlet.


] Clean the disc. (A pg. 11)

] Connect the AC power plug to the AC outlet securely.


Defective disc is loaded.

(A pg. 18)


] Replace the warped or scratched disc with a normal one.


The remote control does not work properly.


Images are blurred or distorted when you start High-Speed

] Remove the batteries, wait for 5 minutes or more, then load the


Search.

batteries again.


] Images are blurred or distorted at the point where the playback

The setting of the remote control code is inappropriate.


speed changes and this is not a malfunction of the unit.

] Set the same remote control code (1, 2, 3, or 4) on both the unit


Playback does not start.

and the remote control. (A pg. 58)


The batteries are discharged.


] Playback does not start for approximately 30 seconds after

] Replace the dead batteries with new ones. The remote control


recording is stopped and this is not a malfunction of the unit.

code will revert back to its default setting A3B. If you had change


Playback (HDD Deck)

the remote control code prior to replacing the batteries, you


need to set the code again. (A pg. 58)


The HDD deck cannot be operated.

Dubbing from the external equipment is not possible.


The HDD deck is not selected.

The source (another video recorder, camcorder) has not been


] Press DV/HDD/DVD on the unit repeatedly or HDD on the

properly connected.


remote so that the HDD lamp lights up on the unit.

] Confirm that the source is properly connected.


Playback (DV Deck)

All necessary power switches have not been turned on.


] Confirm that all units’ power switches are turned on.


The setting of the input channel position is inappropriate.


The DV deck cannot be operated.

] Select the input channel position (AF-1Bor AL-1B) that


The DV deck is not selected.

corresponds to the input terminal connected to the external


] Press DV/HDD/DVD on the unit repeatedly or DV on the remote

equipment. (A pg. 53)


control so that the DV lamp lights up on the unit.


The on-screen display superimposed on the program played


The tape will not rewind or fast-forward.

back/received on this unit is recorded when you dub the


program to an external recording equipment.


The tape is already fully rewound or fast-forwarded.

] Set ASUPERIMPOSEB to AOFFB. (A pg. 61)


] Check the cassette.


The playback picture does not appear while the tape is

The unit does not operate.


running.

There are cases when the operation is prohibited on the disc.


The TV is not set to the AV mode.

Lightning or static electricity may cause malfunction of the unit.


] Set the TV to the AV mode.

] Press A to turn the power off, then press the button again to


turn the power on.


Noise appears during visual search.


The remote control of a JVC TV will not operate the unit.


This is normal.

The setting of the remote control code is inappropriate.


The playback picture is blurred or interrupted while TV

] To operate the unit using a JVC TV remote control, set the


broadcasts are clear or AUSE CLEANING CASSETTEB

remote control code of the unit to A1B (Default: A3B). (A pg. 58)


message appears on the screen.


Playback (DVD Deck)

The DVD deck cannot be operated.

The DVD deck is not selected.

]Press DV/HDD/DVD on the unit repeatedly or DVD on the remote control so that the DVD lamp lights up on the unit.

Images do not appear on the TV screen.

The TV receiver’s channel selector is not set to the AV mode. ] Set the TV to its AV mode.

The video heads may be dirty.

]Use a dry cleaning cassette M-DV12CL, or consult your JVC dealer.

Recording (DVD Deck)

Recording cannot be made.

No disc or a disc not being compatible with the unit is loaded. ] Load a recordable disc on the unit. (A pg. 7)

The disc loaded is not formatted.

]Format the disc. (A pg. 63)

Page 69
Image 69
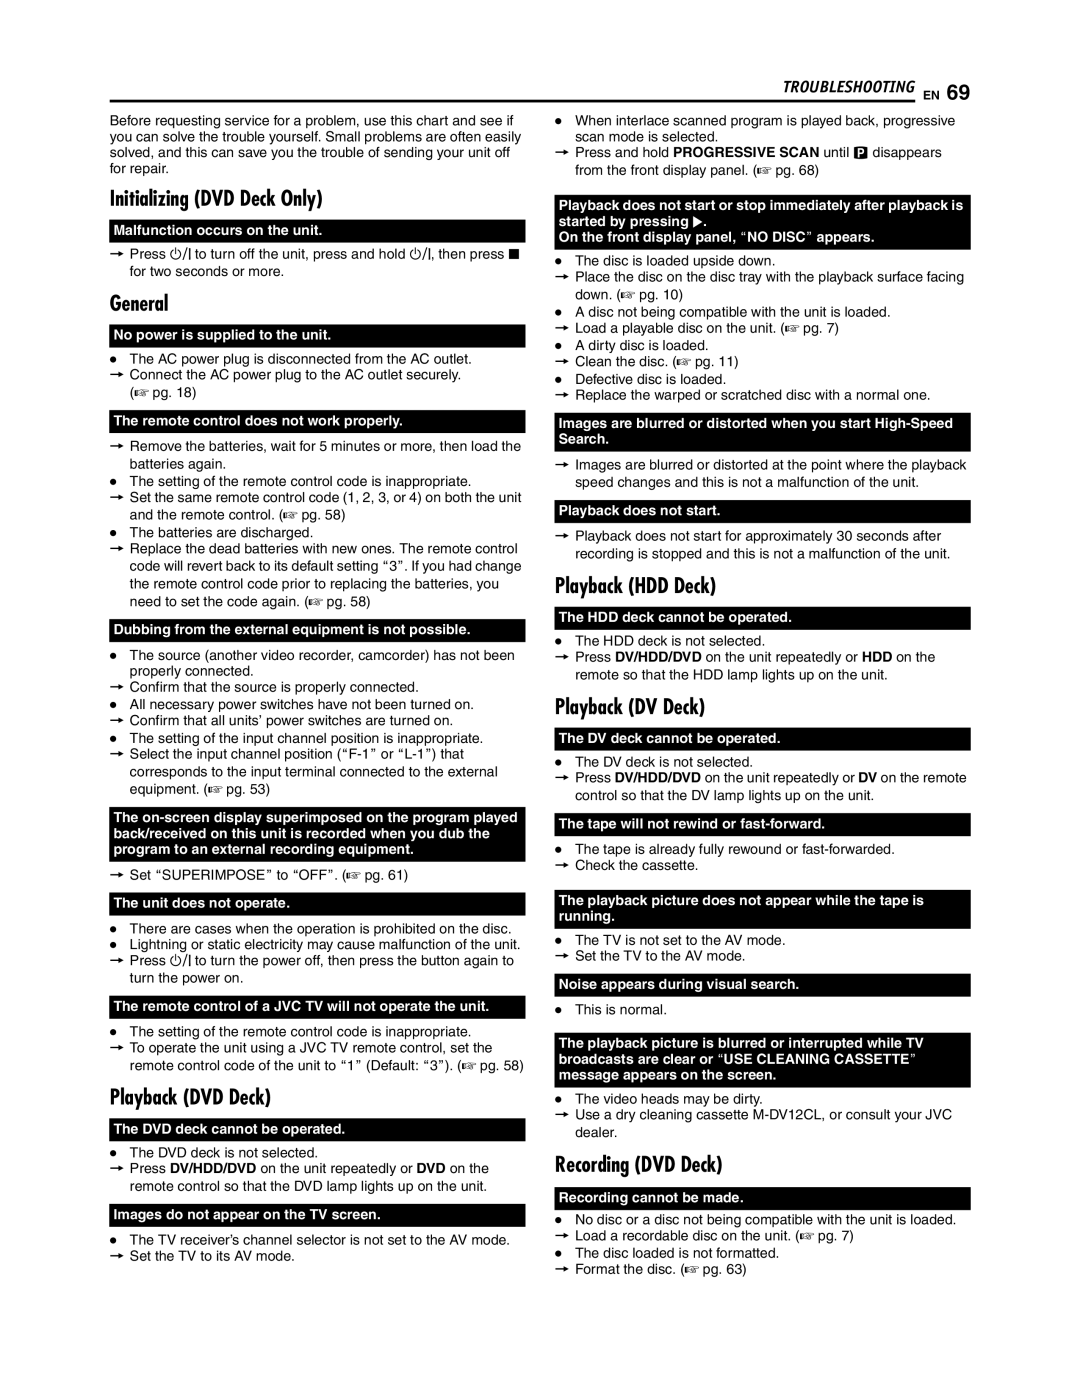
JVC SR-DVM700U manual Initializing DVD Deck Only, General, Playback HDD Deck, Playback DV Deck, Playback DVD Deck

SR-DVM700U specifications

The JVC SR-DVM700U is a versatile and high-performance digital video recorder that caters to both professional and consumer needs. It is designed to handle a variety of video formats, making it a convenient and reliable choice for video production, archiving, and playback tasks.

One of the standout features of the SR-DVM700U is its ability to support both digital and analog formats. It can play and record from MiniDV, DVCAM, and DVCPRO tapes, while also offering the capability to handle various VHS formats. This dual functionality provides users with an excellent solution for converting older tapes to digital formats while maintaining high-quality output.

In terms of connectivity, the SR-DVM700U is equipped with a range of inputs and outputs. It features FireWire (IEEE 1394) connectivity, enabling fast and efficient transfer of digital video to and from computers and other devices. Additionally, it has multiple composite video and audio connections, making it easy to interface with various equipment in the production setup. The S-Video and component outputs enhance the video quality, ensuring professional-grade performance.

The device leverages advanced digital processing technologies to ensure high-quality audio and video recordings. It includes a built-in up-converter that improves the resolution and sharpness of analog signals when converting to digital formats, enhancing the overall viewing experience.

The JVC SR-DVM700U also incorporates features like playback time code and edit search functions, which are essential for video editing workflows. This technology allows users to efficiently navigate through their footage, making it easier to locate specific scenes or segments during the editing process.

Moreover, the unit is designed with a user-friendly interface, featuring a clear LCD screen and easy-to-use controls, which facilitate seamless operation. The compact and robust design ensures durability, making it suitable for both studio environments and on-location shoots.

In summary, the JVC SR-DVM700U digital video recorder is a powerful tool that combines multiple recording formats, advanced processing technologies, and versatile connectivity options. Its ability to bridge the gap between analog and digital media, coupled with its professional features, makes it an invaluable asset for videographers and multimedia professionals looking to preserve and transform their video content.