Getting started
NOTES
•Connect “Y” to “Y”, “PB” to “PB”, “PR” to “PR” correctly.
•When the component video input jacks of the TV is of the BNC type, use an adapter to convert a pin jack to a BNC jack (optional).
•Make the “DOWN MIX” setting in “PREFERENCE 2” to “Lo/Ro” and the Speaker setting in “SPK. SETTING” to “2 CHANNEL” (see pages 57 and 59).
•When the Progressive scan mode is selected, the VIDEO and
Getting started
About SCAN MODE
To display video on the monitor (television) screen, the conventional scanning method is called “Interlaced scan”. With this method, only half of the horizontal lines are displayed at a time. So two fields complete a single picture (frame); i.e., the first field, containing all the
On the other hand, the Progressive scan system scans all horizontal lines at a time, so you can double the number of pictures compared with the interlaced scan, resulting
To enjoy the progressive scanned video, a monitor (or TV or projector) to be connected to the unit must have the Progressive inputs.
Depending on the material source format, DVD VIDEO discs can be classified into two types; film source and video source (Note that some DVD VIDEO discs contain both film source and video source). Film sources are recorded as 24-
When the unit plays back a film source material, uninterlaced progressive output signals are created using the original information. When a video source material is played back, the unit interleaves lines between the interlaced lines on each to create the pseudo uninterlaced picture and outputs as the progressive signal.
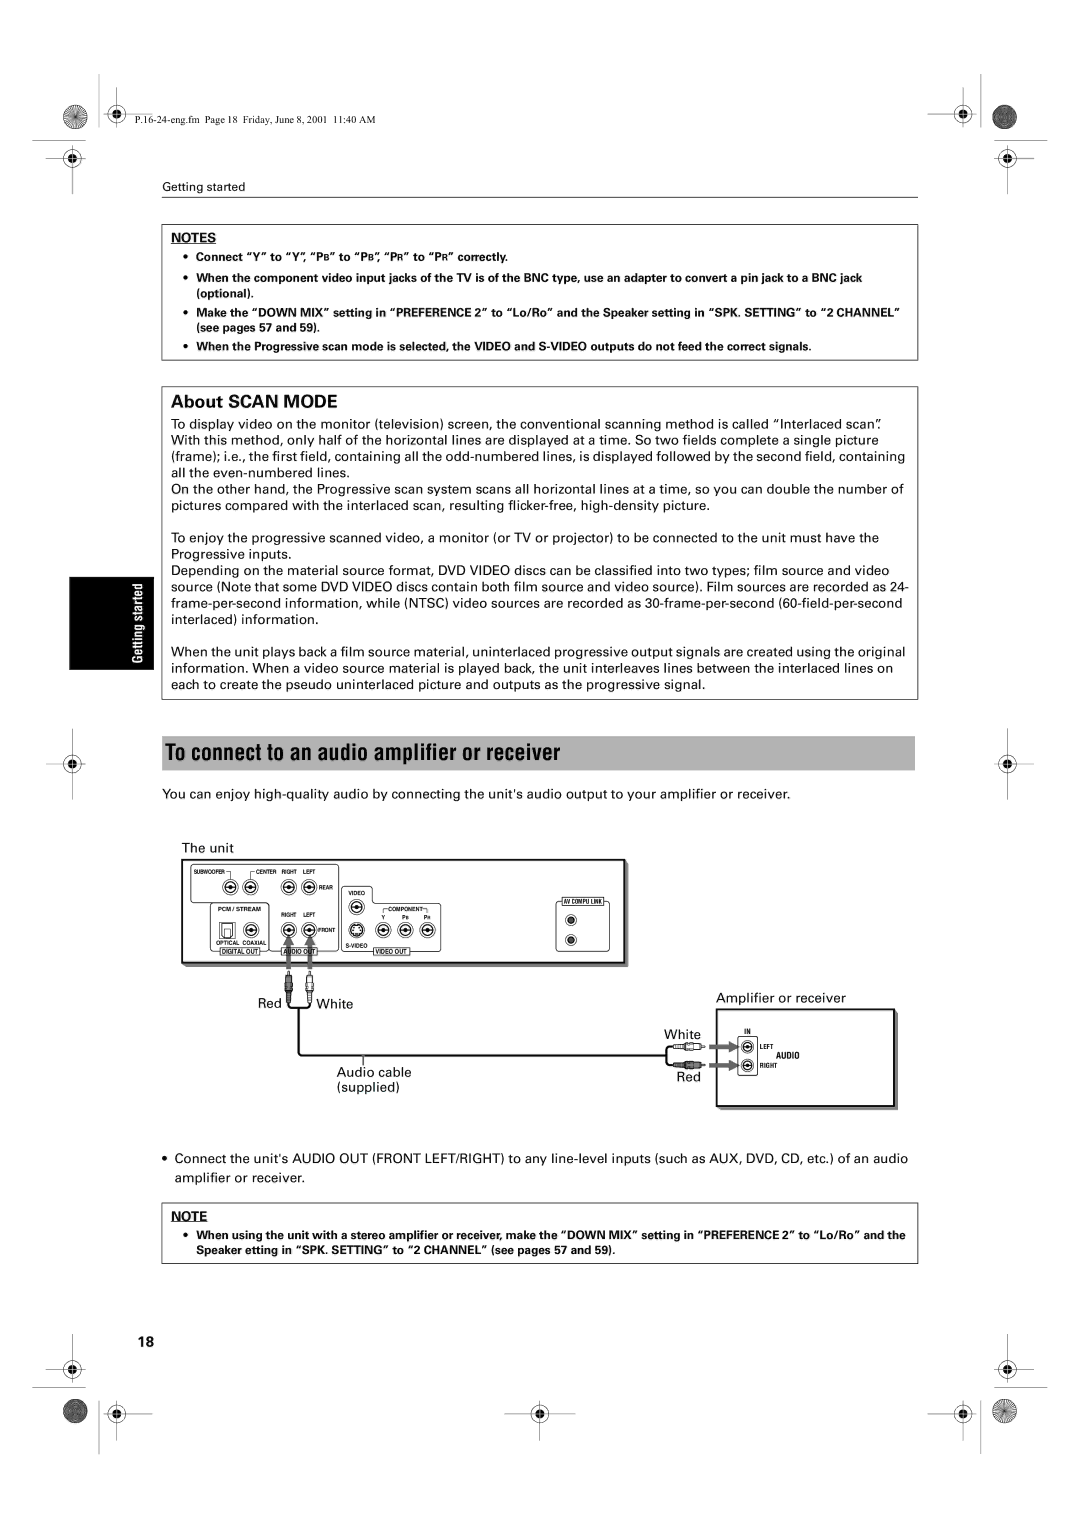
To connect to an audio amplifier or receiver
You can enjoy
The unit
SUBWOOFER | CENTER | RIGHT | LEFT |
|
|
|
|
|
|
| REAR |
|
|
|
|
|
| VIDEO |
|
|
|
|
|
|
|
| AV COMPU LINK |
PCM / STREAM | RIGHT | LEFT |
| COMPONENT |
| |
|
| Y | PB | PR | ||
|
|
|
| |||
|
|
|
| FRONT |
|
|
OPTICAL COAXIAL |
|
|
|
| ||
DIGITAL OUT | AUDIO OUT |
|
| |||
VIDEO OUT |
| |||||
Red | White |
|
|
| White |
| Audio cable | Red |
| (supplied) | |
|
|
Amplifier or receiver
IN
LEFT
AUDIO
RIGHT
•Connect the unit's AUDIO OUT (FRONT LEFT/RIGHT) to any
NOTE
•When using the unit with a stereo amplifier or receiver, make the “DOWN MIX” setting in “PREFERENCE 2” to “Lo/Ro” and the Speaker etting in “SPK. SETTING” to “2 CHANNEL” (see pages 57 and 59).
18
