To keep things simple, this manual will refer to the five SELECT buttons along the left side of the LCD screen as
In some cases when you see an item displayed on the screen and press the L or R button next to it, that item on the screen will become highlighted (shown in reverse color) to indicate you have selected that item. Sometimes a submenu screen relating to that item will be displayed and present you with further options.
When you press one of the F buttons, the corrosponding function on the LCD screen will be highlighted to indicate that it has been selected.
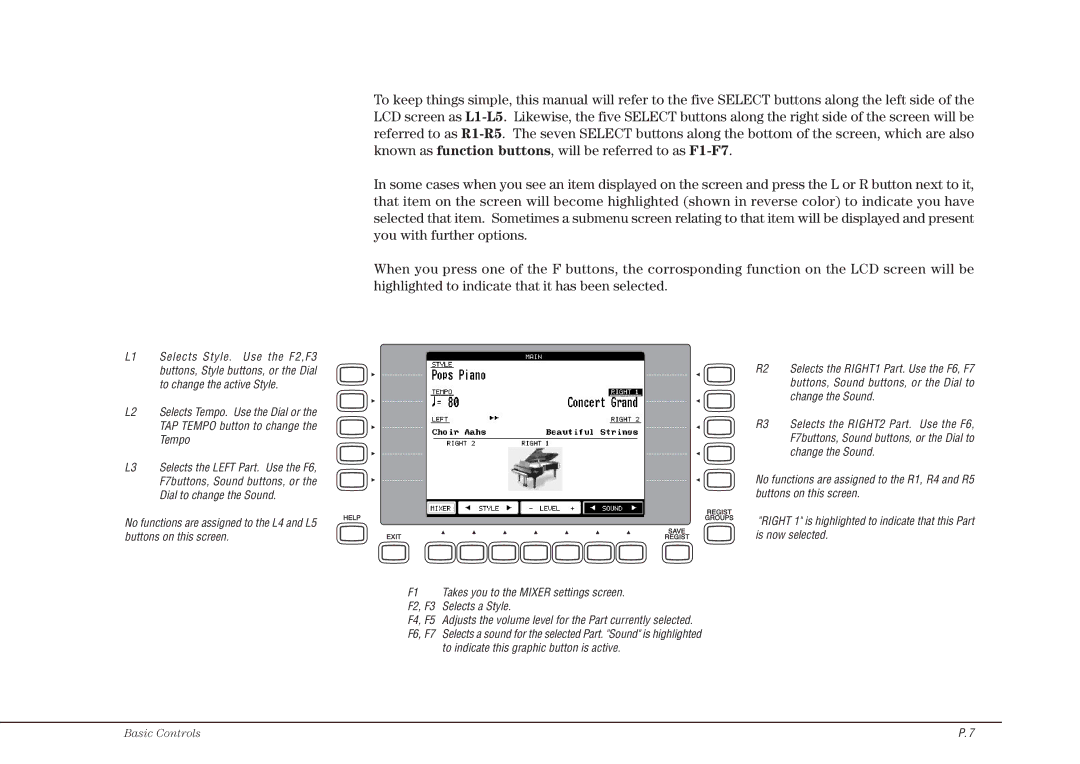
L1 Selects Style. Use the F2,F3 buttons, Style buttons, or the Dial to change the active Style.
L2 Selects Tempo. Use the Dial or the TAP TEMPO button to change the Tempo
L3 Selects the LEFT Part. Use the F6, F7buttons, Sound buttons, or the Dial to change the Sound.
No functions are assigned to the L4 and L5 buttons on this screen.
F1 Takes you to the MIXER settings screen. F2, F3 Selects a Style.
F4, F5 Adjusts the volume level for the Part currently selected. F6, F7 Selects a sound for the selected Part. "Sound" is highlighted
to indicate this graphic button is active.
R2 Selects the RIGHT1 Part. Use the F6, F7 buttons, Sound buttons, or the Dial to change the Sound.
R3 Selects the RIGHT2 Part. Use the F6, F7buttons, Sound buttons, or the Dial to change the Sound.
No functions are assigned to the R1, R4 and R5 buttons on this screen.
"RIGHT 1" is highlighted to indicate that this Part is now selected.
Basic Controls | P. 7 |