Assembly
9
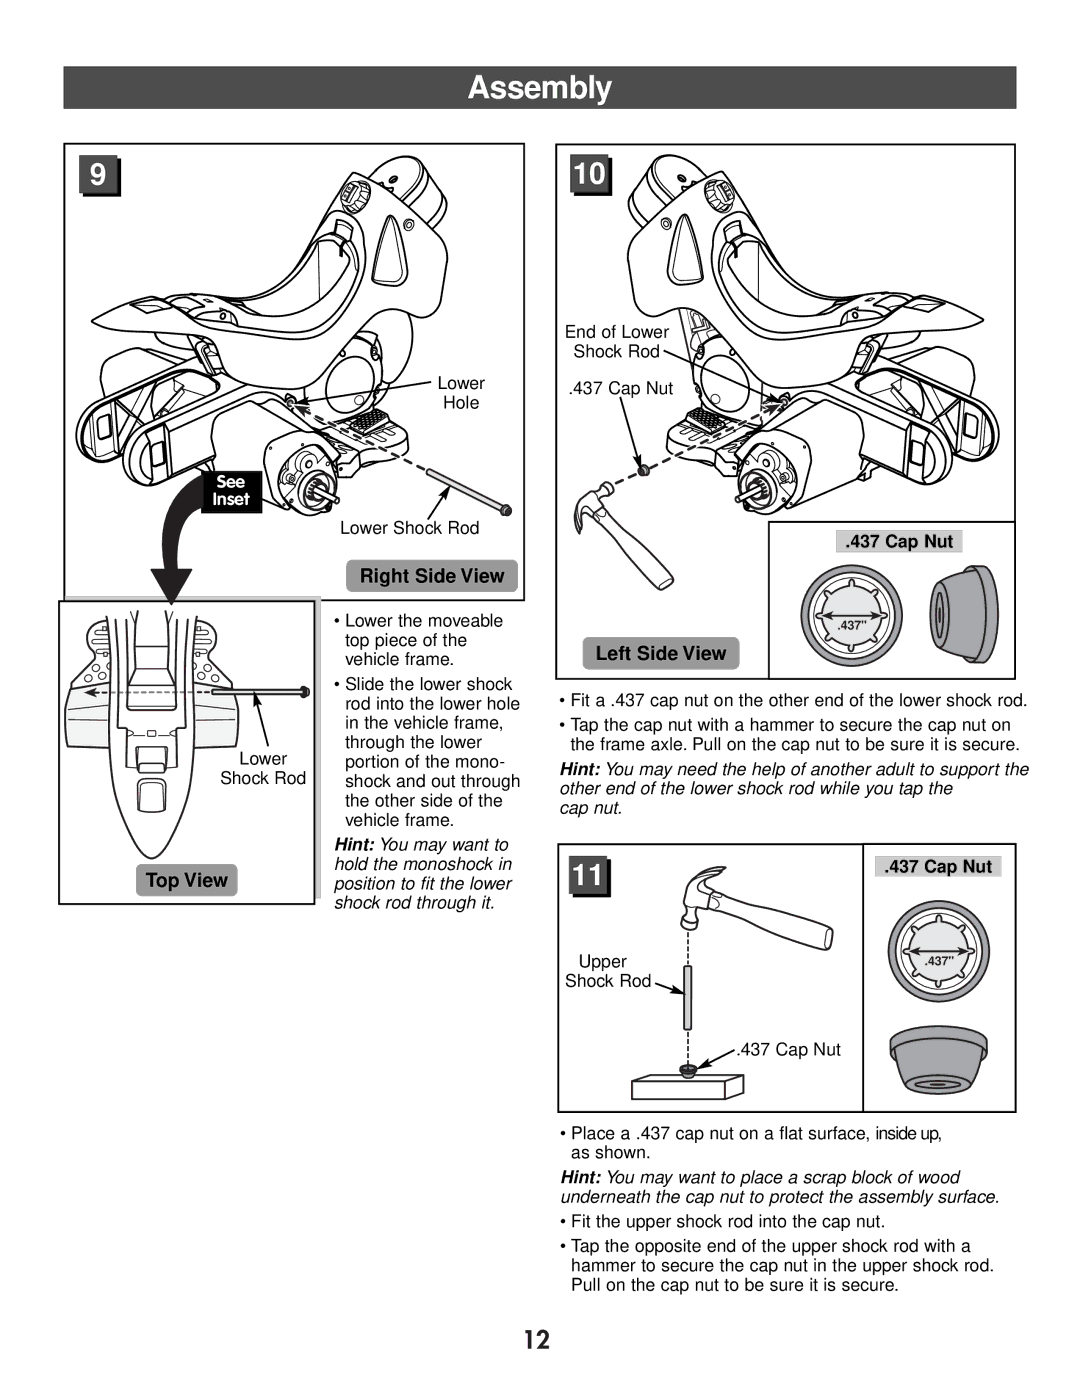
Lower
Hole
![]() See
See
Inset
Lower Shock Rod
10 |
End of Lower |
Shock Rod |
.437 Cap Nut |
.437 Cap Nut |
Lower
Shock Rod
Right Side View
•Lower the moveable top piece of the vehicle frame.
•Slide the lower shock rod into the lower hole in the vehicle frame, through the lower portion of the mono- shock and out through the other side of the vehicle frame.
.437" |
Left Side View |
•Fit a .437 cap nut on the other end of the lower shock rod.
•Tap the cap nut with a hammer to secure the cap nut on the frame axle. Pull on the cap nut to be sure it is secure.
Hint: You may need the help of another adult to support the other end of the lower shock rod while you tap the
cap nut.
Top View
Hint: You may want to hold the monoshock in position to fit the lower shock rod through it.
11
Upper
Shock Rod ![]()
.437 Cap Nut
.437"
.437 Cap Nut
•Place a .437 cap nut on a flat surface, inside up, as shown.
Hint: You may want to place a scrap block of wood underneath the cap nut to protect the assembly surface.
•Fit the upper shock rod into the cap nut.
•Tap the opposite end of the upper shock rod with a hammer to secure the cap nut in the upper shock rod. Pull on the cap nut to be sure it is secure.
12