| Assembly | |
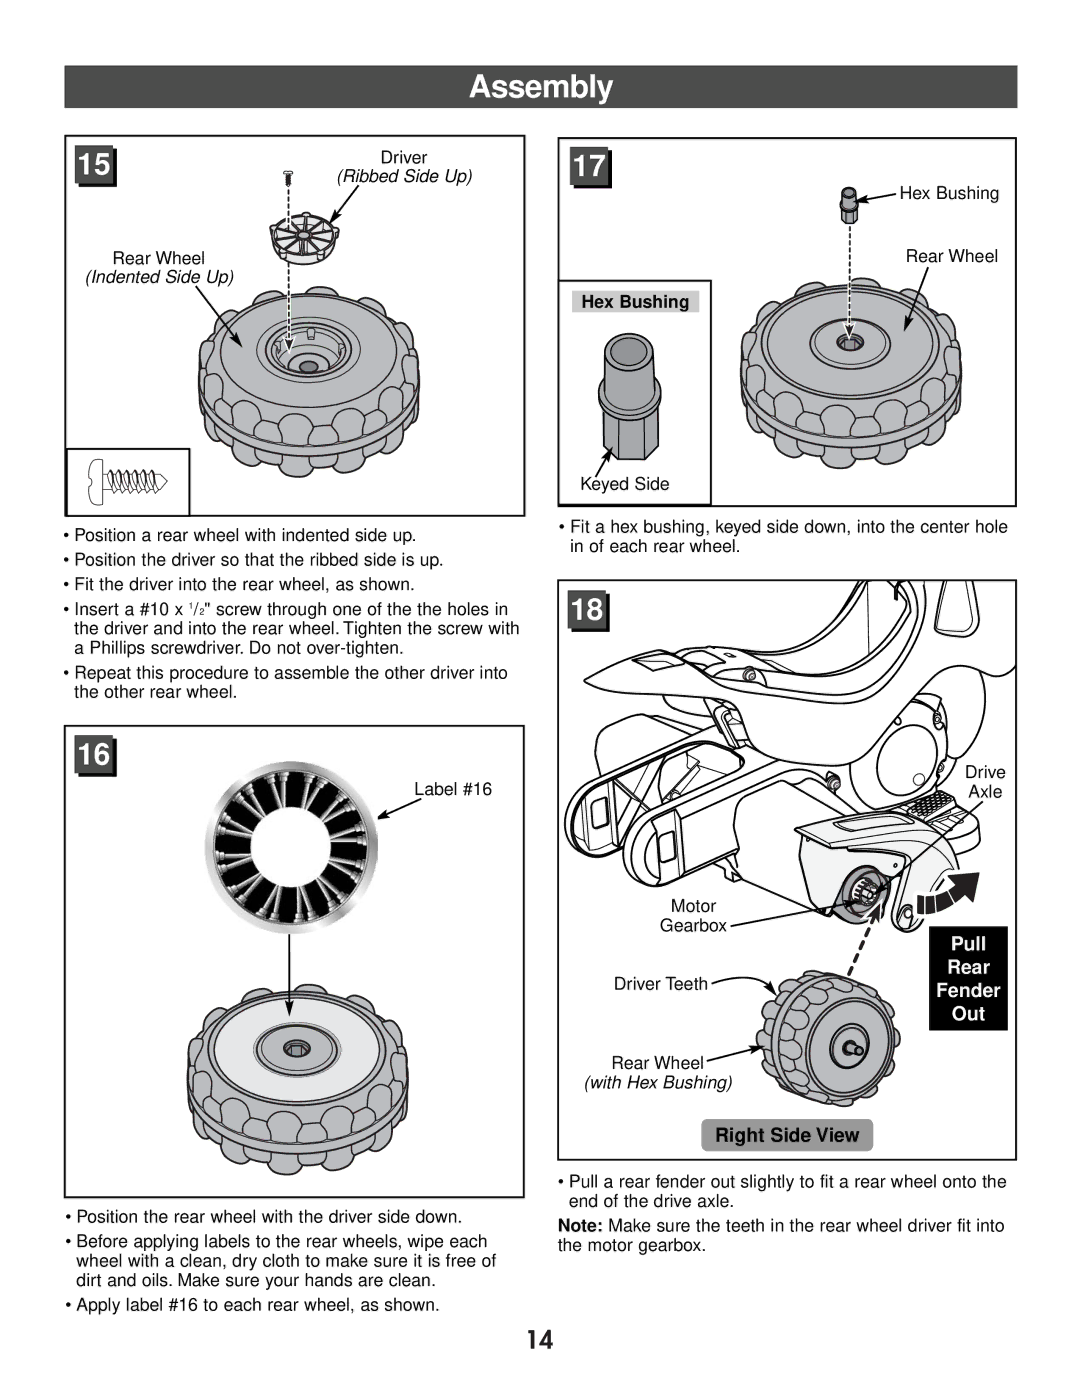
15 | Driver | 17 |
(Ribbed Side Up) | ||
|
| Hex Bushing |
Rear Wheel |
| Rear Wheel |
(Indented Side Up) |
|
|
|
| Hex Bushing |
|
| Keyed Side |
•Position a rear wheel with indented side up.
•Position the driver so that the ribbed side is up.
•Fit the driver into the rear wheel, as shown.
•Insert a #10 x 1/2" screw through one of the the holes in the driver and into the rear wheel. Tighten the screw with a Phillips screwdriver. Do not
•Repeat this procedure to assemble the other driver into the other rear wheel.
16
Label #16
•Position the rear wheel with the driver side down.
•Before applying labels to the rear wheels, wipe each wheel with a clean, dry cloth to make sure it is free of dirt and oils. Make sure your hands are clean.
•Apply label #16 to each rear wheel, as shown.
•Fit a hex bushing, keyed side down, into the center hole in of each rear wheel.
18 |
|
| Drive |
| Axle |
Motor |
|
Gearbox | Pull |
| |
Driver Teeth | Rear |
Fender | |
| Out |
Rear Wheel |
|
(with Hex Bushing) |
|
Right Side View |
|
•Pull a rear fender out slightly to fit a rear wheel onto the end of the drive axle.
Note: Make sure the teeth in the rear wheel driver fit into the motor gearbox.
14